Nad's Land
Mimi~gyaru
Private Area

Sewing / Cosplay
Tutorials > Sewing / Cosplay
Bum Pad
Les Bandes de LED
Roses
Button placket
Padded arm
Range saddlebag tools
Cover de chaussures
Diadème de Sailor


 "Pin it")
Bum Pad
Le patron de cette fiche est à acheter dans ma boutique
7

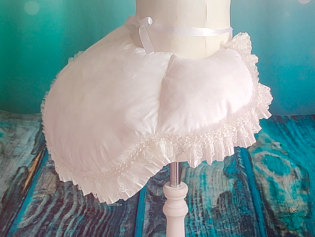
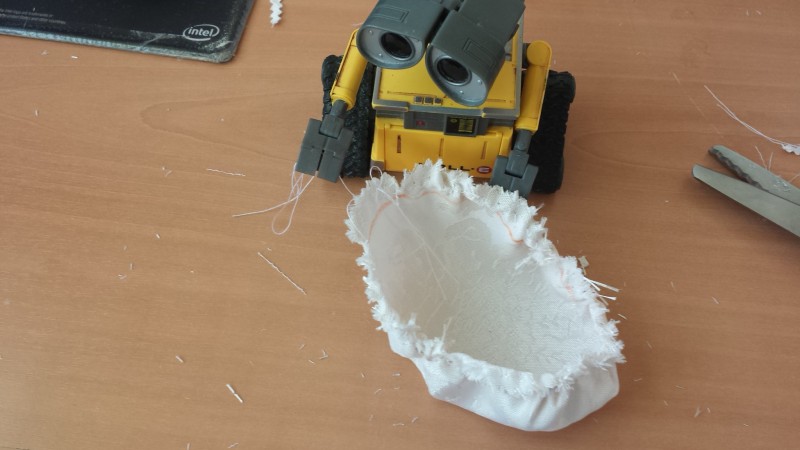
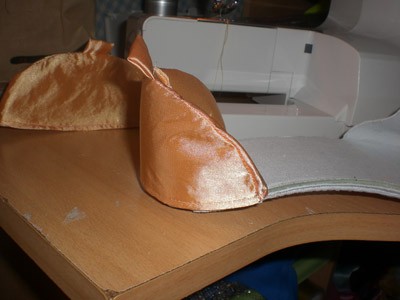
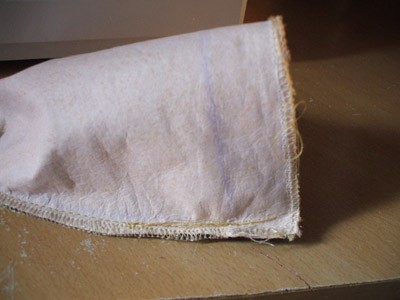
Tutoriel relativement très simple à réaliser, afin de confectionner un faux cul (ou bum pad en forme de « coquillage ».
Utilisé pour donner du volume aux hanches et aux fesses sans pour autant avoir besoin d’armature style baleine.
Materiel
- Tissu coton :140x60cm
- Ruban 15mm : 1m50
- Dentelle large ≈ 2m
- Ouate de rembourrage ≈ 800g
- Machine à coudre
- Nécessaire de couture
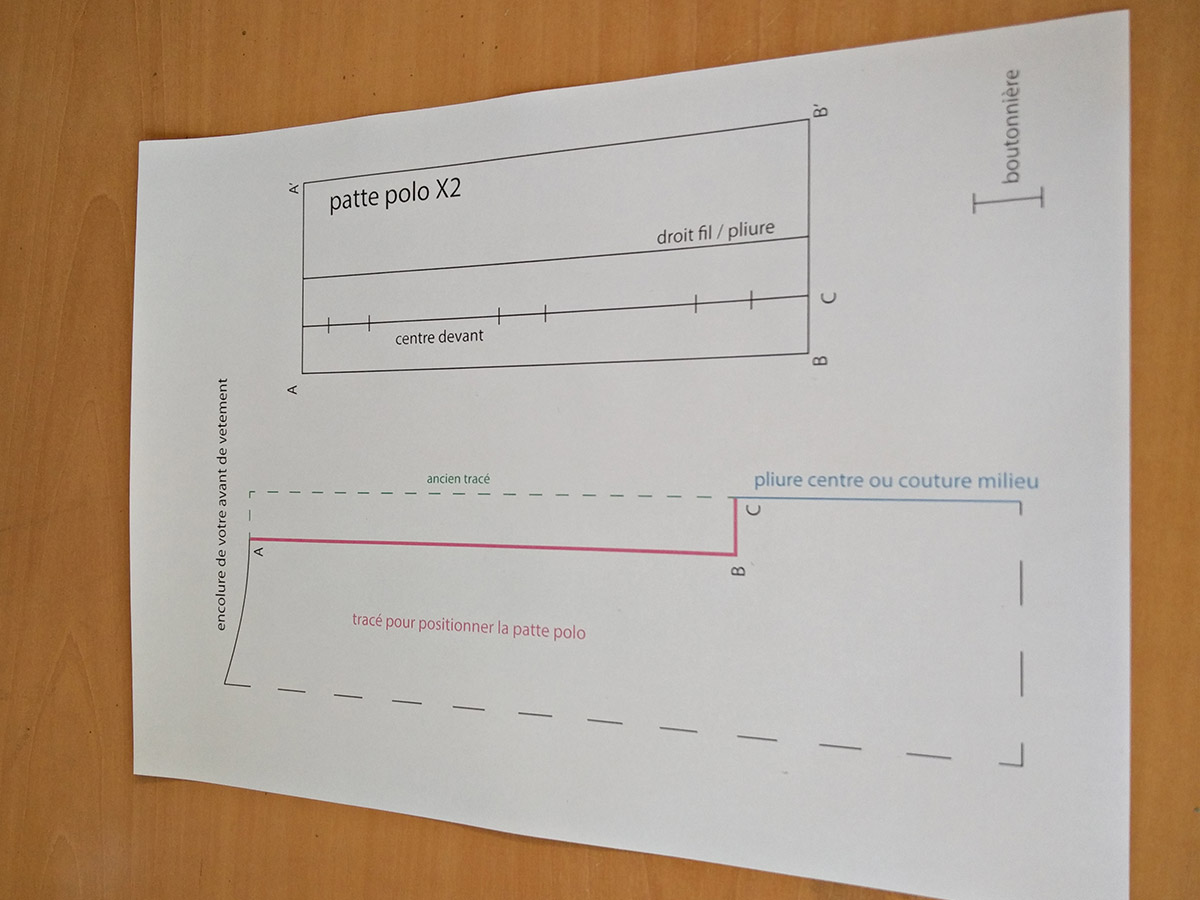
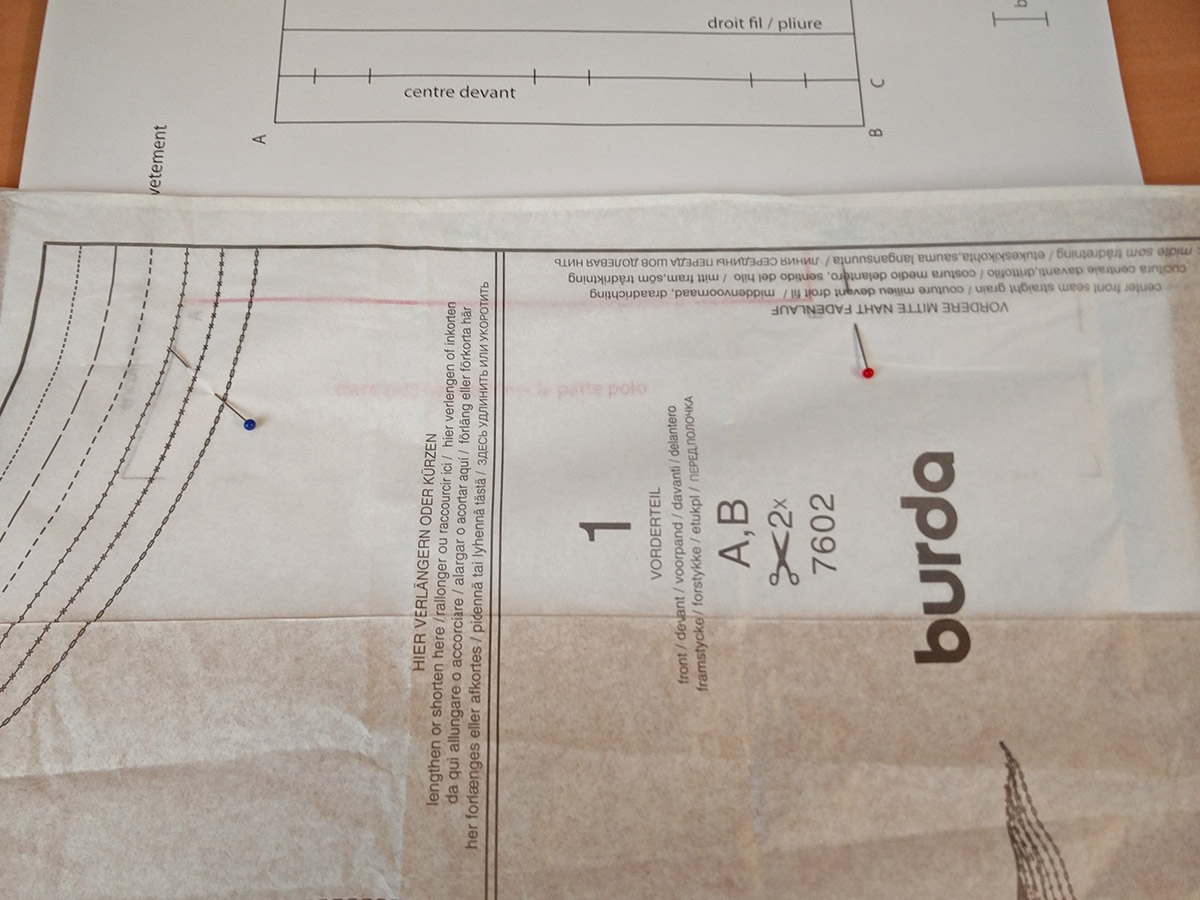
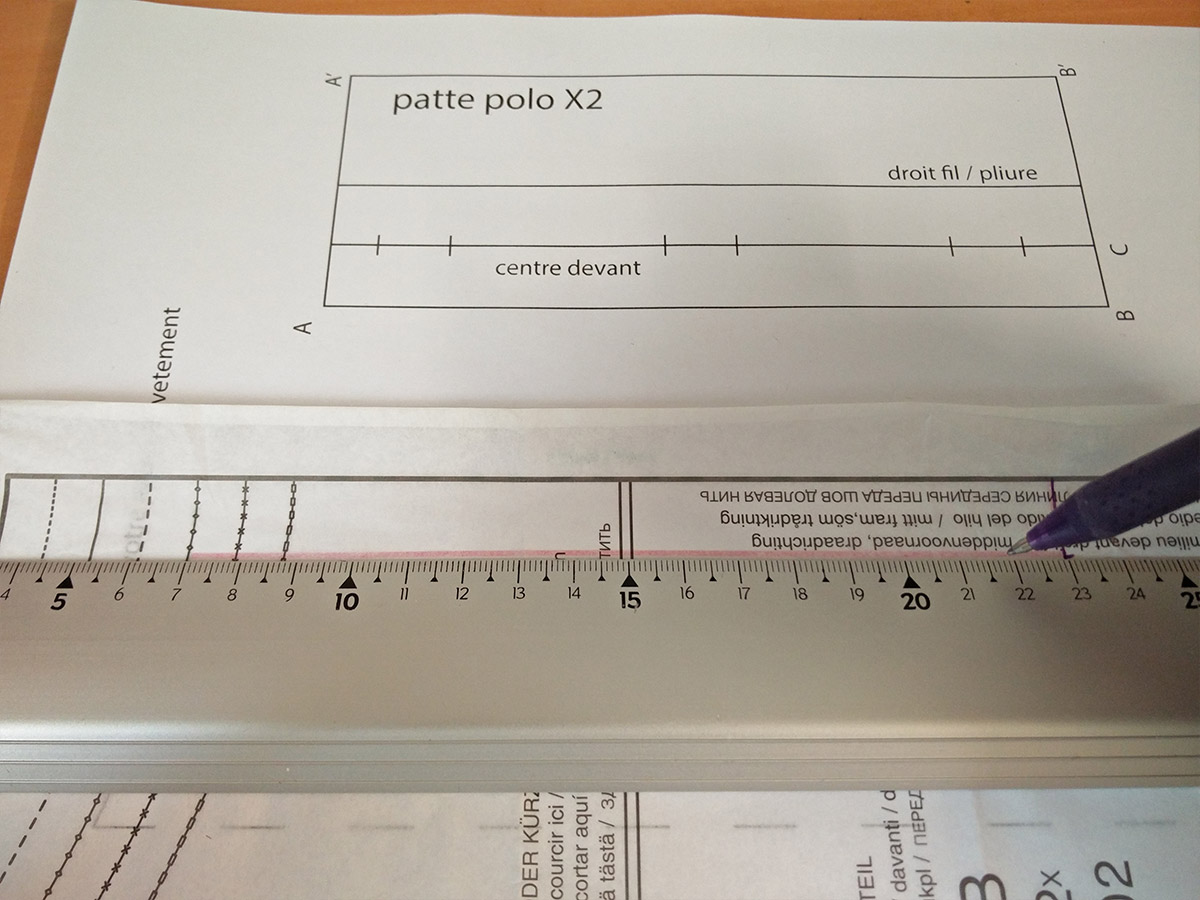
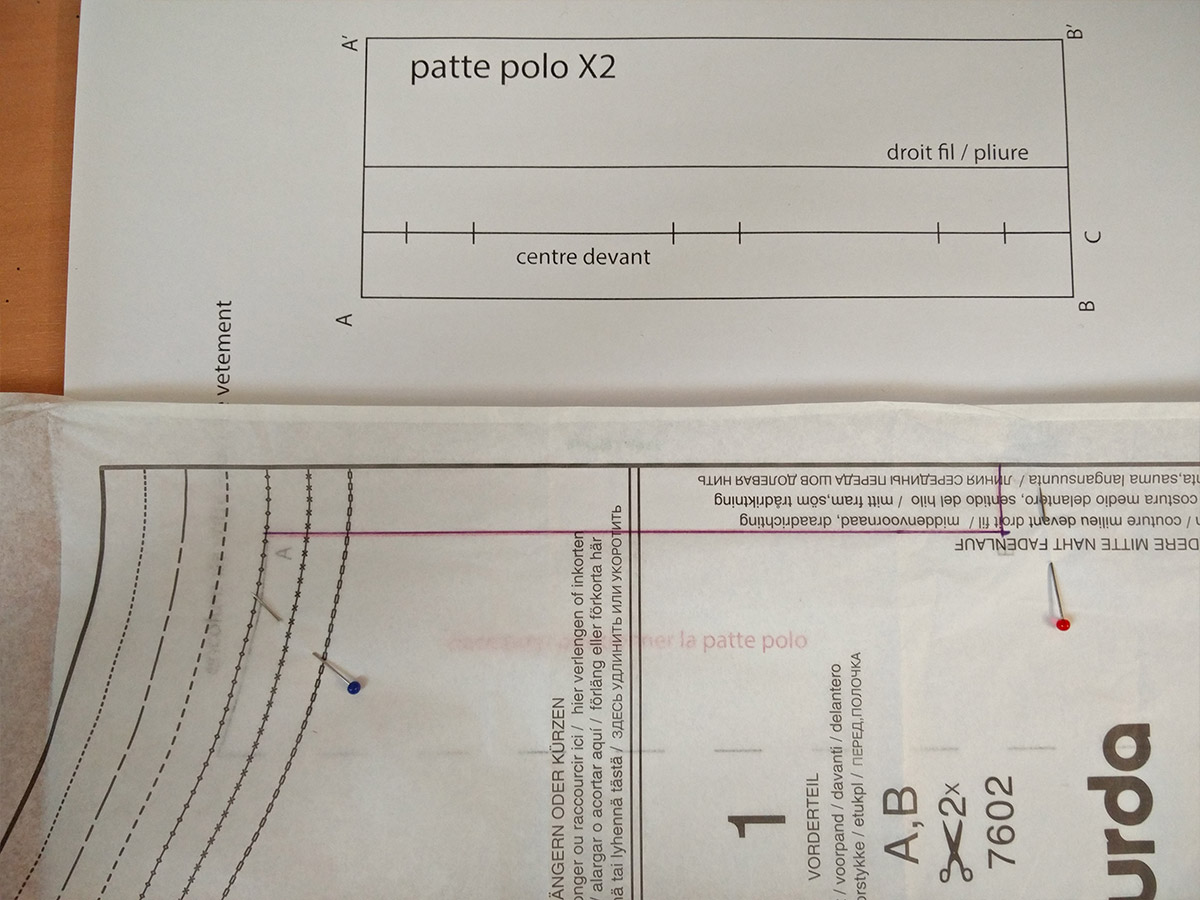
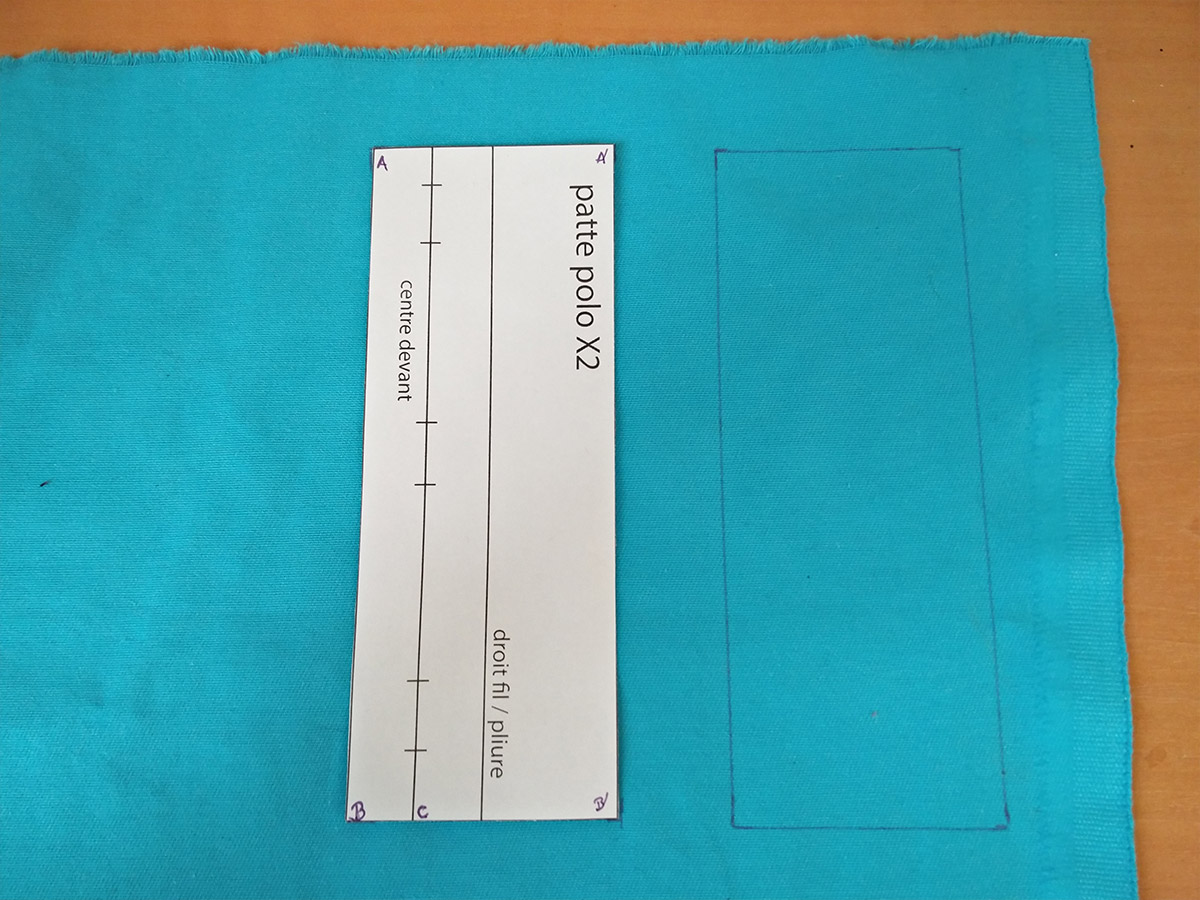
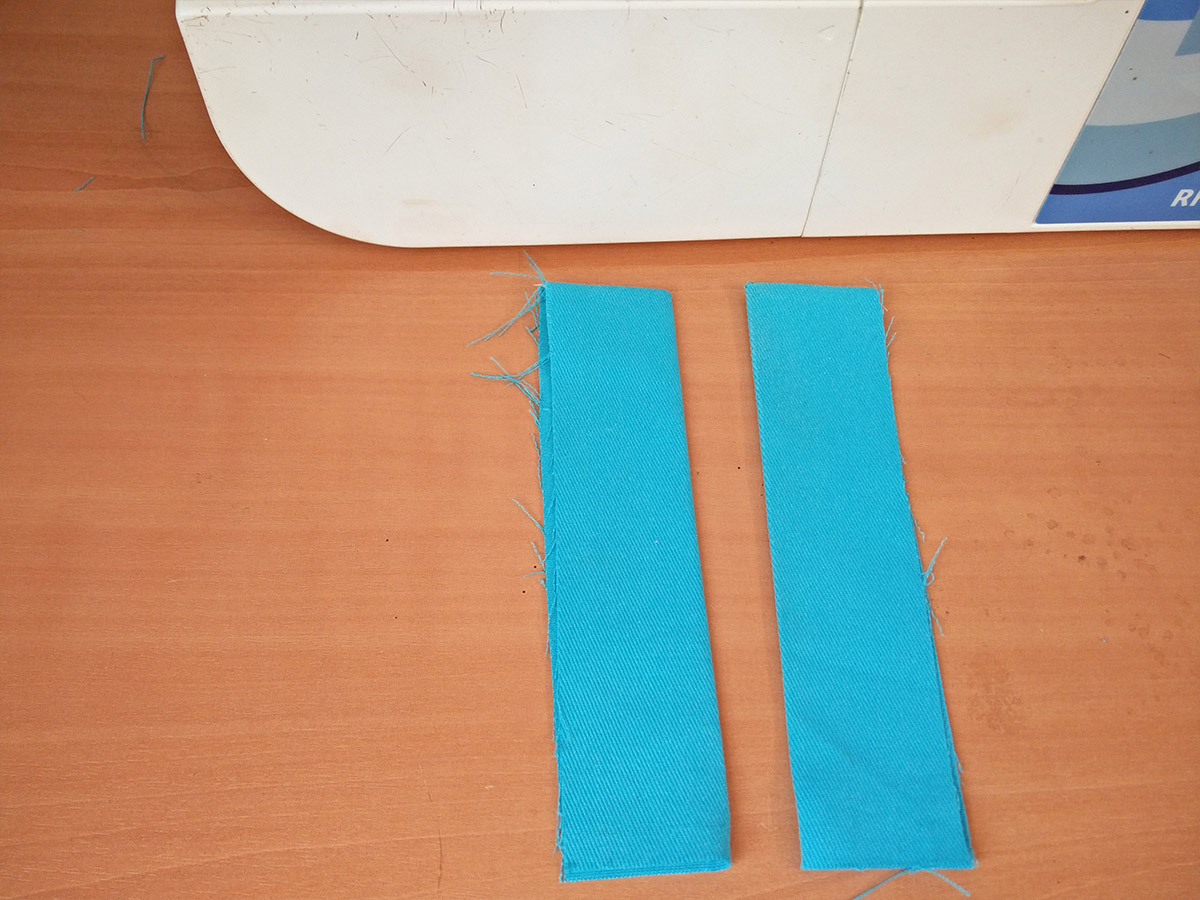
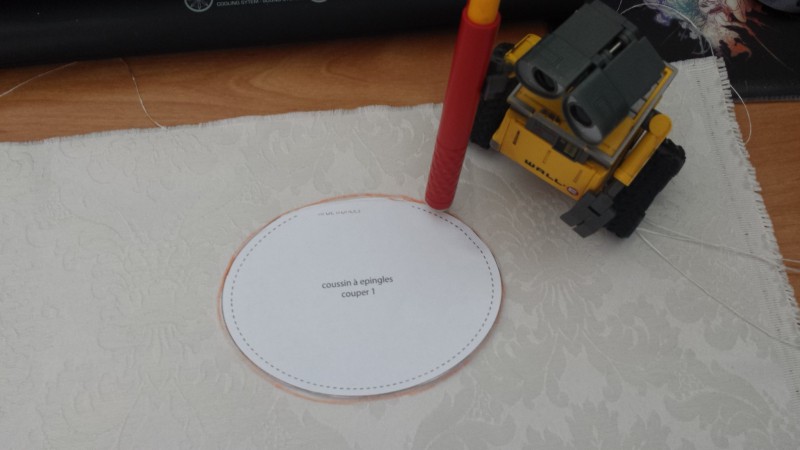
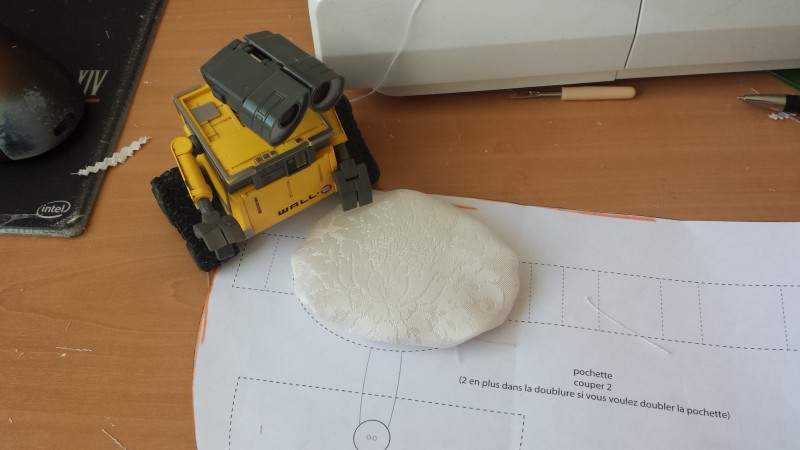
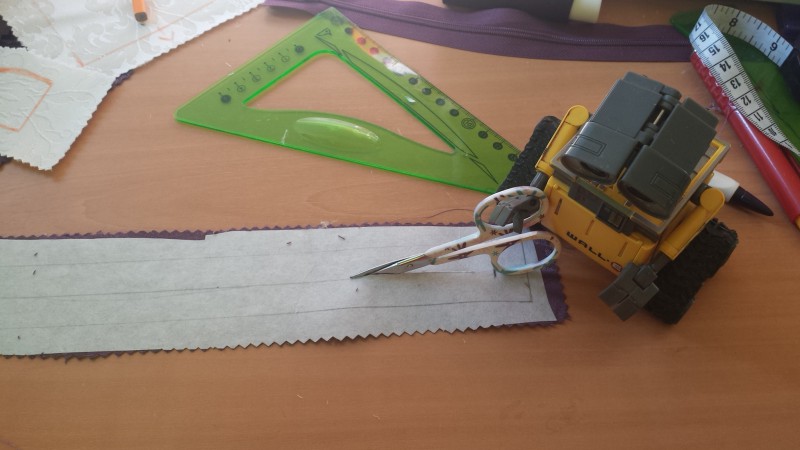
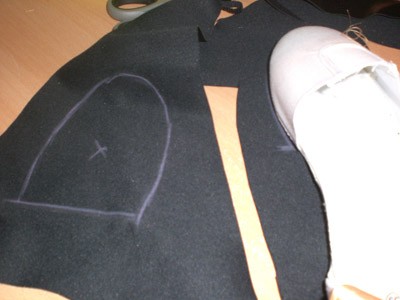
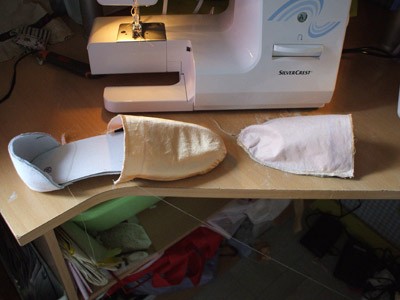
Étape 1 : Le patron
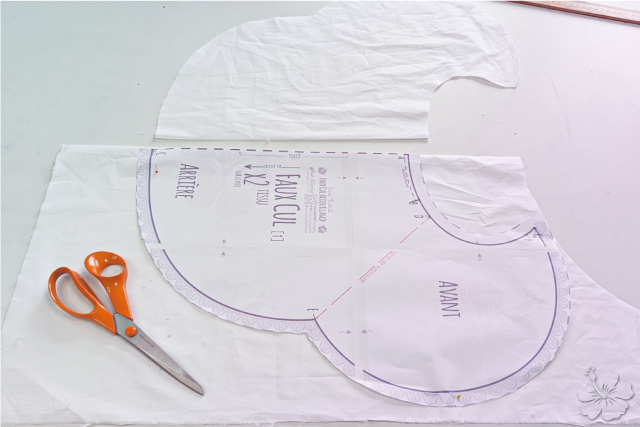
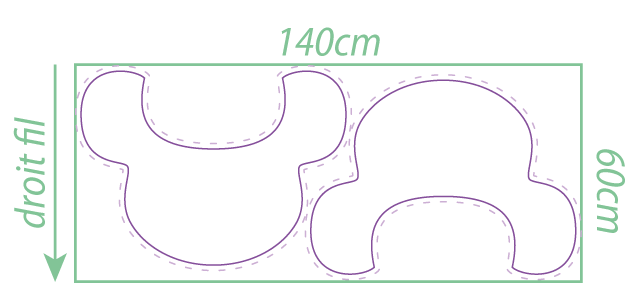
Reportez le patron sur votre tissu coton en positionnant les pièces comme ci-dessus.
Veillez à laisser les valeurs de couture indiquées par les pointillés lors de la découpe.
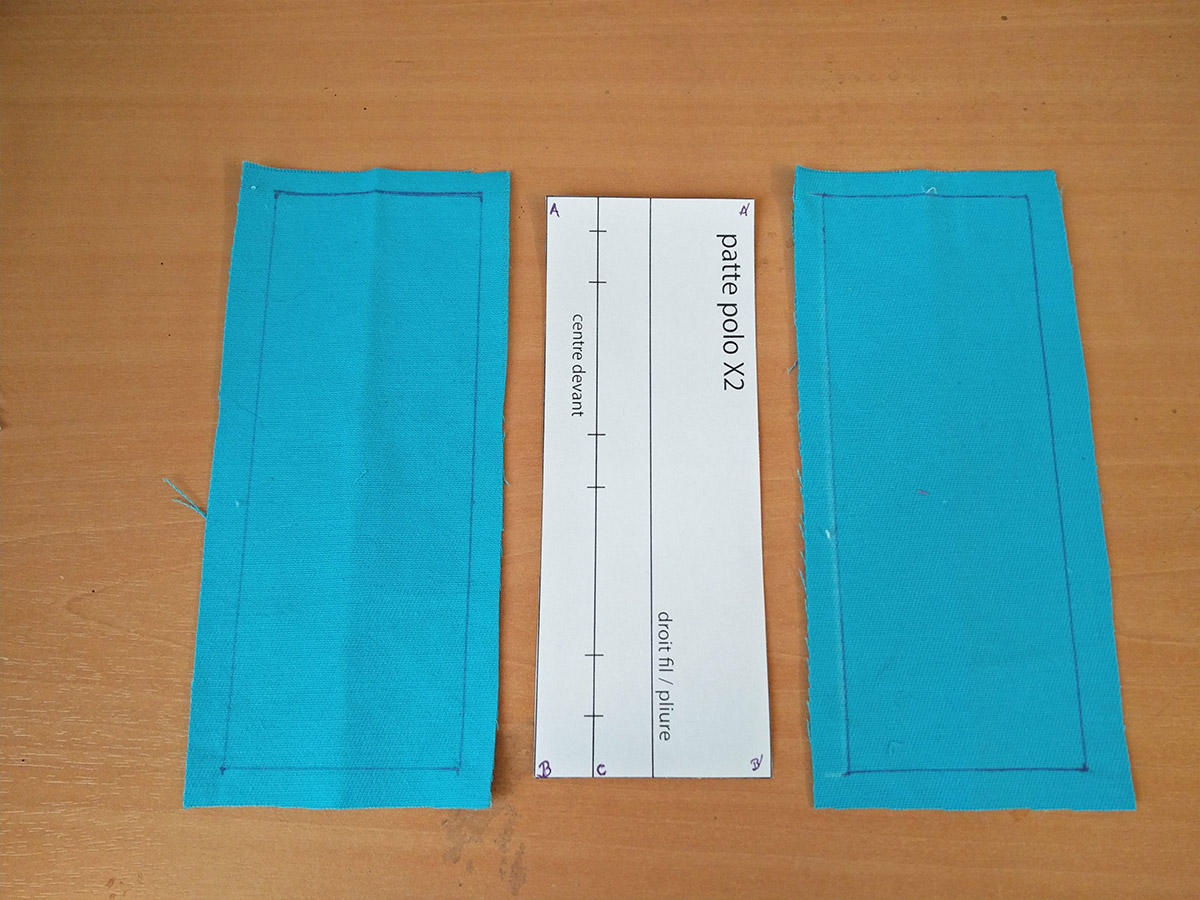
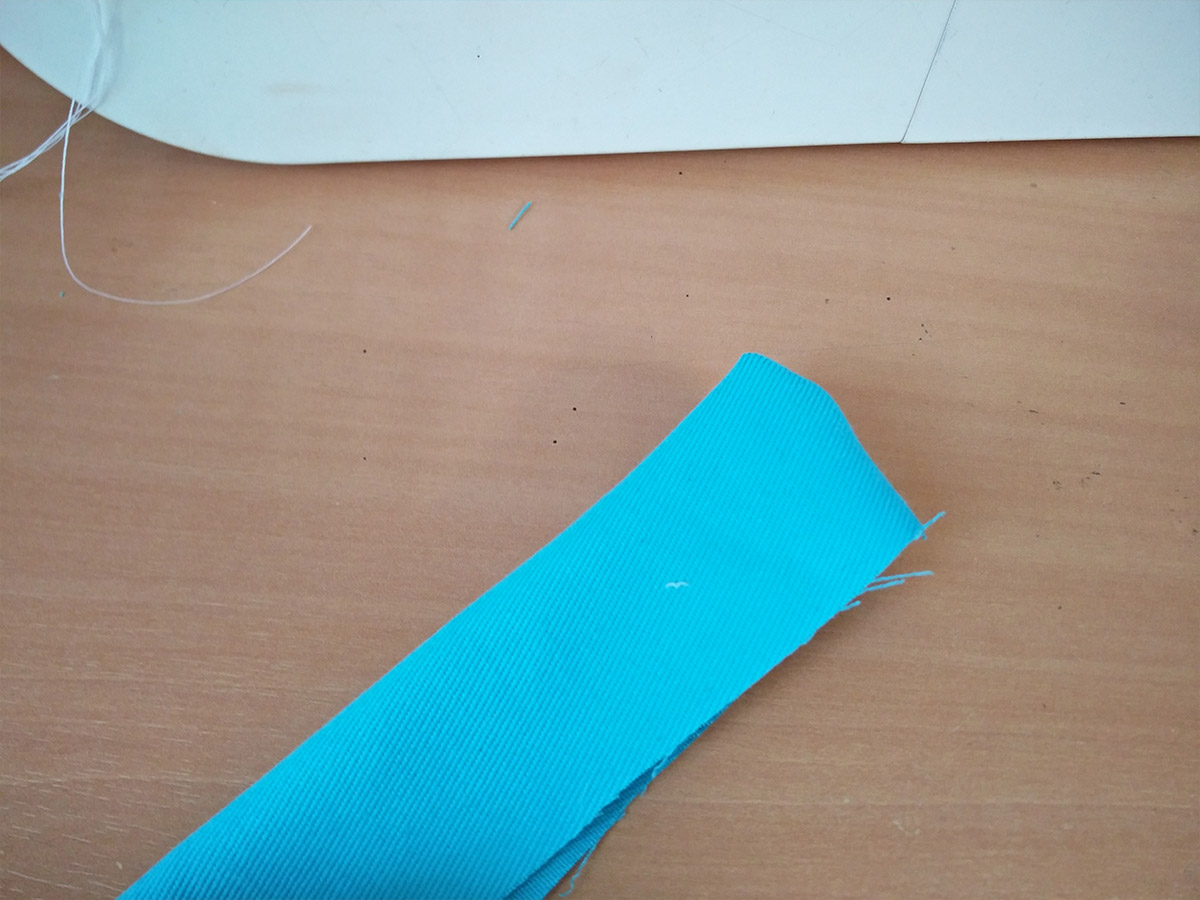
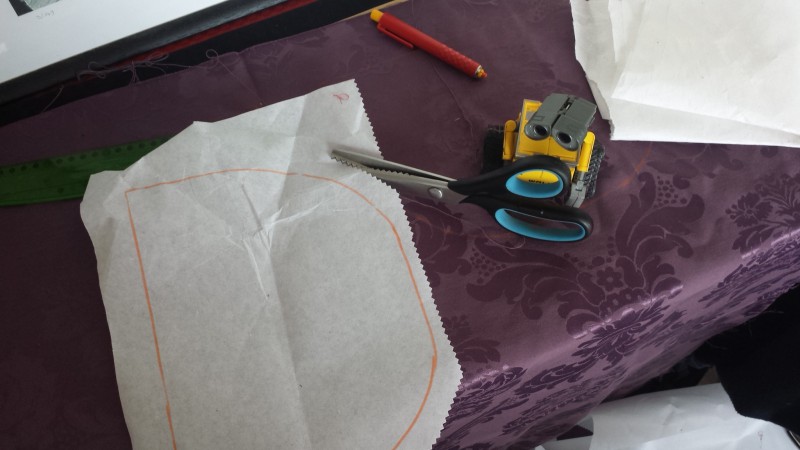
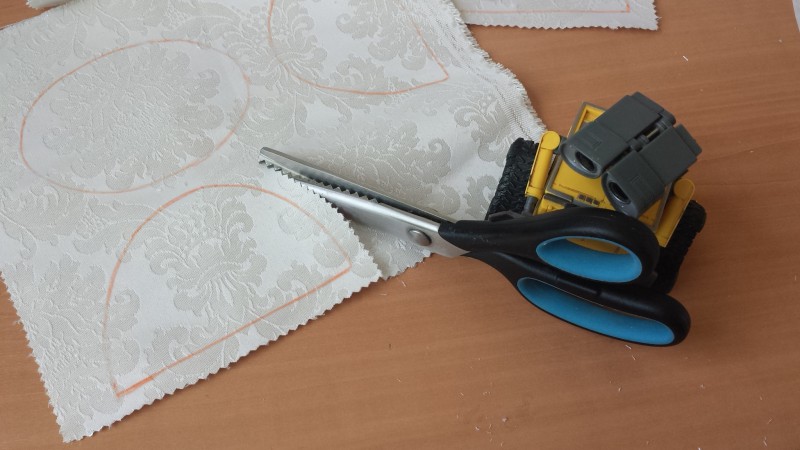
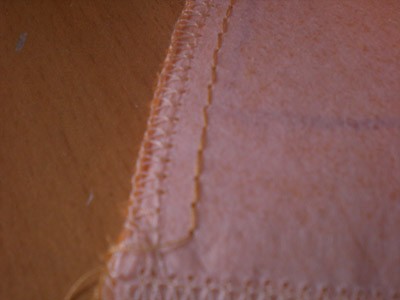
Étape 2 : Préparer vos pièces
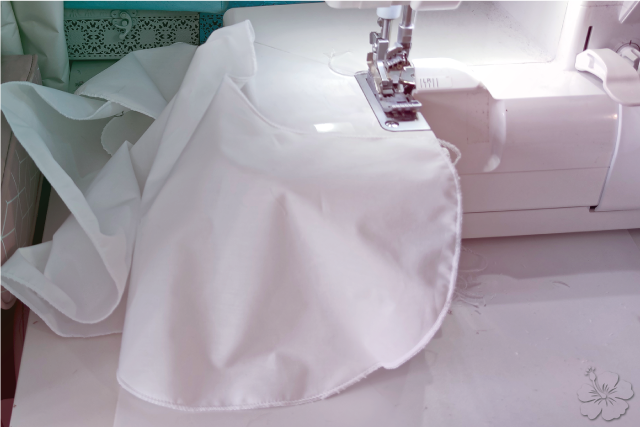
Découpez les 2 morceaux, puis faites un surjet (ou point zigzag) sur tous les bords pour éviter que le tissu s’effiloche.
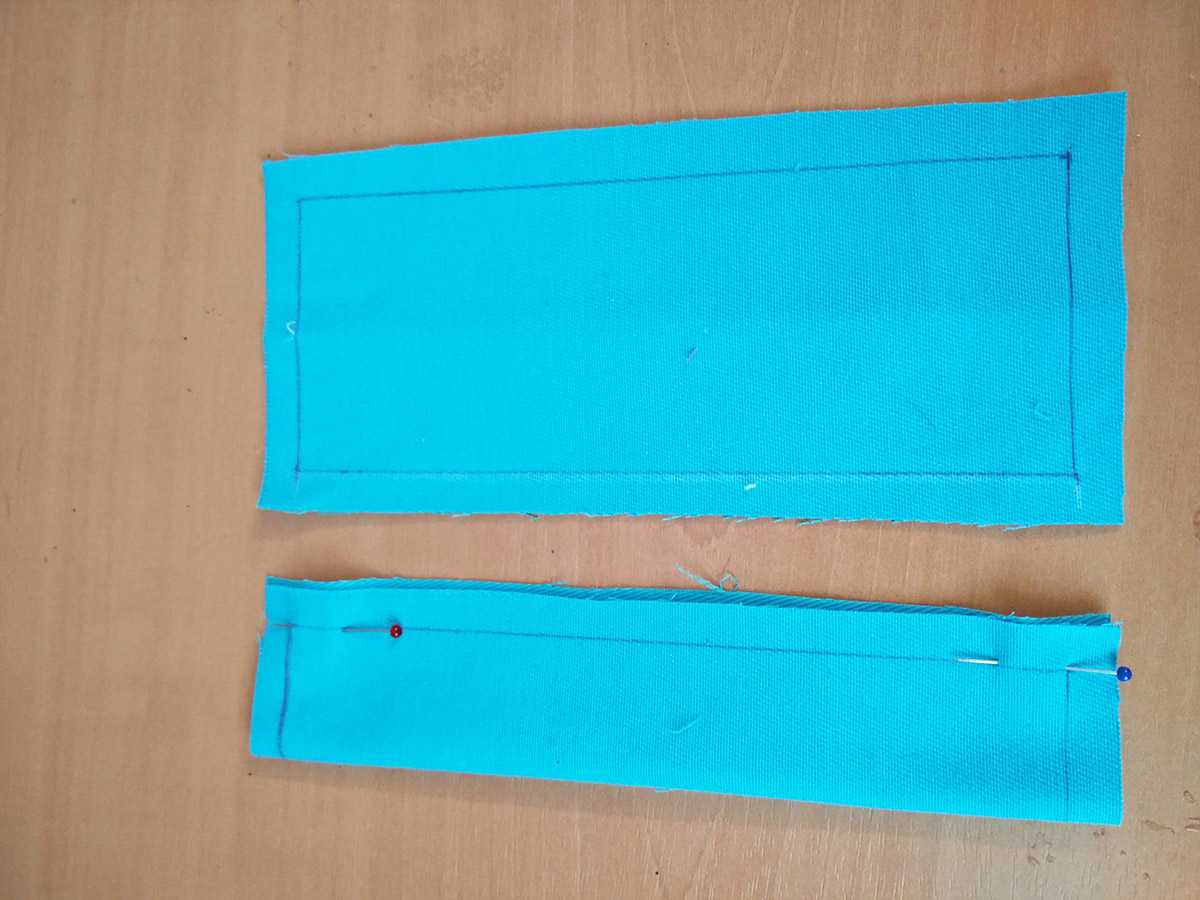
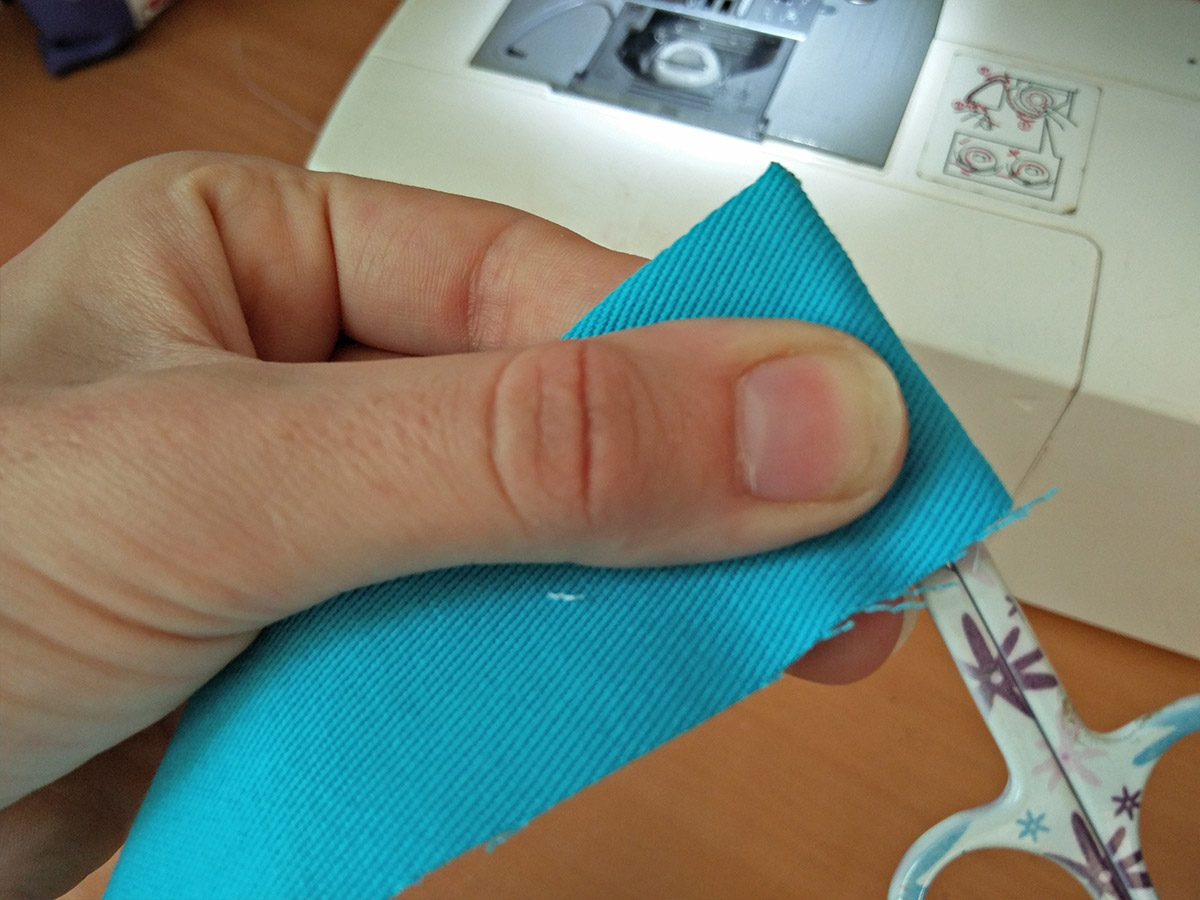
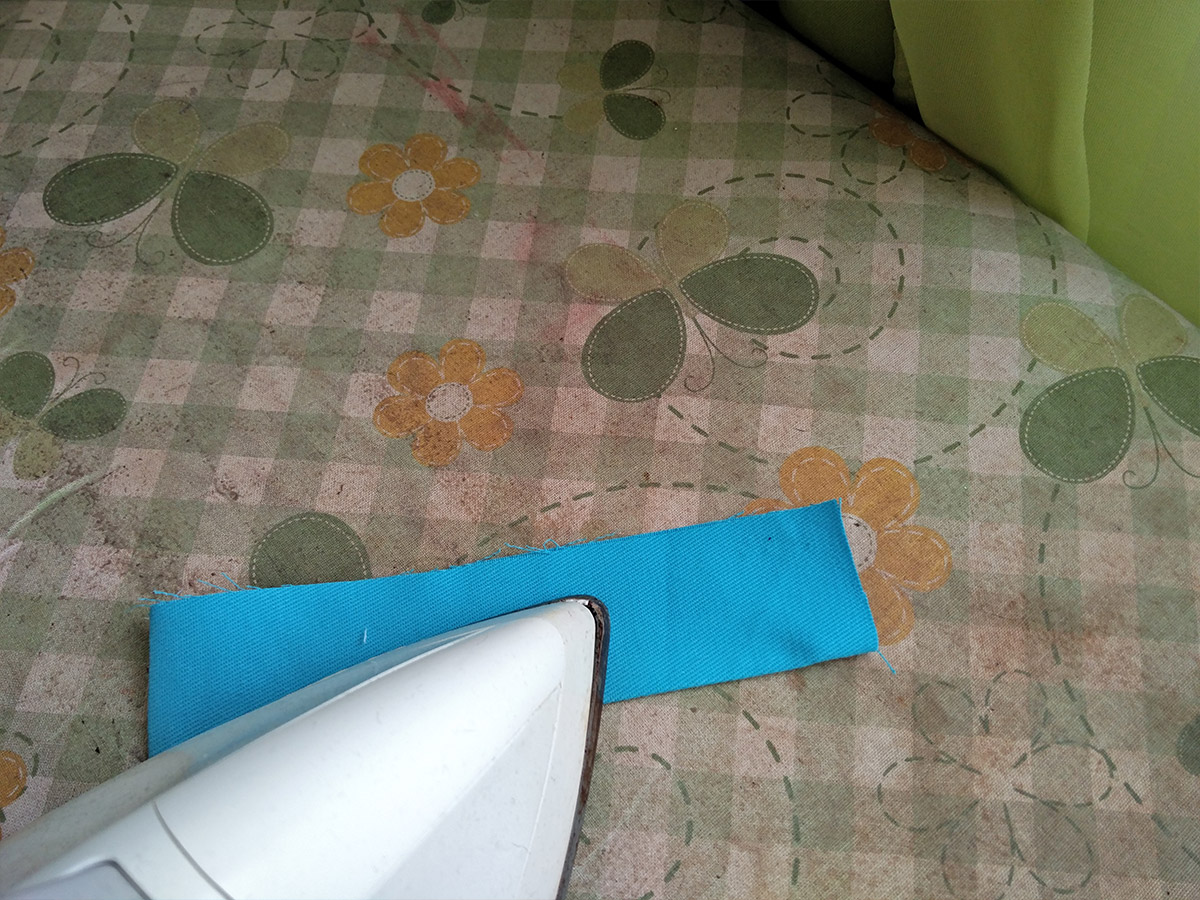
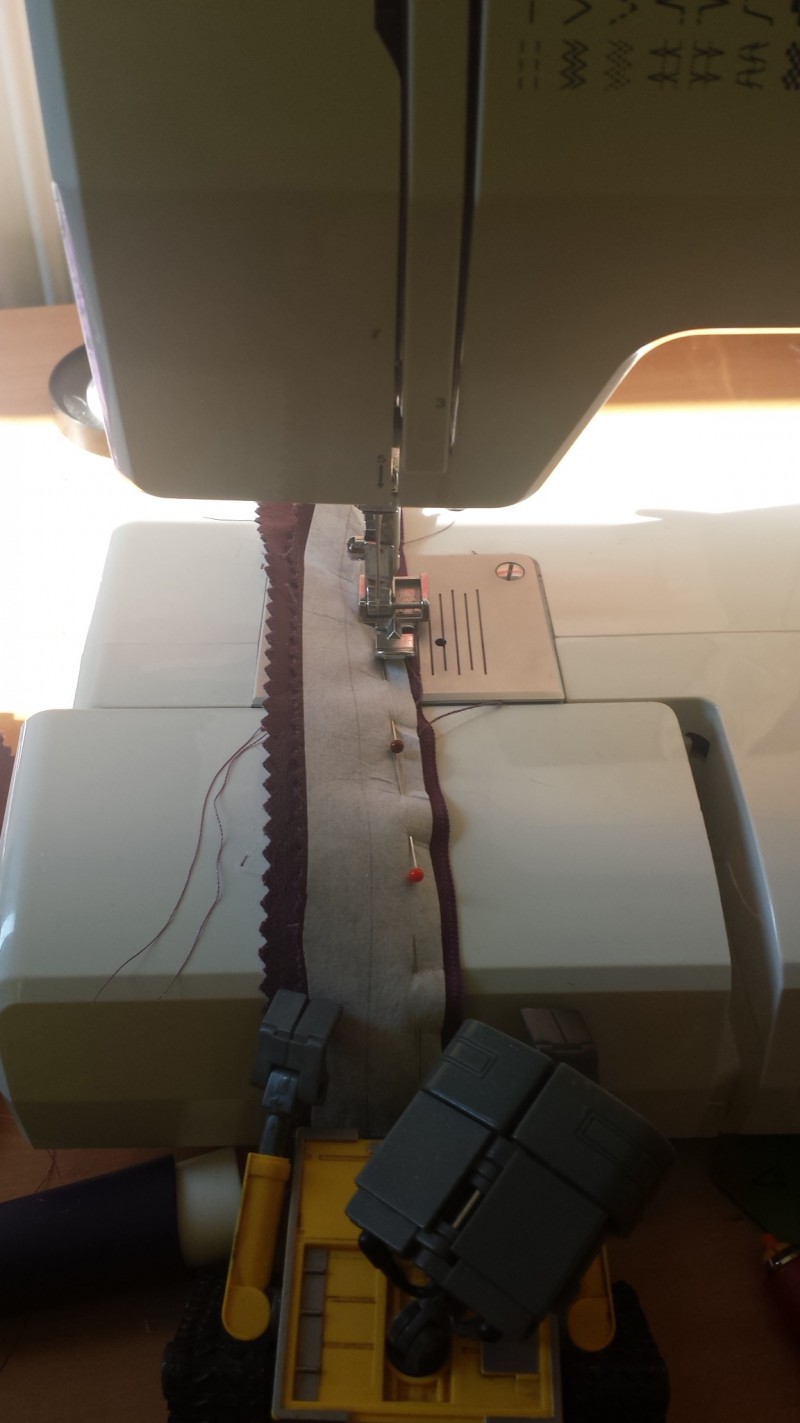
Étape 3 : Les rubans
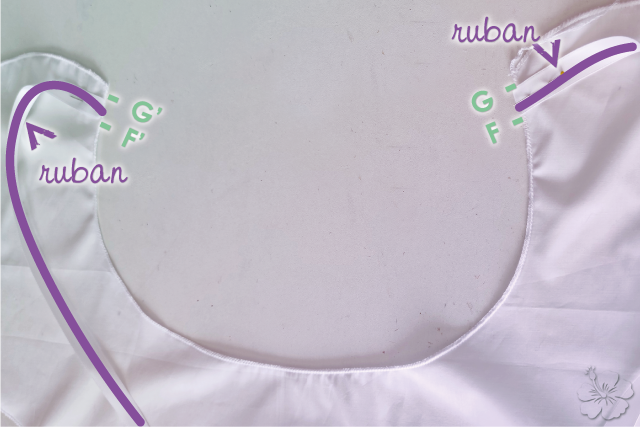
Coupez votre ruban en 2 et positionnez les 2 parties entre les repères F et G ainsi que F’ et G’.
Il faut que la longueur du ruban soit sur l'intérieur du tissu.
* les repères ’ sont situés au même niveau que leurs homologues sur la partie en miroir.
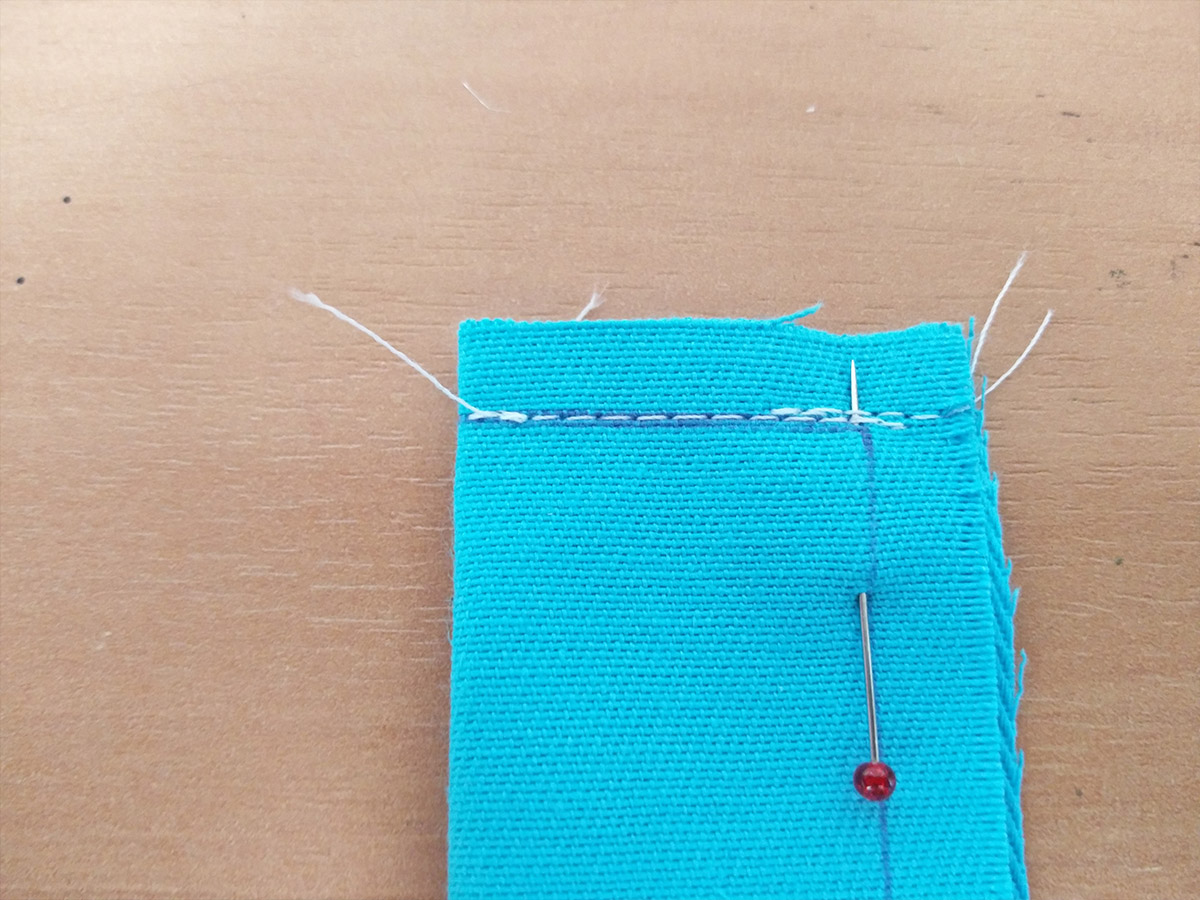
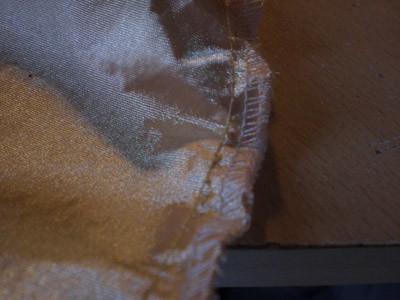
Étape 4 : Assembler les morceaux

Positionnez les 2 morceaux endroit contre endroit et faites une couture entre les repères B et B’ en passant par le repère C.
Faites attention de bien laisser les rubans à l’intérieur et à ne pas les prendre dans vos coutures.
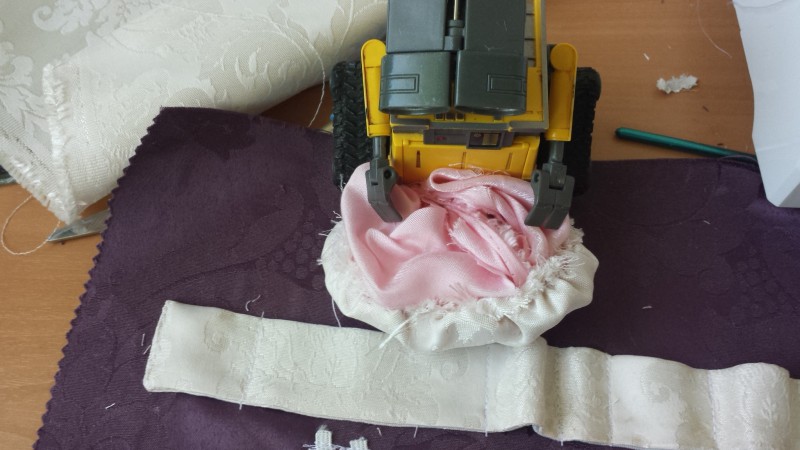
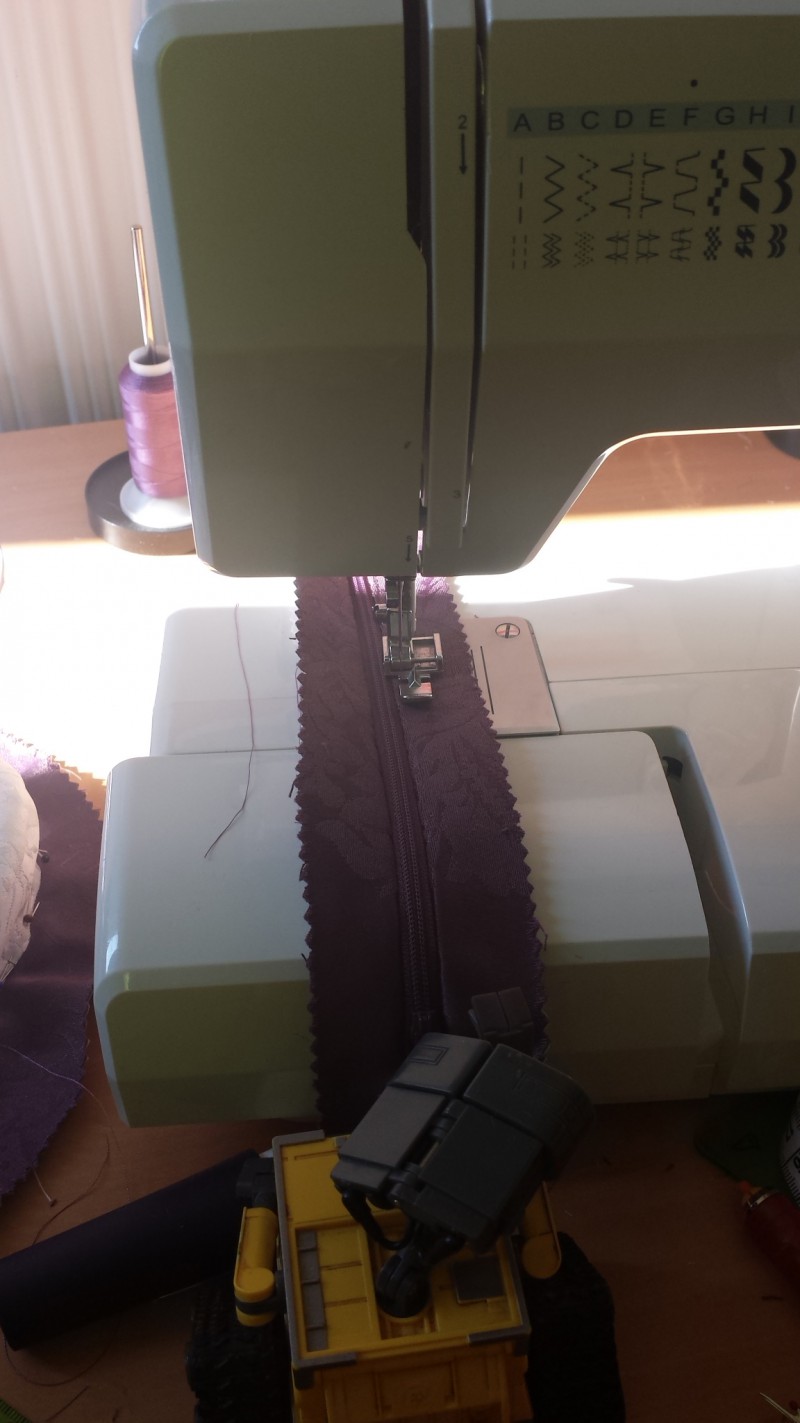
Étape 5 : Retourner et bourrer
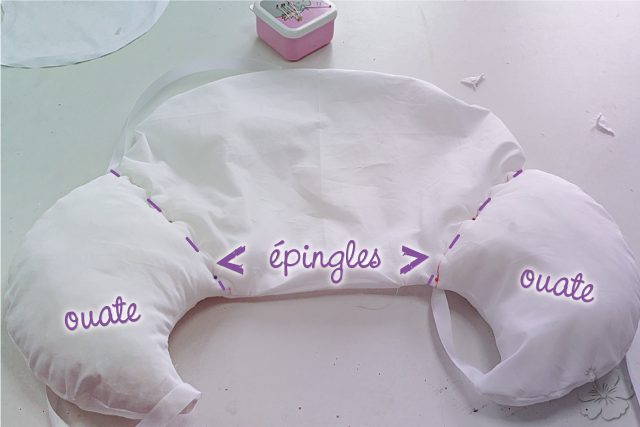
Retournez votre faux cul puis commencez à remplir les parties « Avant » avec de la ouate de rembourrage.
Il faut que ça soit bien rempli pour supporter le poids de vos jupes : donc, bourrez bien !
Puis, posez des épingles le long de la ligne de couture pour maintenir la bourre en place.
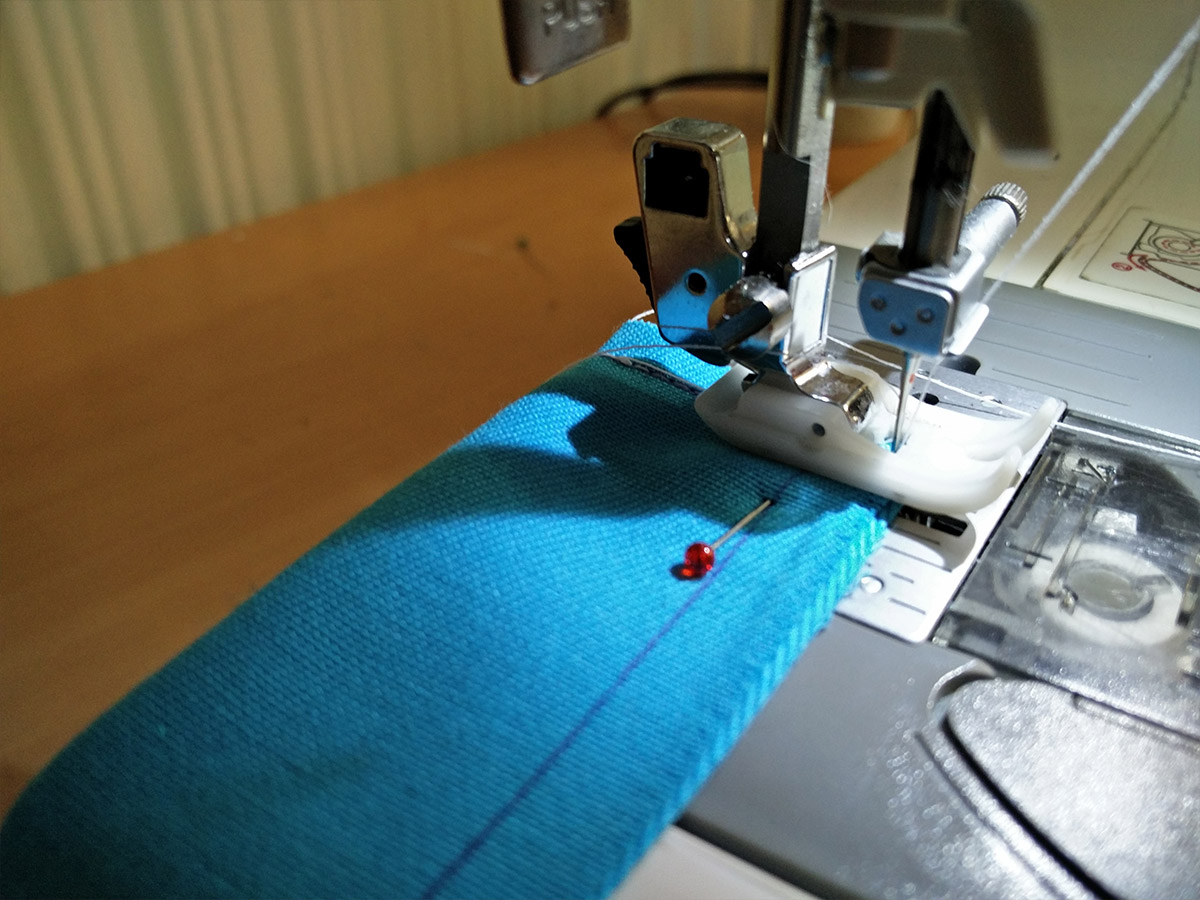
Étape 6 : Couture de séparation
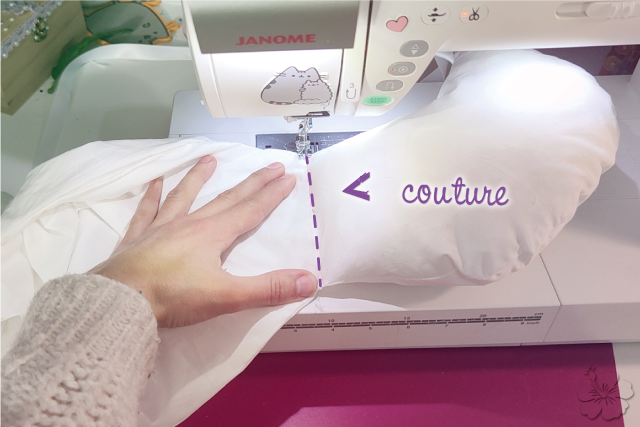
Faites une surpiqure sur les deux cotés entre les repères D et E afin de bloquer la bourre pour qu’elle reste dans la partie avant et faire ainsi 3 « cousins » en un.
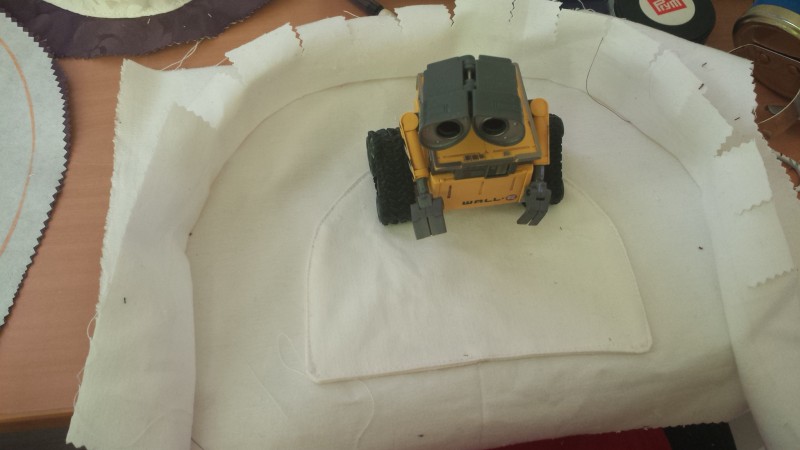
Étape 7 : Bourrer et fermer
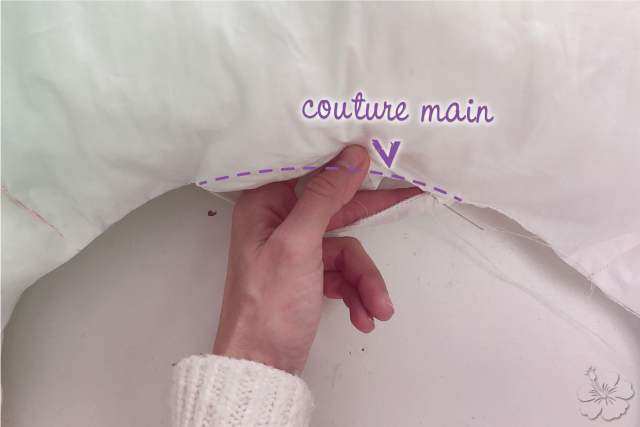
Finissez de bourrer la partie « Arrière » de la ouate de rembourrage.
Une fois cette partie bien pleine, vous pouvez fermer le trou à la main avec un point invisible.
Étape 8 : Poser la dentelle
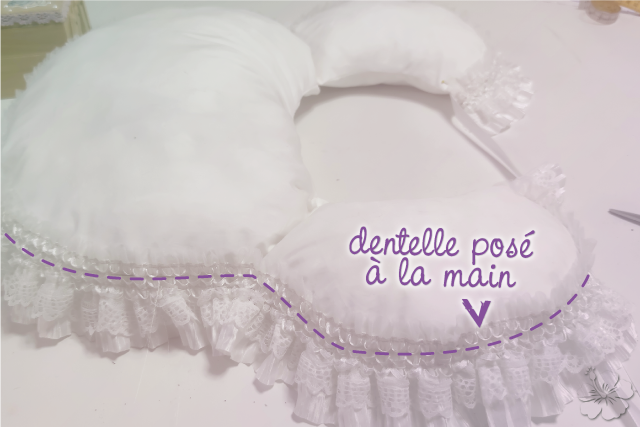
Posez la dentelle large sur le tour du coquillage comme indiqué sur le patron par le motif dentelle. Utilisez les rubans pour le fixer à votre taille.
 "Pin it")
Les Bandes de LED
Montage et programmation

[introduction]
Step 1 : titre
[bla bla]
citation
Step 2 : titre
[bla bla]
Step 3 : titre
[bla bla]
citation
Conclusion
[bla bla]
 "Pin it")
Roses
simple in 2 methods
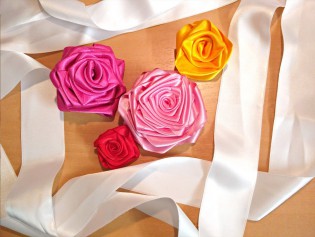
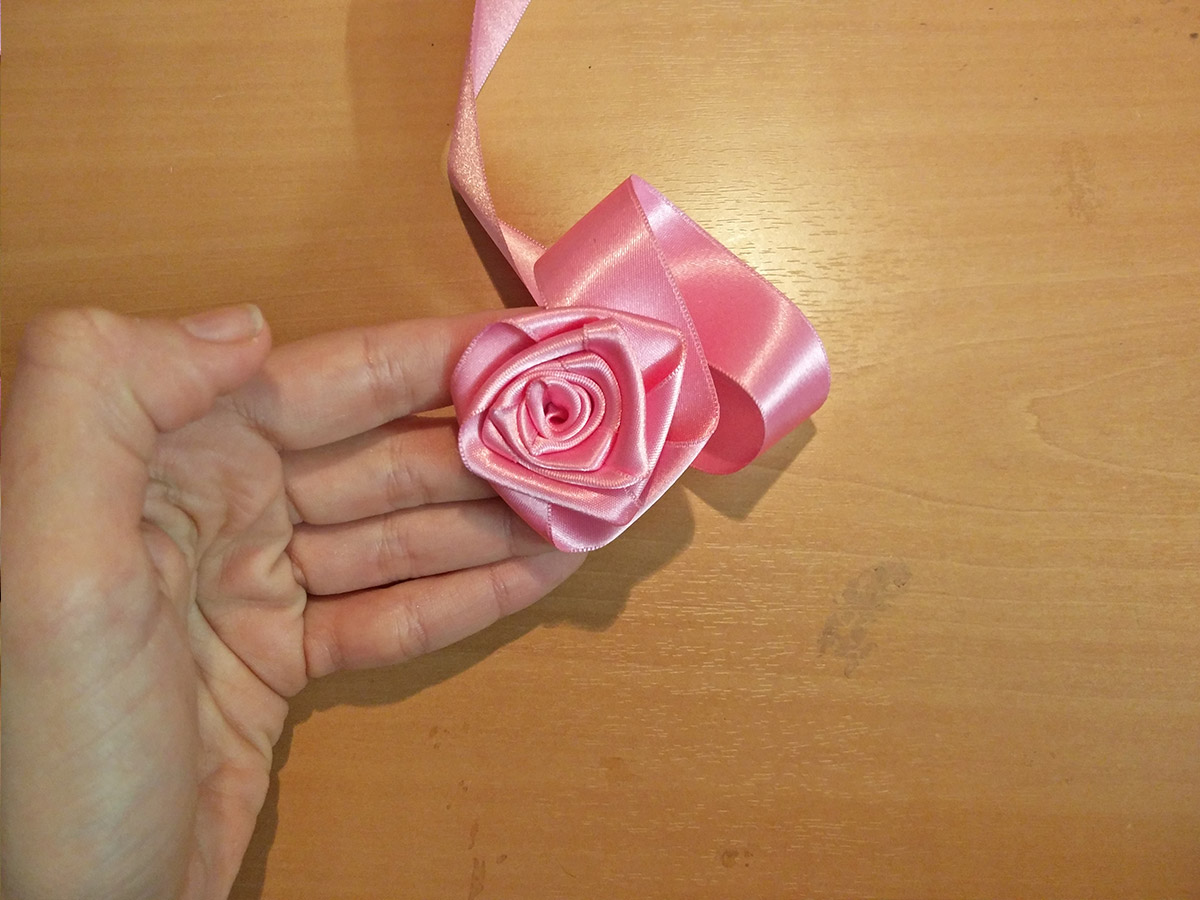
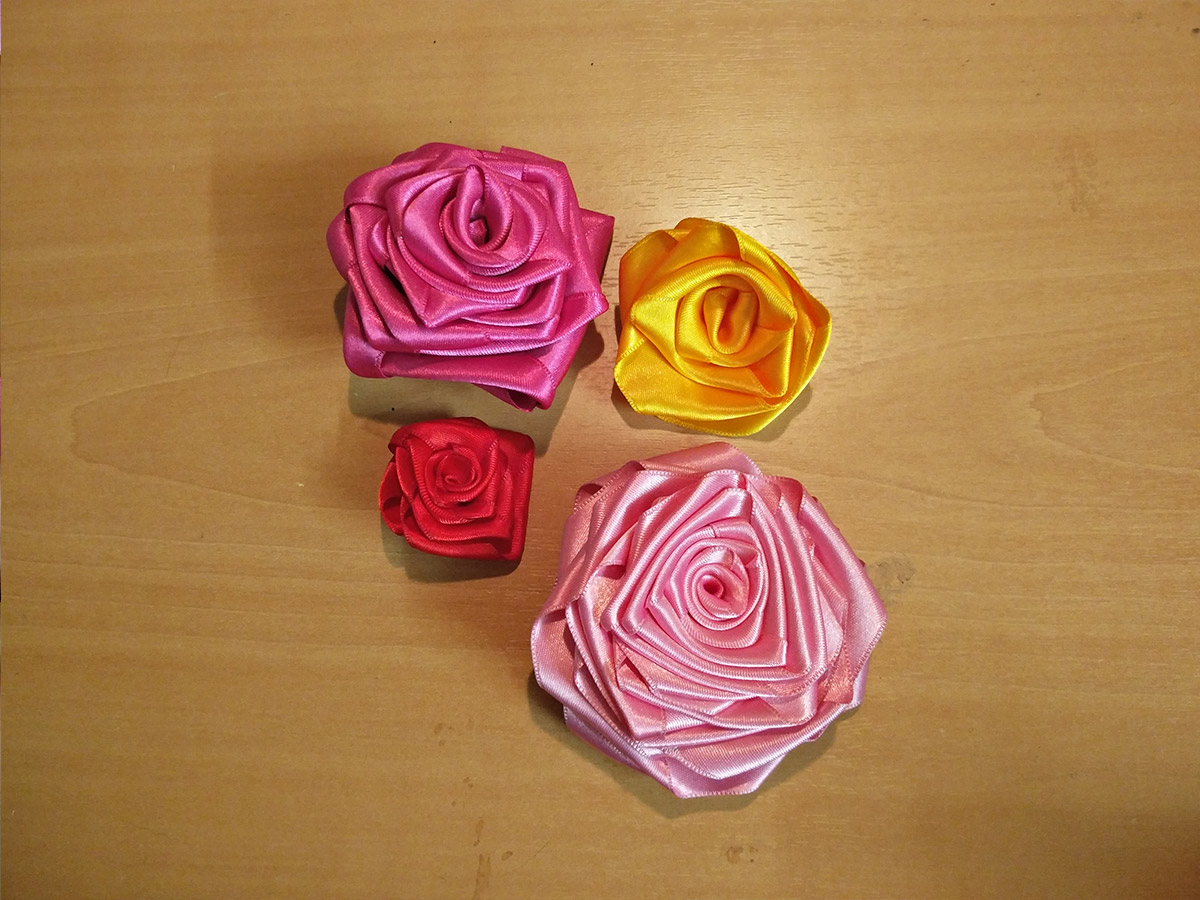
Pour réaliser une rose il vous faut un galon de satin plus ou moins large et long en fonction de la taille de la rose souhaité.
Si vous voulez faire une grosse rose bien fournie prenez un galon de 4cm de large sur 2m à 2m 50 de long. Si en revanche vous voulez faire une toute petite rose, un galon de 1,5cm de large sur 80cm de long fera largement l'affaire !
Je vous conseil de ne pas découper votre galon si vous avez du rabe car ça vous permettra de doser la taille de votre rose : prévoyez toujours un peu plus long ... on ne sait jamais !
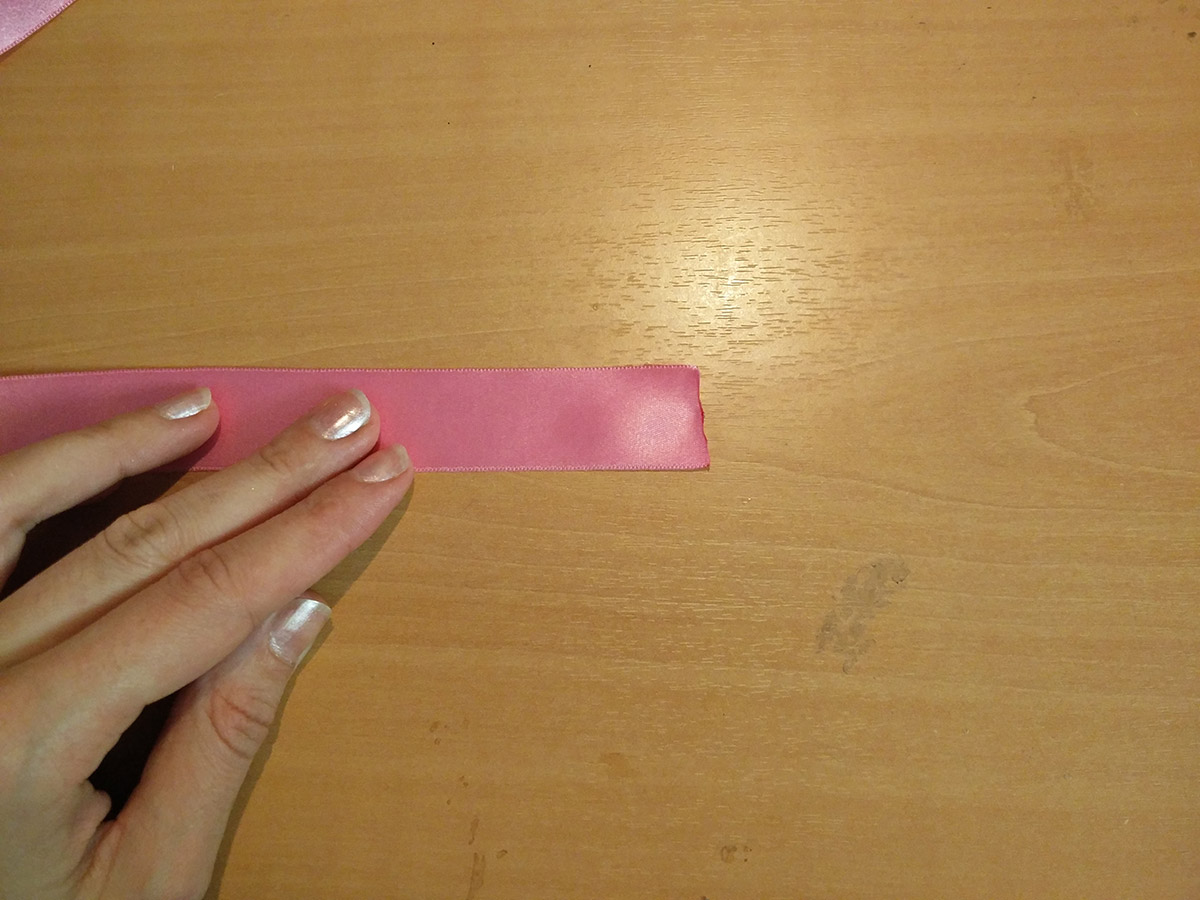
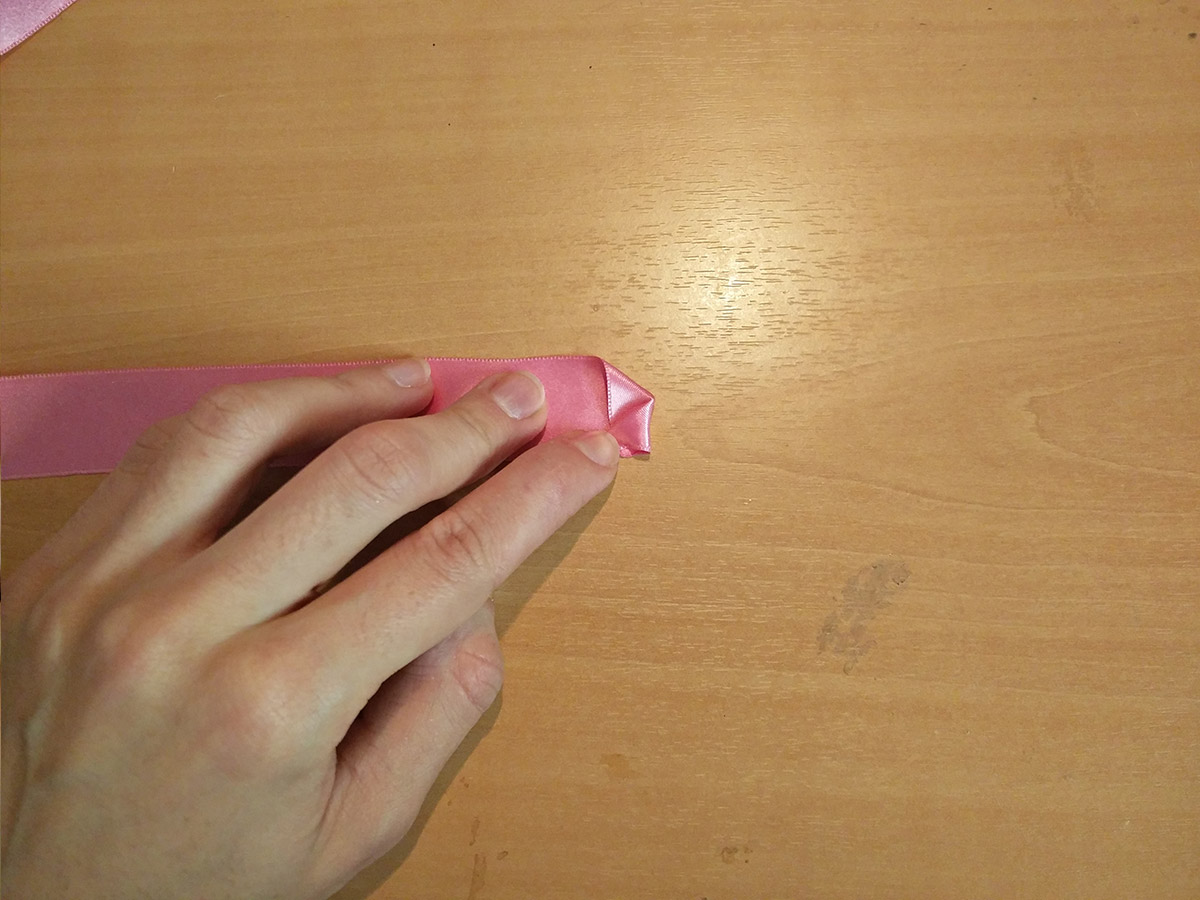
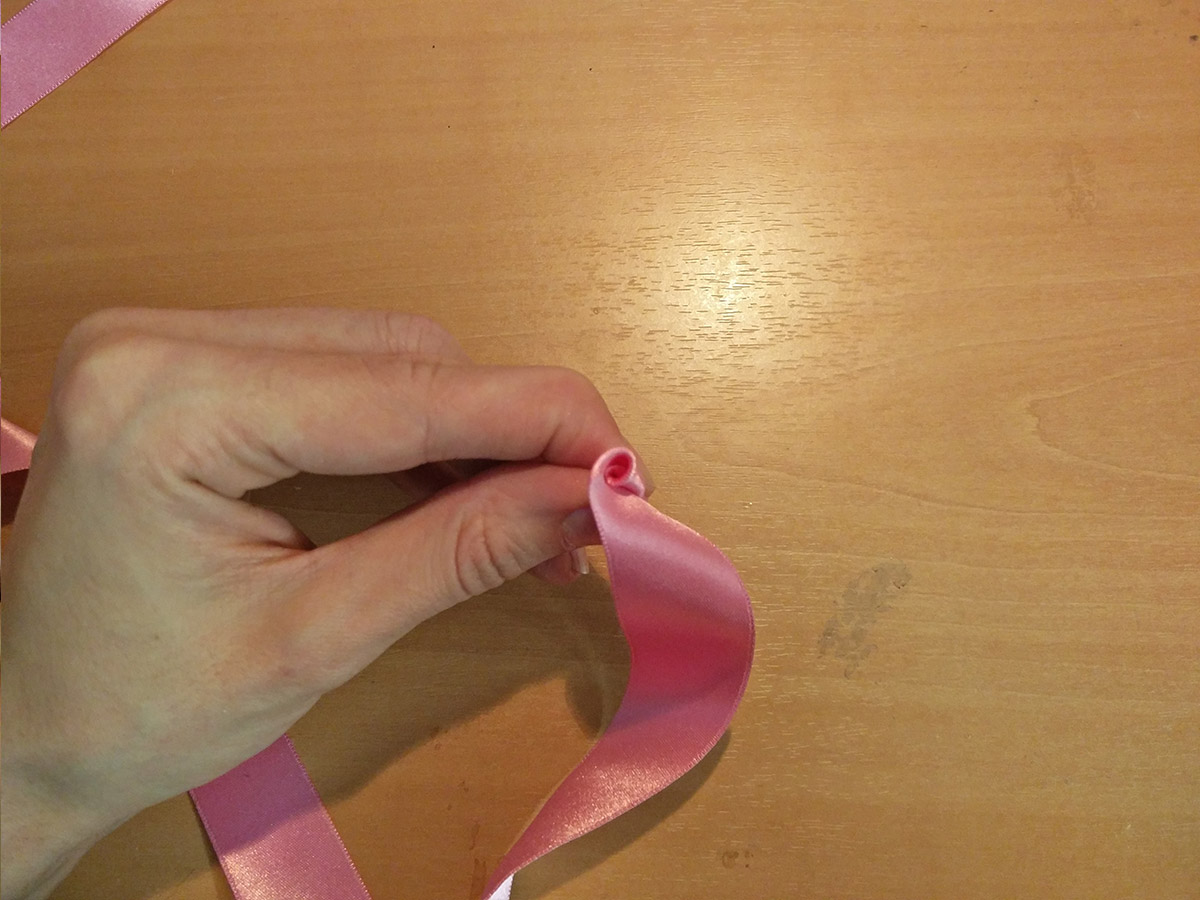
Vous allez voir c'est hyper simple il suffit juste se plier son galon 
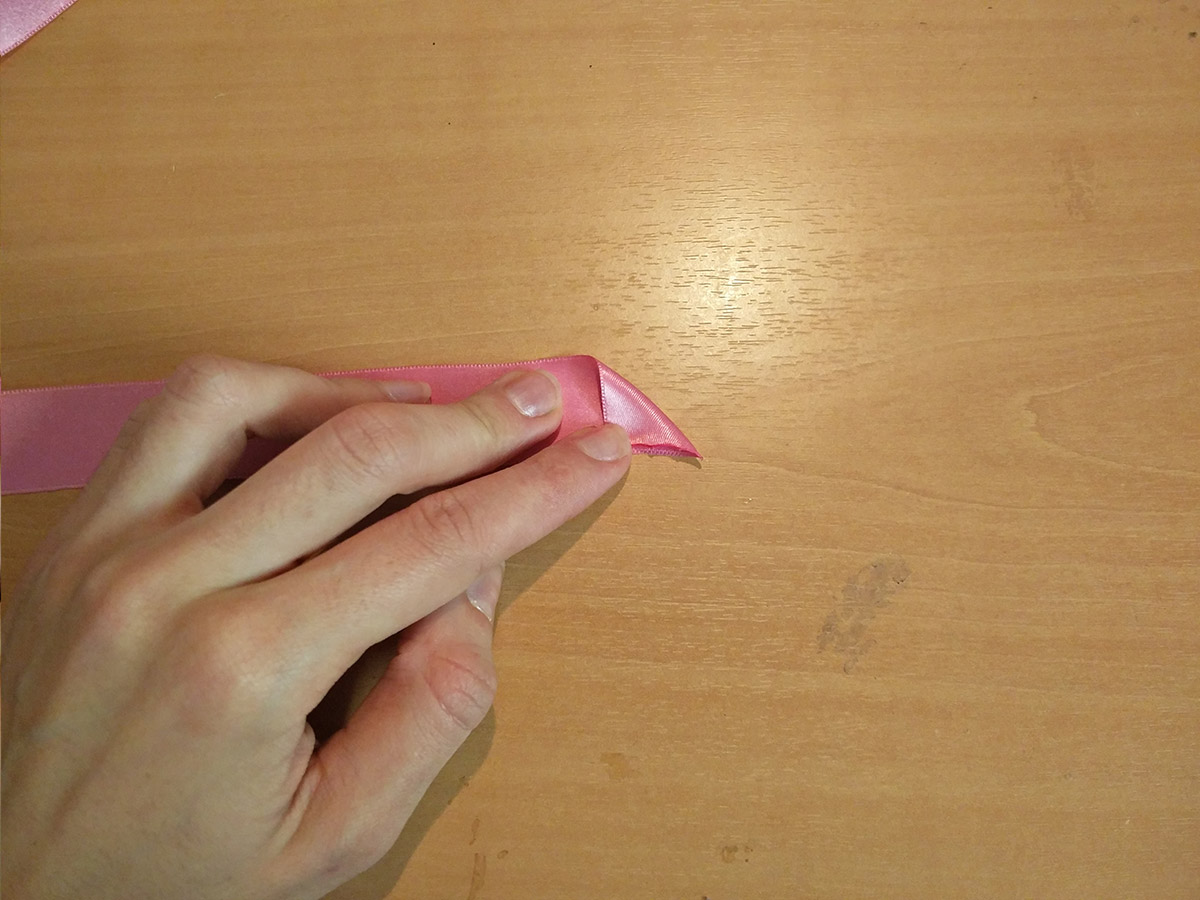
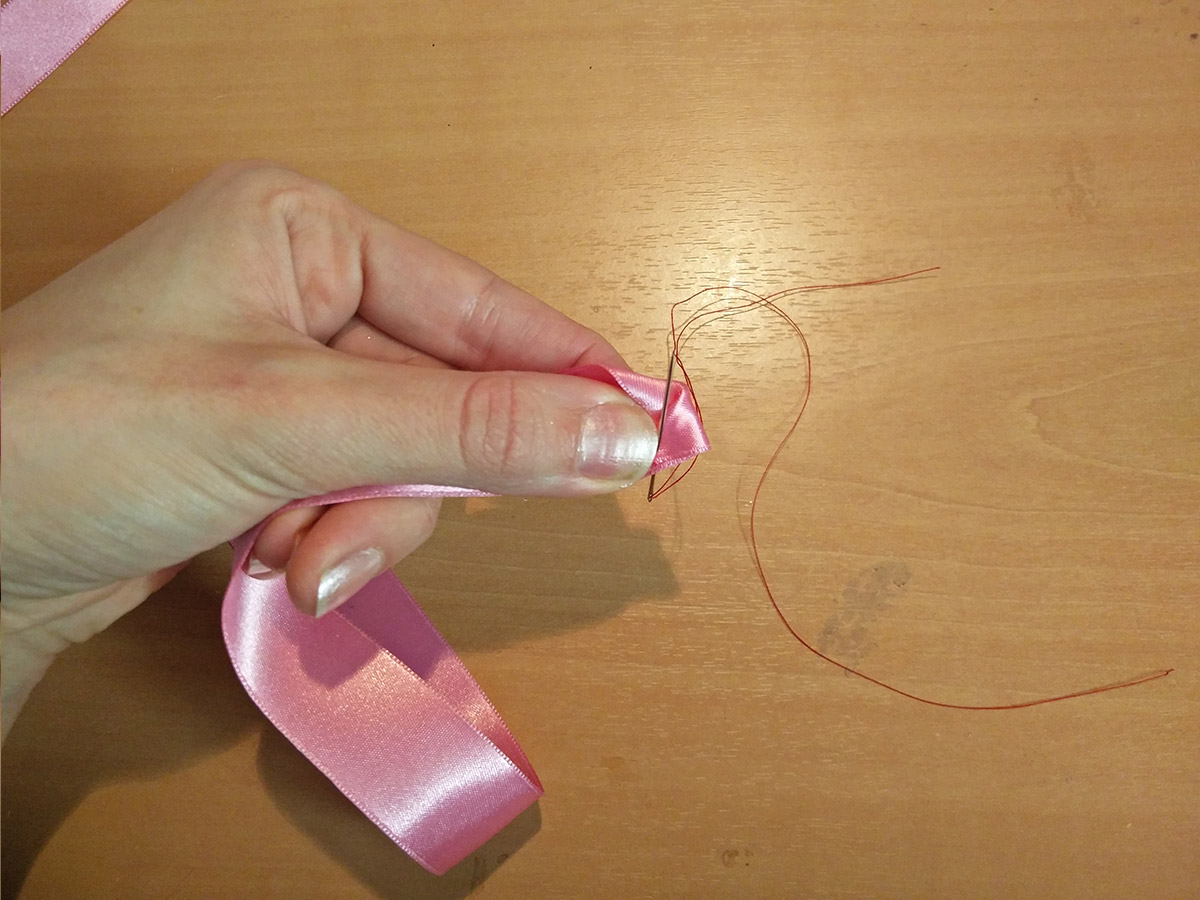
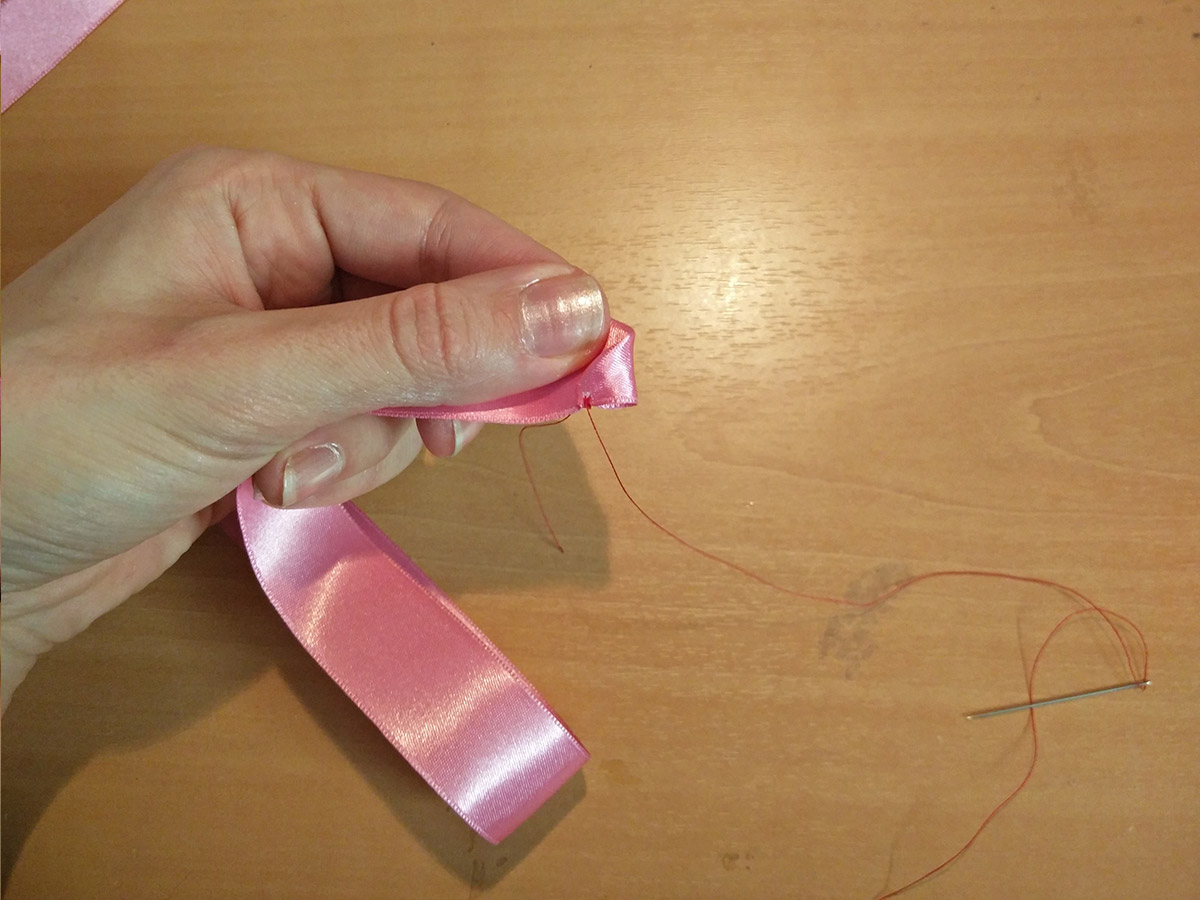
- pliez votre galon pour former un angle, puis rabattez encore le coin extérieur de l'angle vers l'extrémité du coin formé avant. Fixer cet "angle" avec un point main pour le maintenir ; vous pouvez faire sans mais plus votre galon sera fin plus il sera dure de faire toute la rose sans qu'elle se défasse (surtout si vous avez des grandes mains comme moi
 )
) 


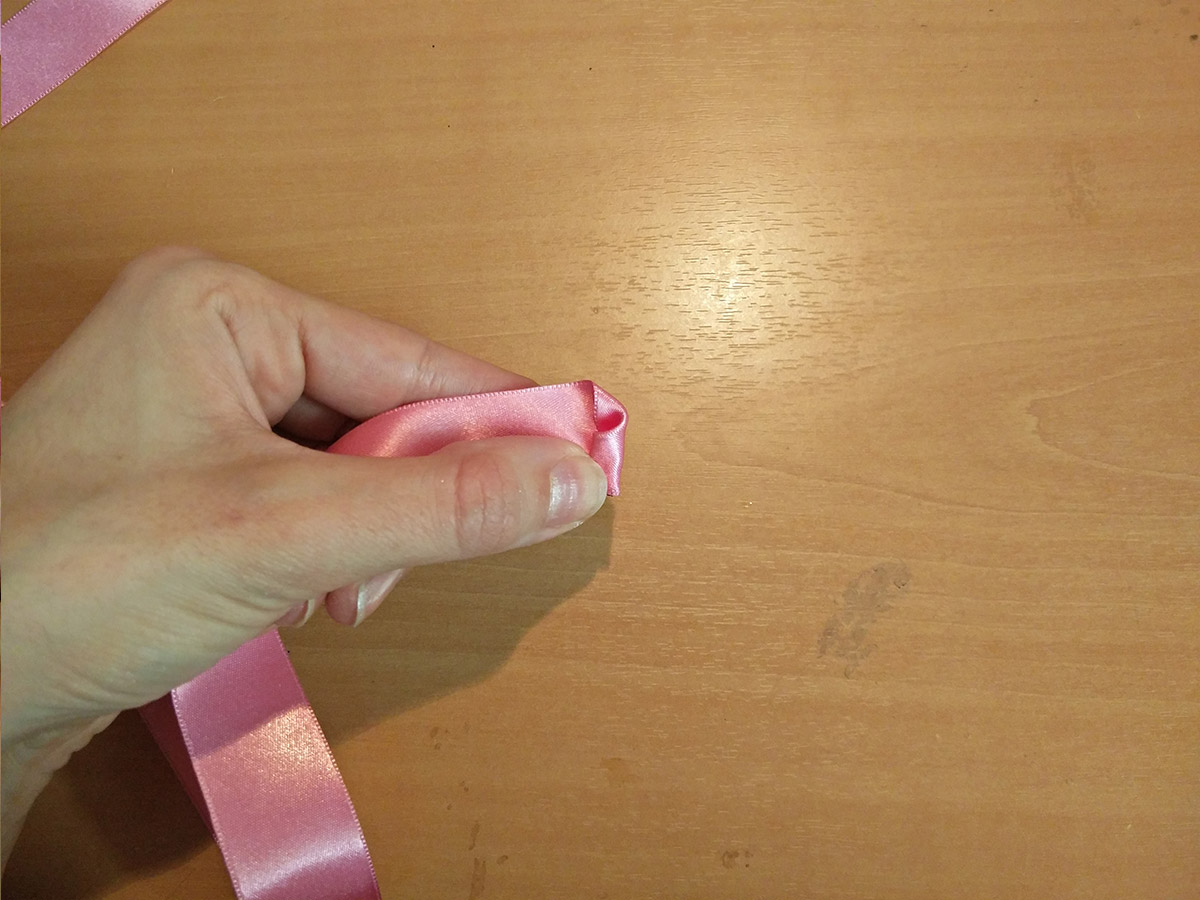
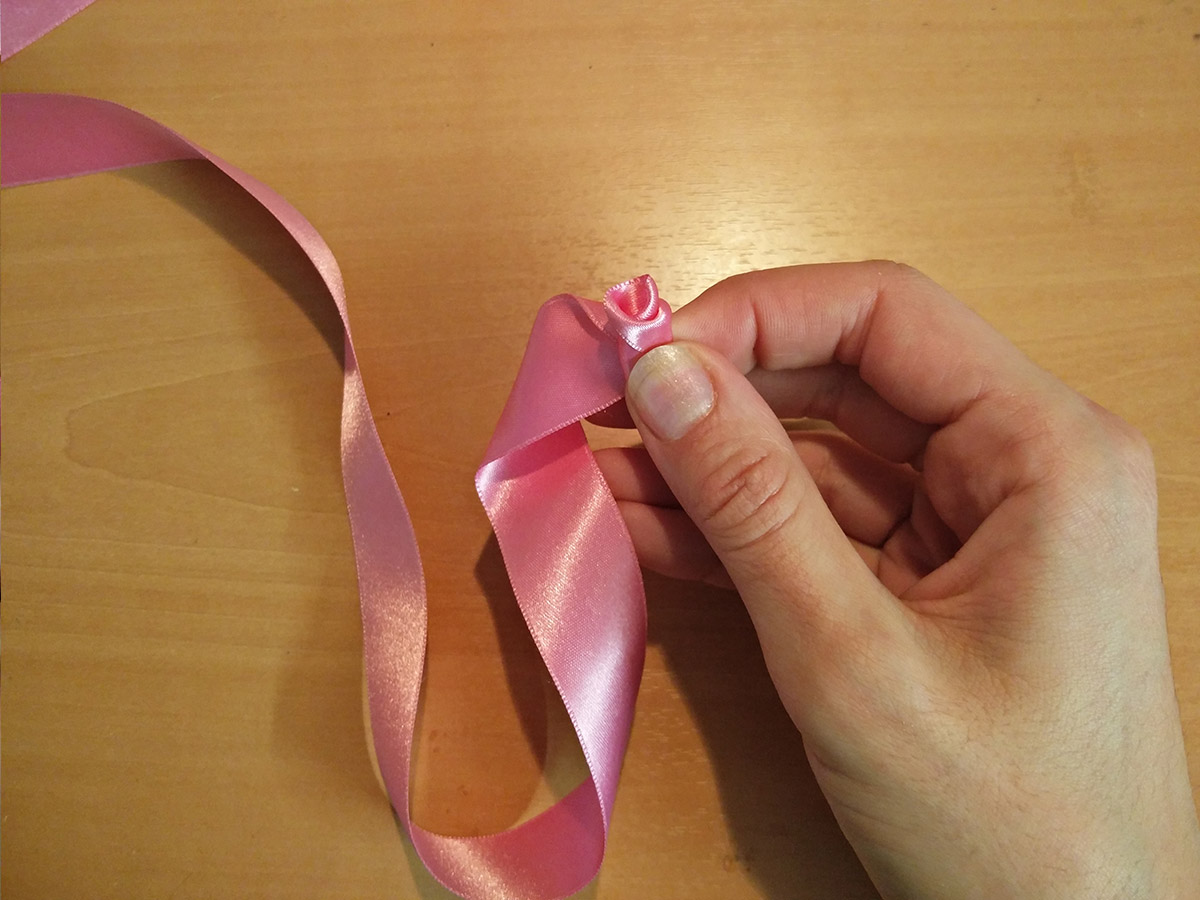
- commencez à rouler votre galon autour du futur "centre" de la rose


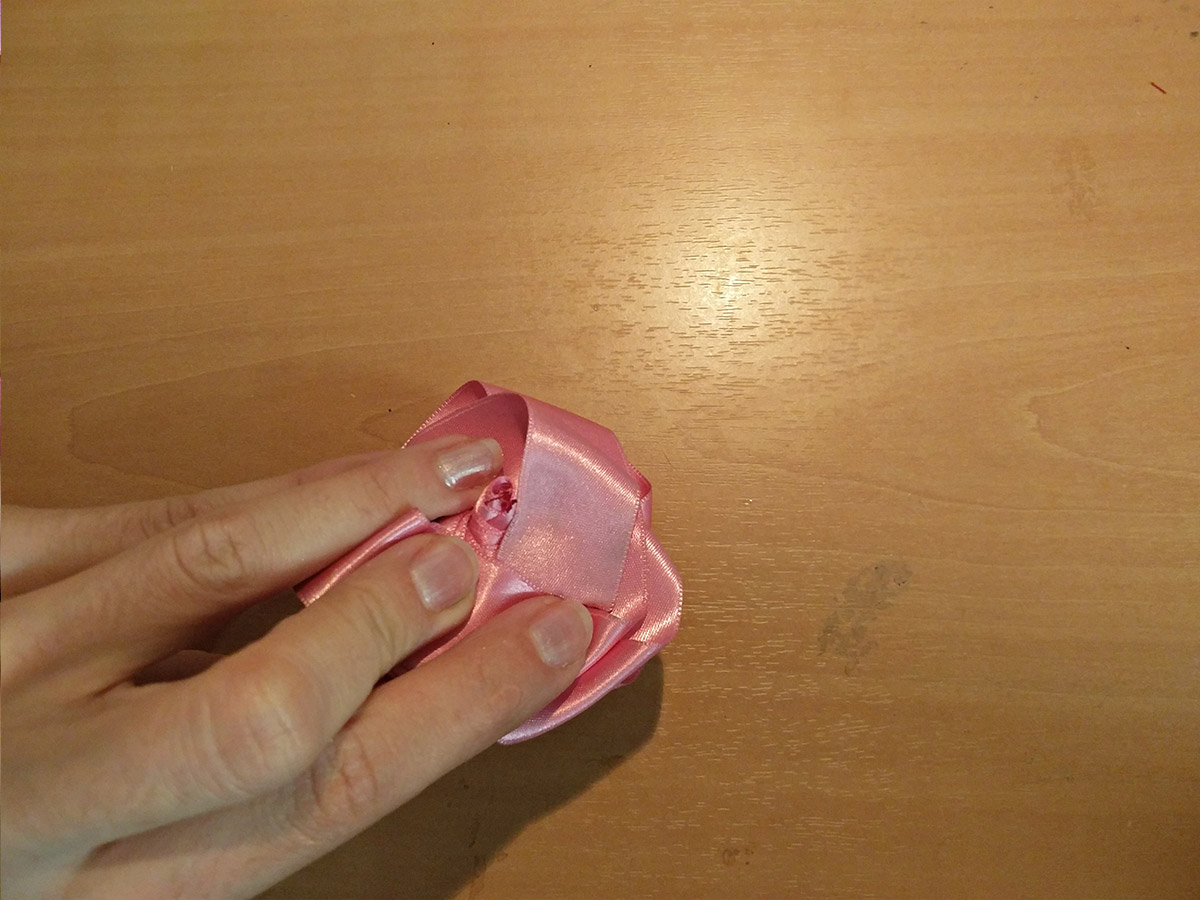
- à partir de maintenant on va répéter la même action jusqu'a obtenir la taille de rose que l'on souhaite :
- pliez le galon en angle : la partie restante passe en dessous en formant l'angle et pas au dessus !
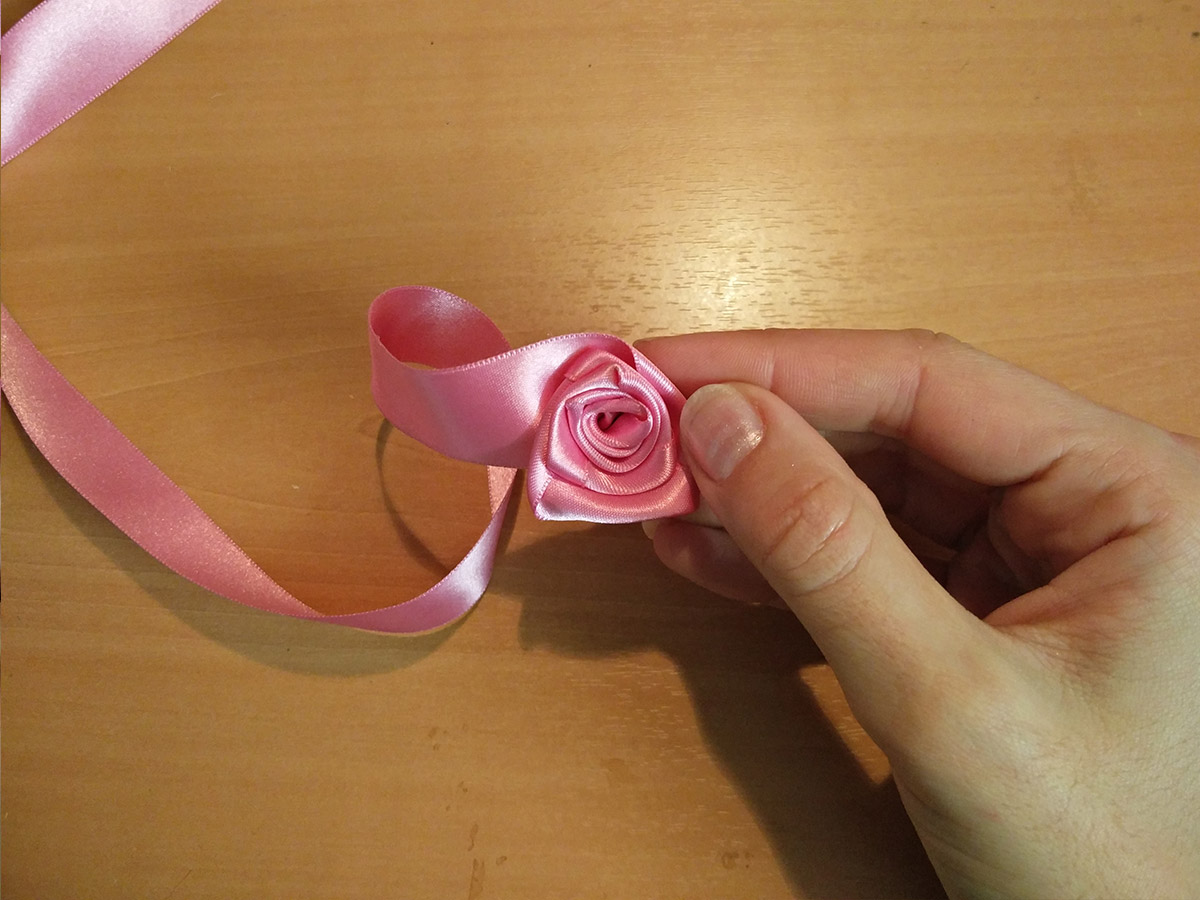
- roulez le ensuite autour de la rose
- une fois que toute la partie replié est enrouler autour du centre recommencez ainsi de suite jusqu'a la fin


- quand vous avez obtenu la taille de votre rose retournez la et couper le galon, puis rabattez le sous le dernier plis de la rose puis fixer le tout avec du fil


- voila ! votre rose est finie : amusez vous à en faire de différente tailles et couleurs !


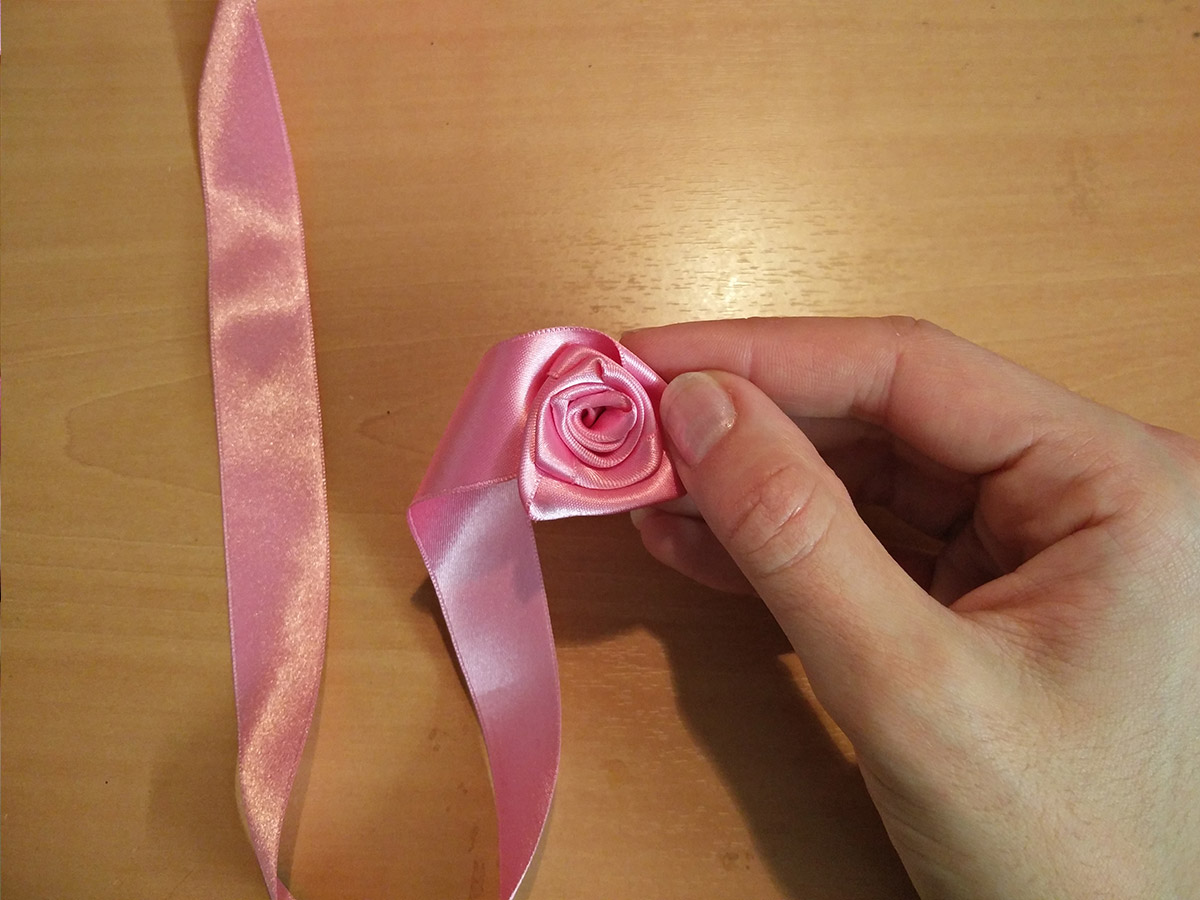

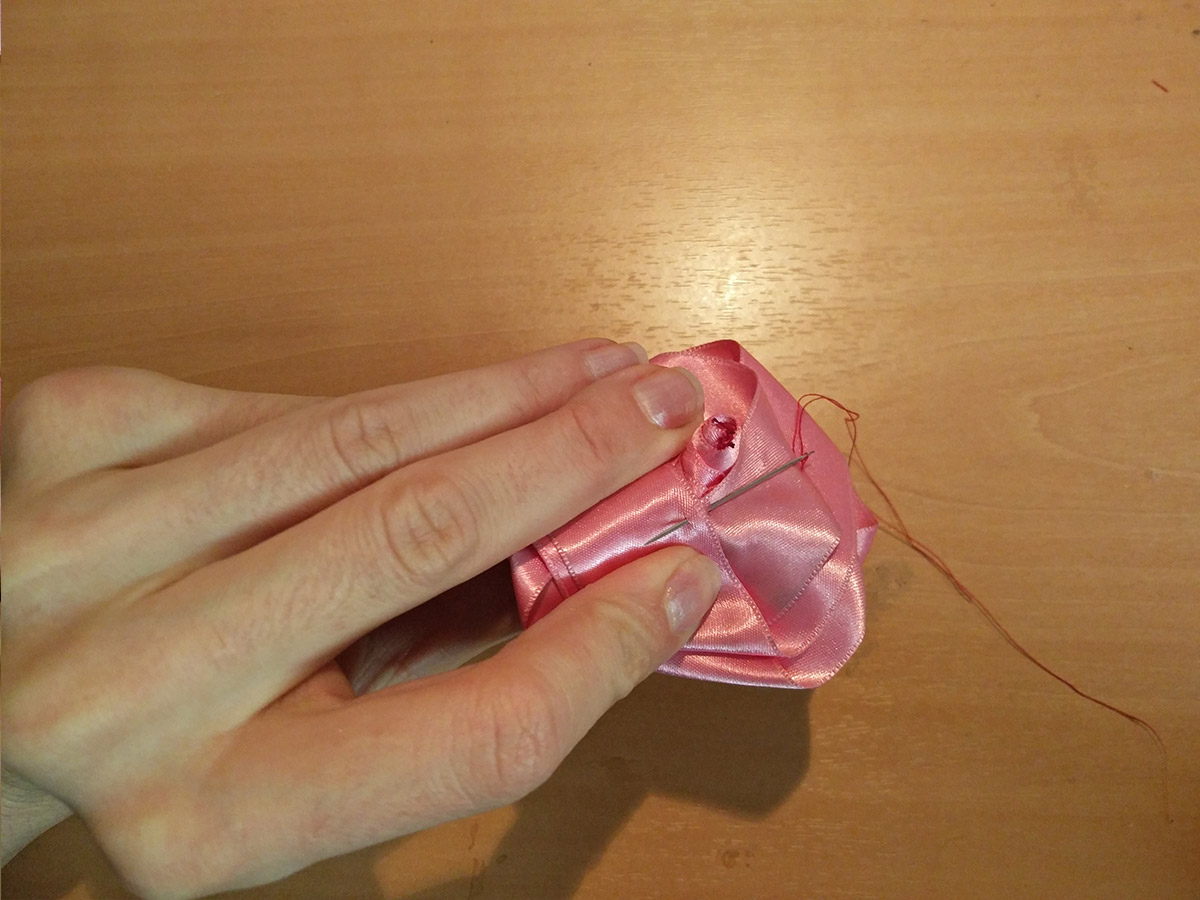
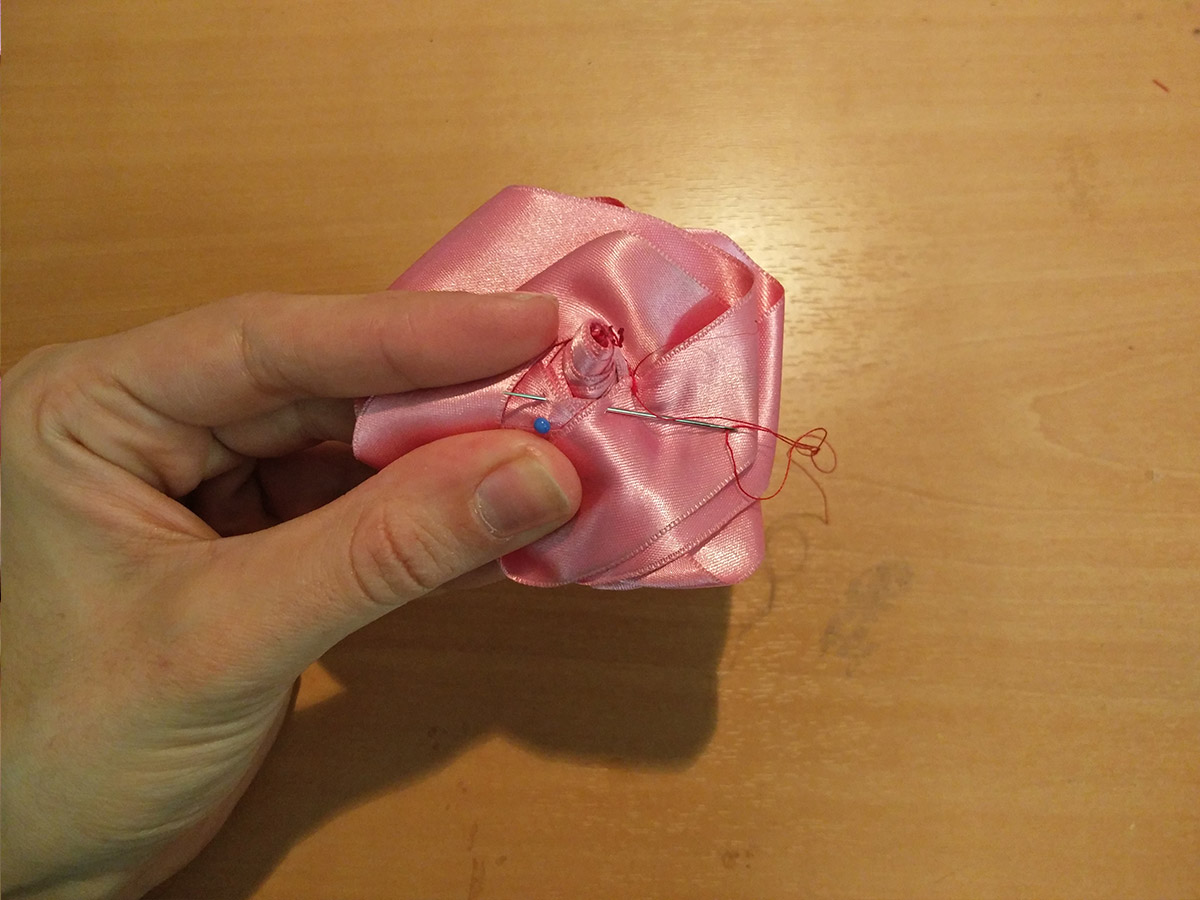
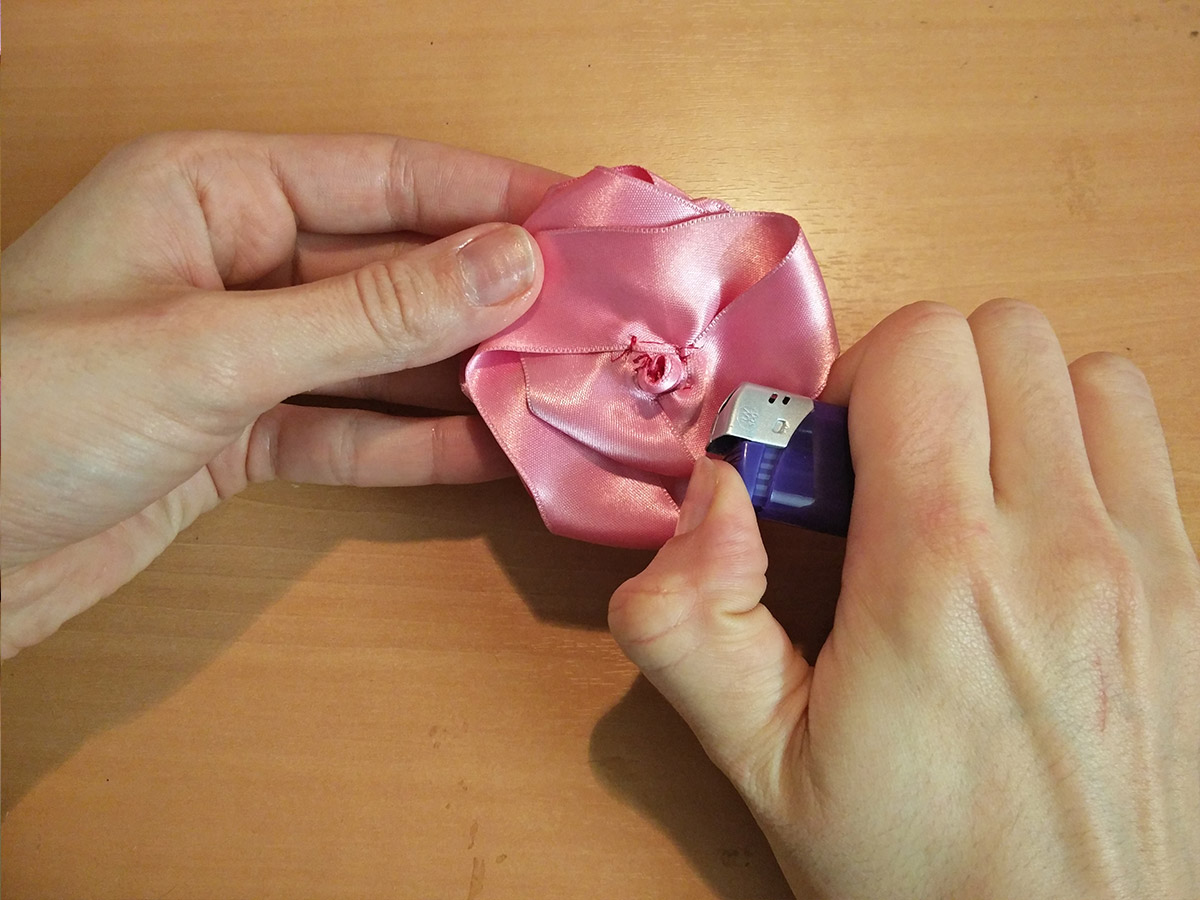
je ne serais trop vous conseillez de fixer régulièrement vos plis au dos de la rose avec du fil pour qu'elle reste bien en place : surtout si la rose est toute petite comme la rouge sinon vous aurez du mal à faire vos plis et tourner votre galon autour du centre sans qu'elle vous "explose" entre les doigts !
Et rien que vous vous une belle vidéo car on comprend toujours mieux quand ça bouge
 "Pin it")
Button placket
simple in 2 methods
Here is a simple tutorial to make a padded arms for your dress form
The boss is right for my arm to say not very big but it's still long enough a standard size!
Do not hesitate to rework the boss to your arm
The arm length is about 63 cm from shoulder to wrist
armhole with approx 50 cm and a 16 cm wrist
Step 1 : the pattern
At first I invite you to download and print the following pattern  .
.
Print the pattern and tape the sheets edge to edge and possibly retrace some contours if like me your printer does not manage funds lost! Finally cut out all elements of the pattern.
Step 2 : cutting
Warning ! The bosses do not take into account the seams then plot the values on your fabric not forget to leave room for cutting!
Choose a non-stretch fabric: cotton is perfect!
Once all your cut items one will be able to move on!
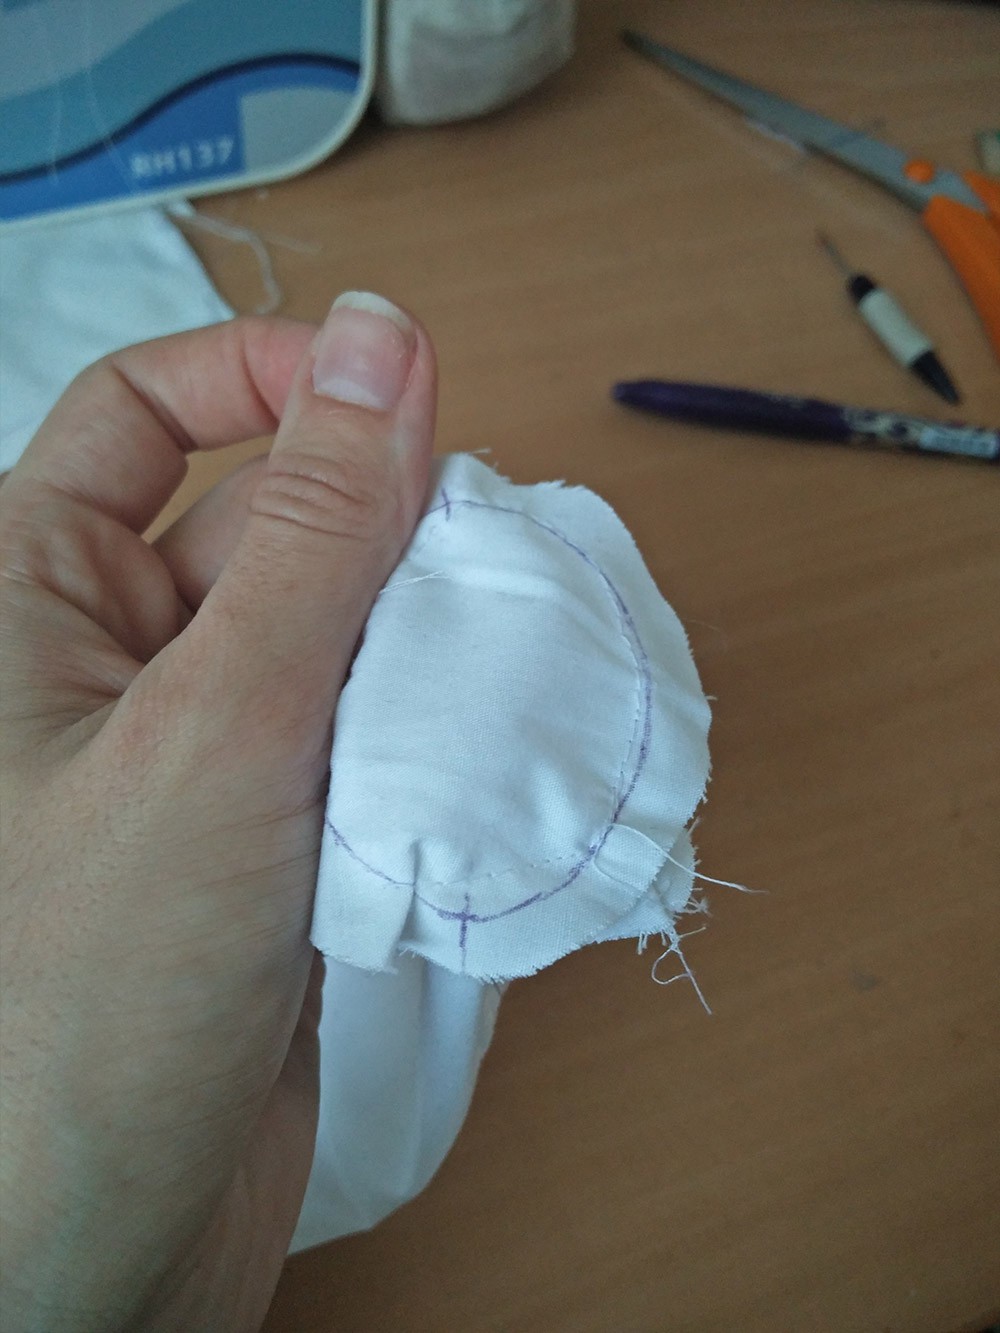
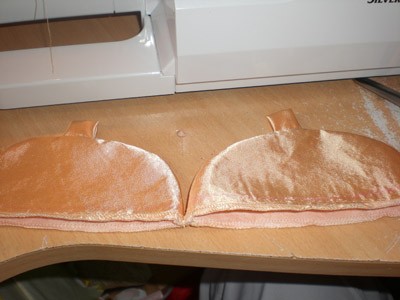
Step 3 : assemblage
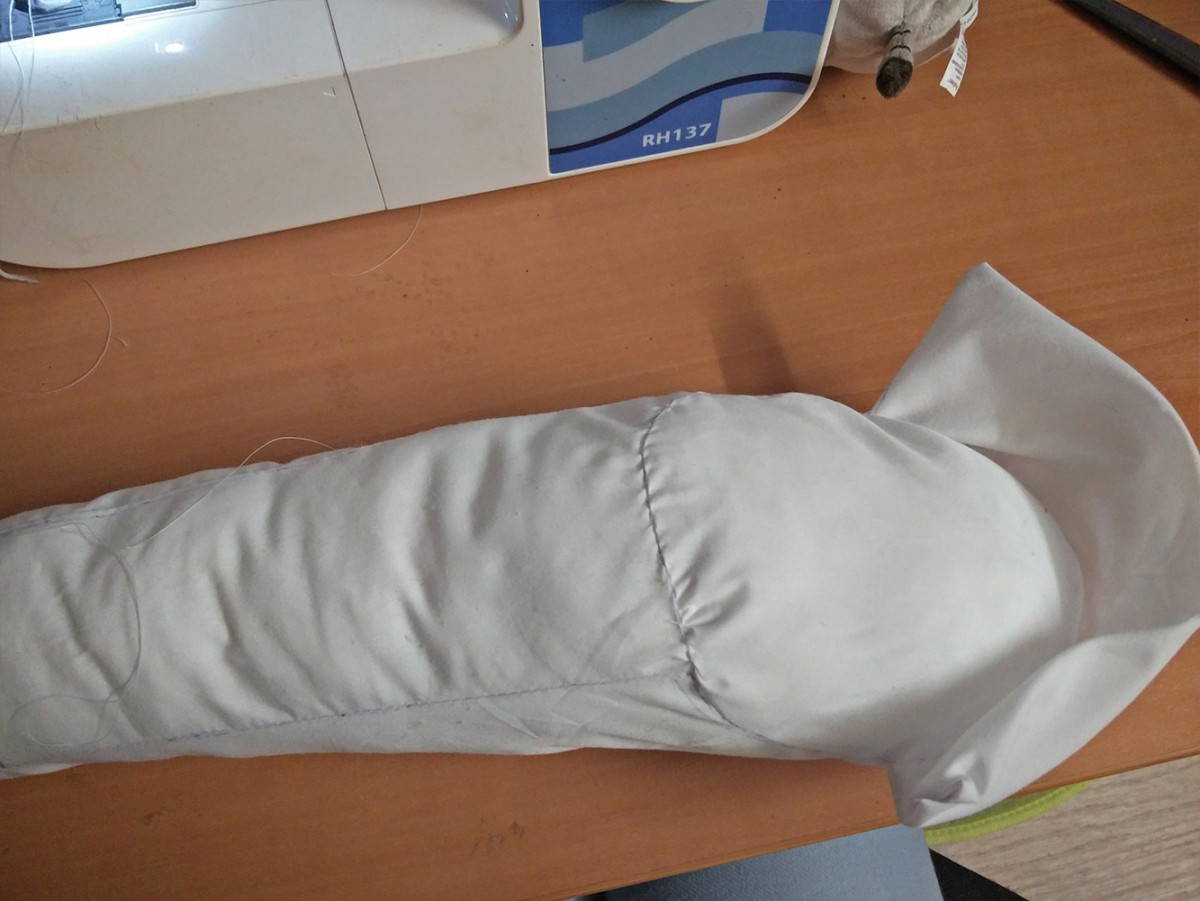
First assemble the top of the arm with the underside of the arm following the indications provided by the registration marks. (face on face of course)
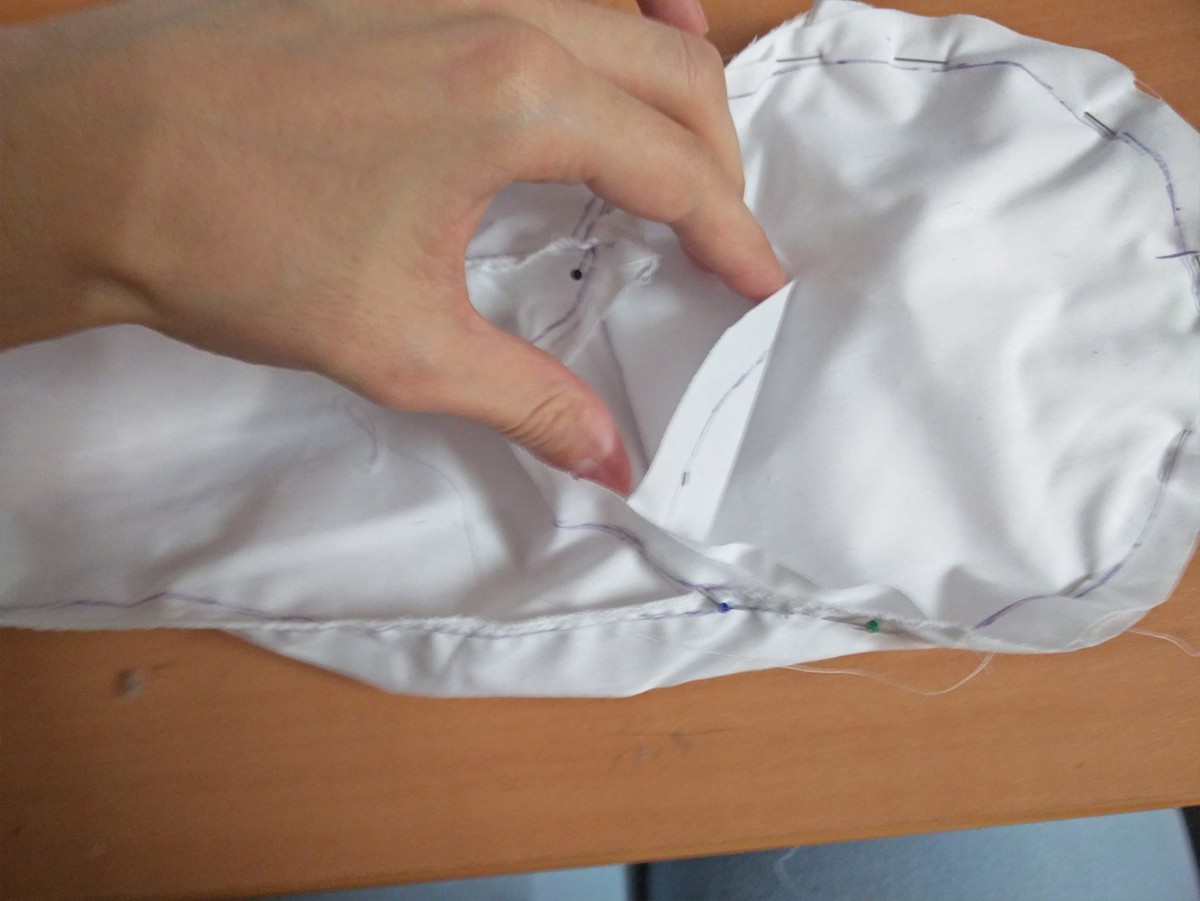
Then pin it to the place of the sleeve starting from the B mark the center and then follow the curve to the right and left of the marker.
Sew along the handle side mark on the reverse: it will be easier to make a nice curve that follows the pattern.
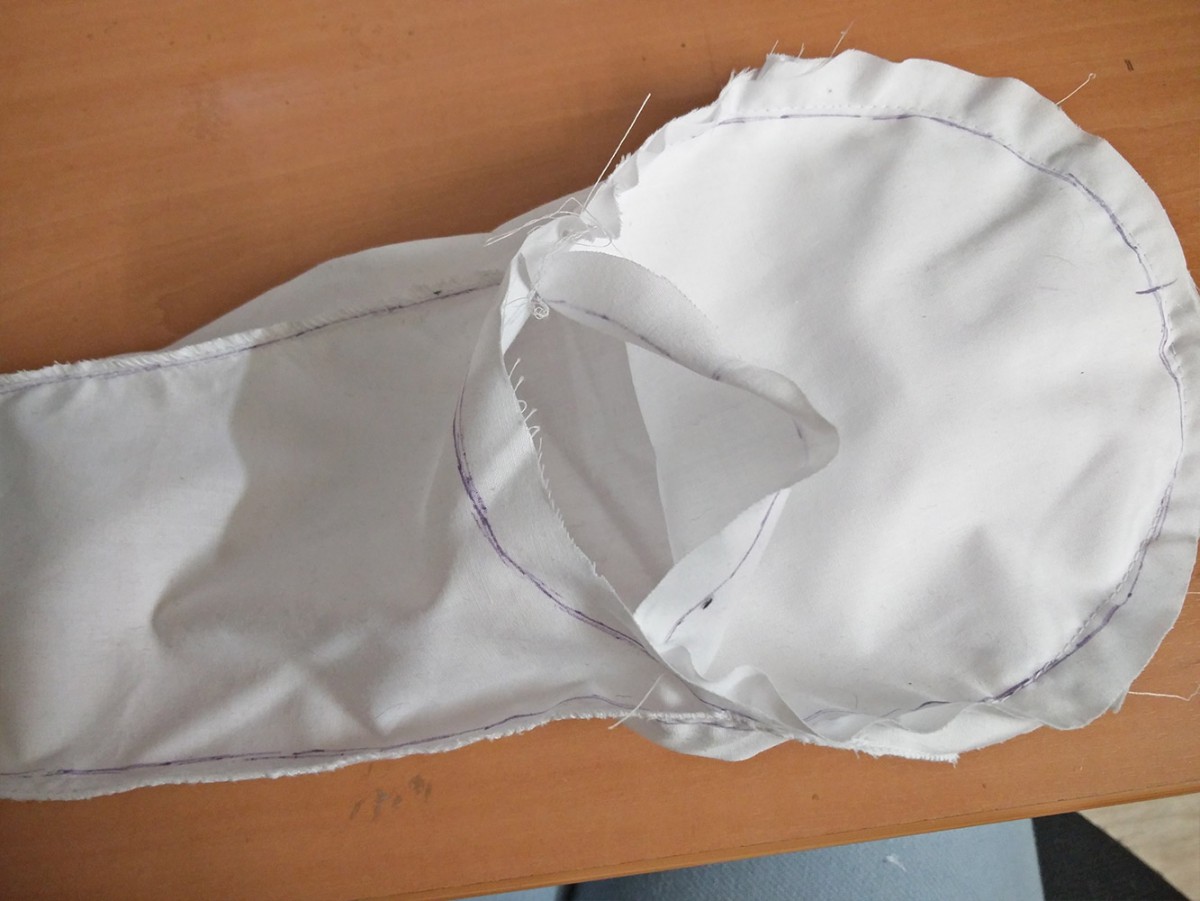
Once this part posed sew the oval at the bottom of the wrist of the arm following the registration marks (rather delicate stitching because the wrist is fine enough: to follow the trais I advise you to make a frames.

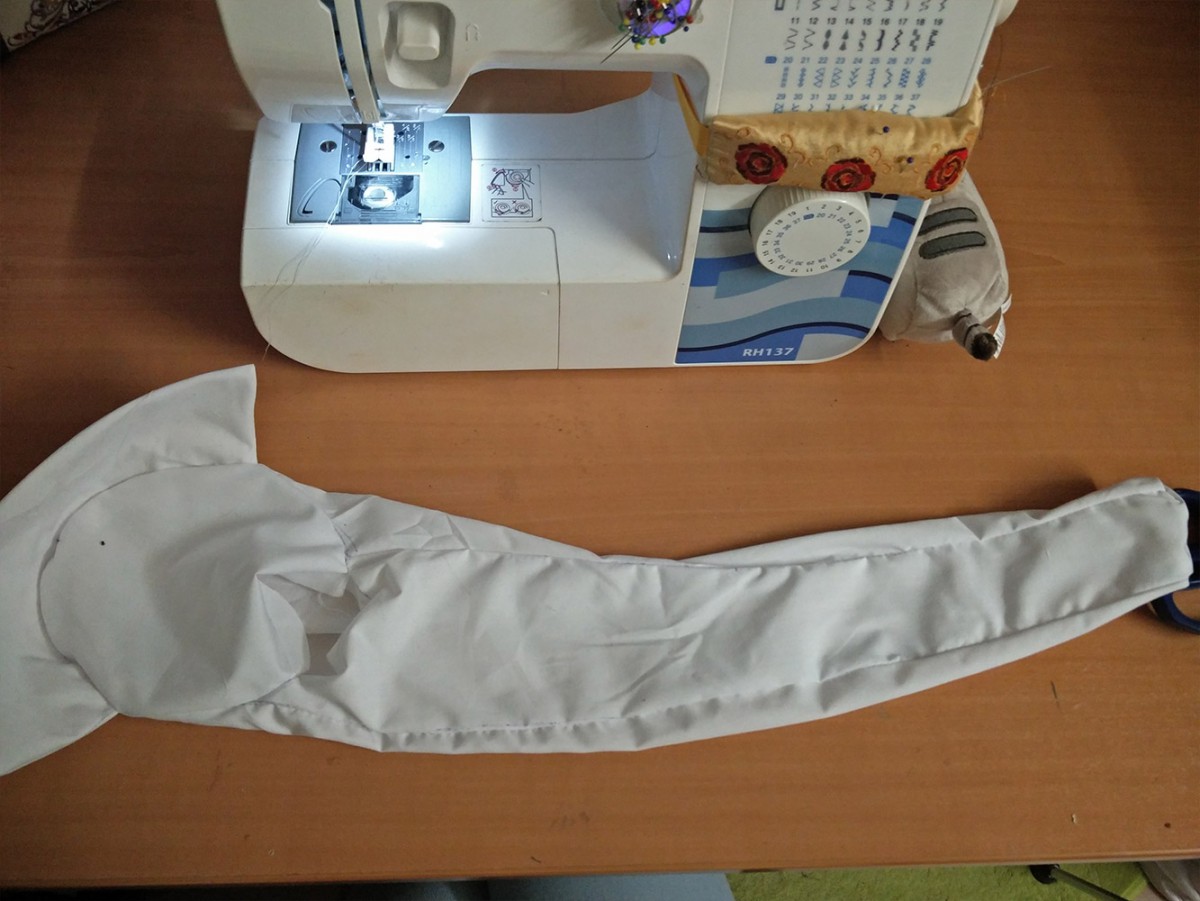
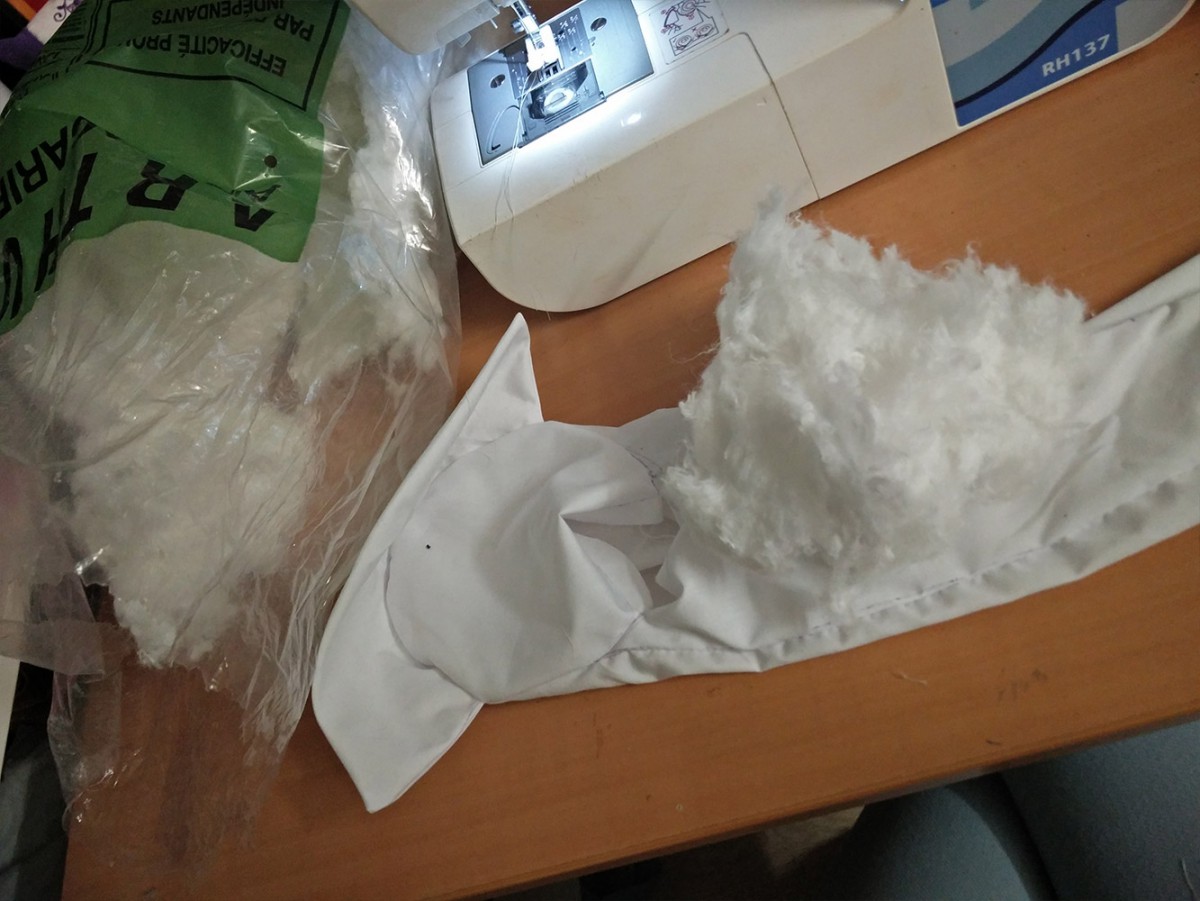
Step 7 : padding
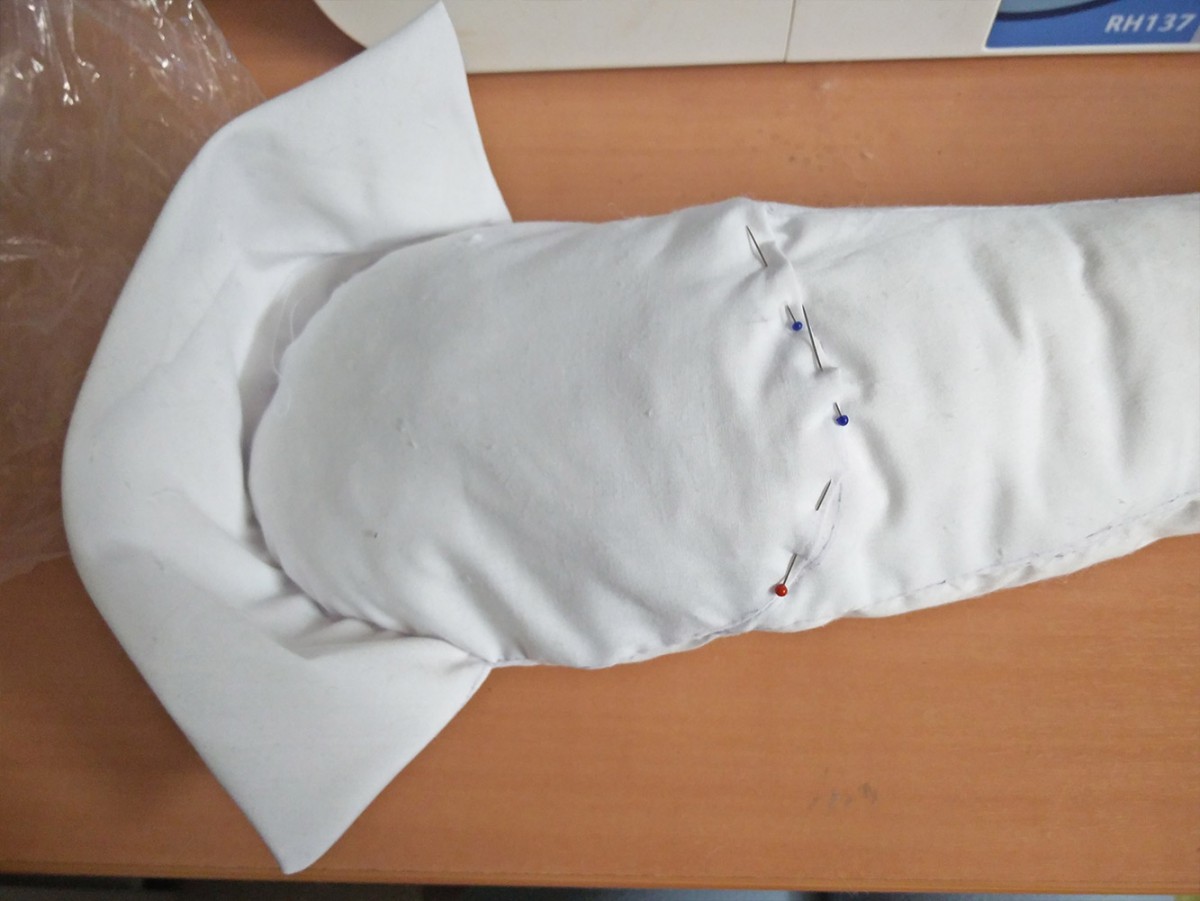
Nothing complicated here! You just have to take the stuffing and fill the hole left armhole!

After closing the arms well filled with small blind stitch.
Conclusion
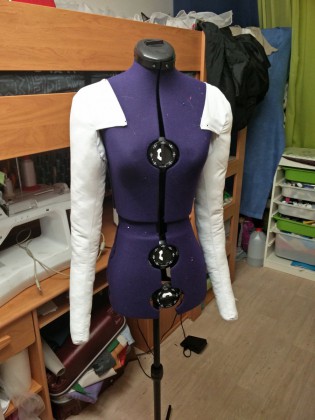
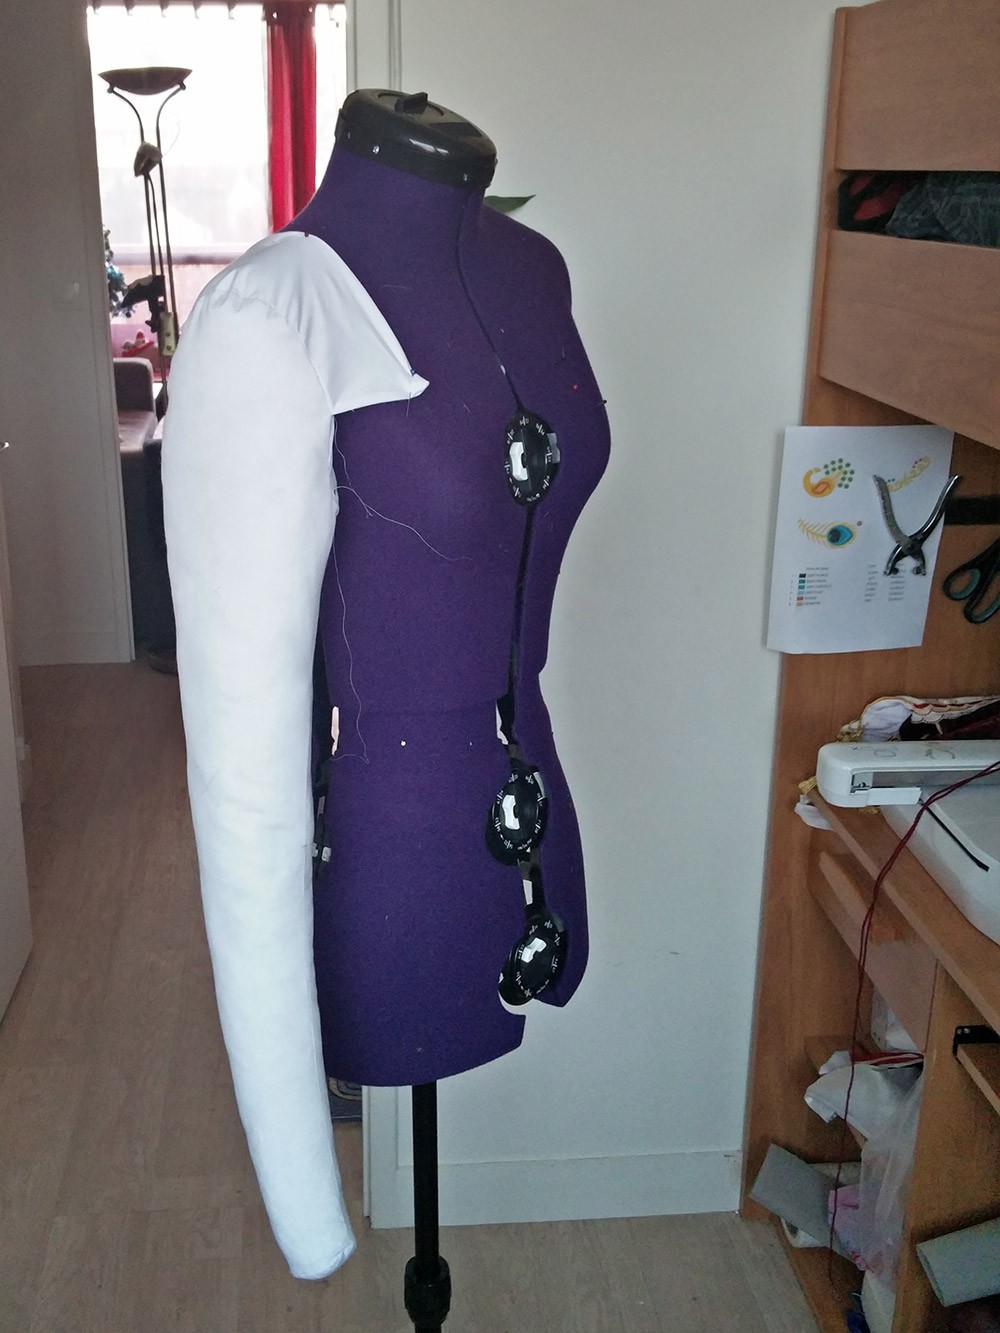
There's your arm is ready! It'll just fix it by simply pinning the shoulder belt to your mannequin.
I've done 2 directly so I am calm
 "Pin it")
Padded arm
for sewing mannequin
Here is a simple tutorial to make a padded arms for your dress form
The boss is right for my arm to say not very big but it's still long enough a standard size!
Do not hesitate to rework the boss to your arm
The arm length is about 63 cm from shoulder to wrist
armhole with approx 50 cm and a 16 cm wrist
Step 1 : the pattern
At first I invite you to download and print the following pattern .
Print the pattern and tape the sheets edge to edge and possibly retrace some contours if like me your printer does not manage funds lost! Finally cut out all elements of the pattern.
Step 2 : cutting
Warning ! The bosses do not take into account the seams then plot the values on your fabric not forget to leave room for cutting!
Choose a non-stretch fabric: cotton is perfect!
Once all your cut items one will be able to move on!
Step 3 : assemblage
First assemble the top of the arm with the underside of the arm following the indications provided by the registration marks. (face on face of course)

Then pin it to the place of the sleeve starting from the B mark the center and then follow the curve to the right and left of the marker.
Sew along the handle side mark on the reverse: it will be easier to make a nice curve that follows the pattern.

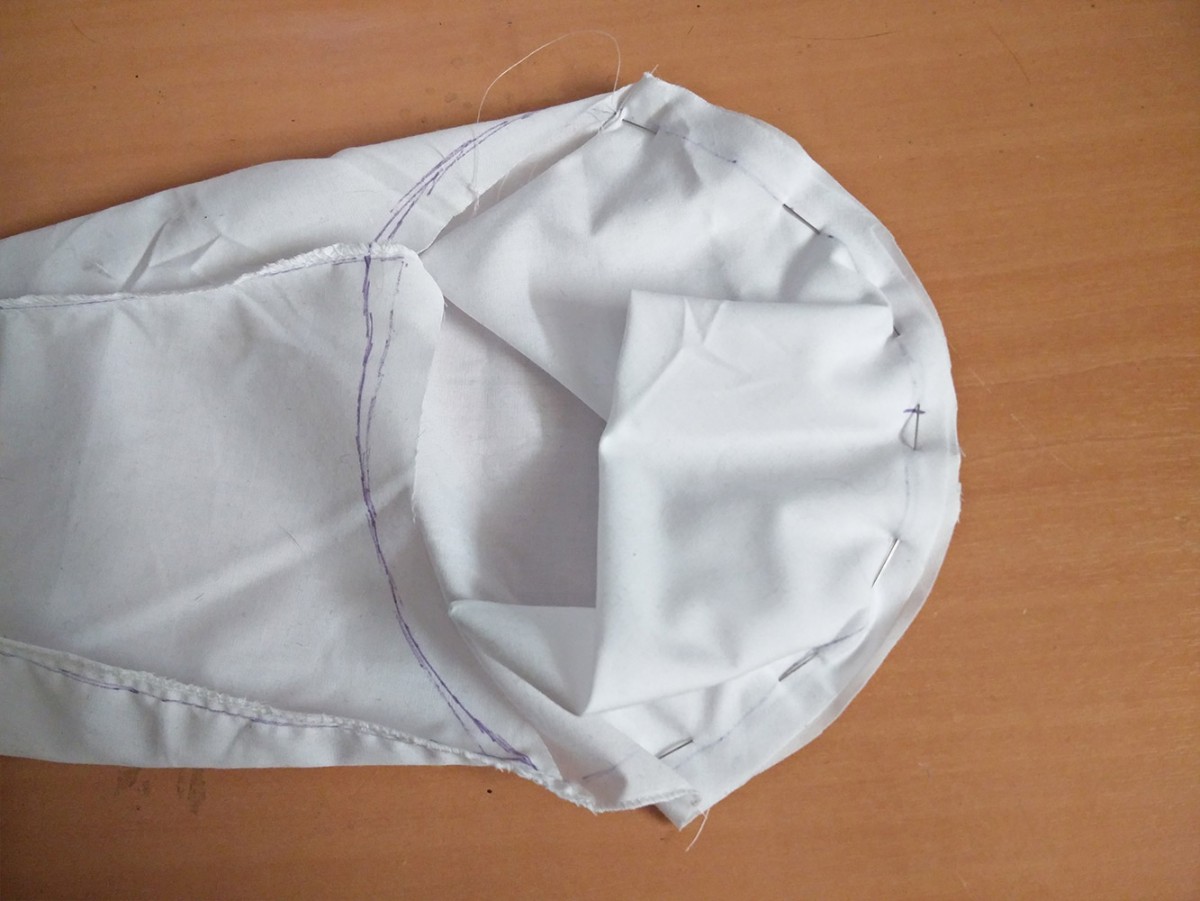

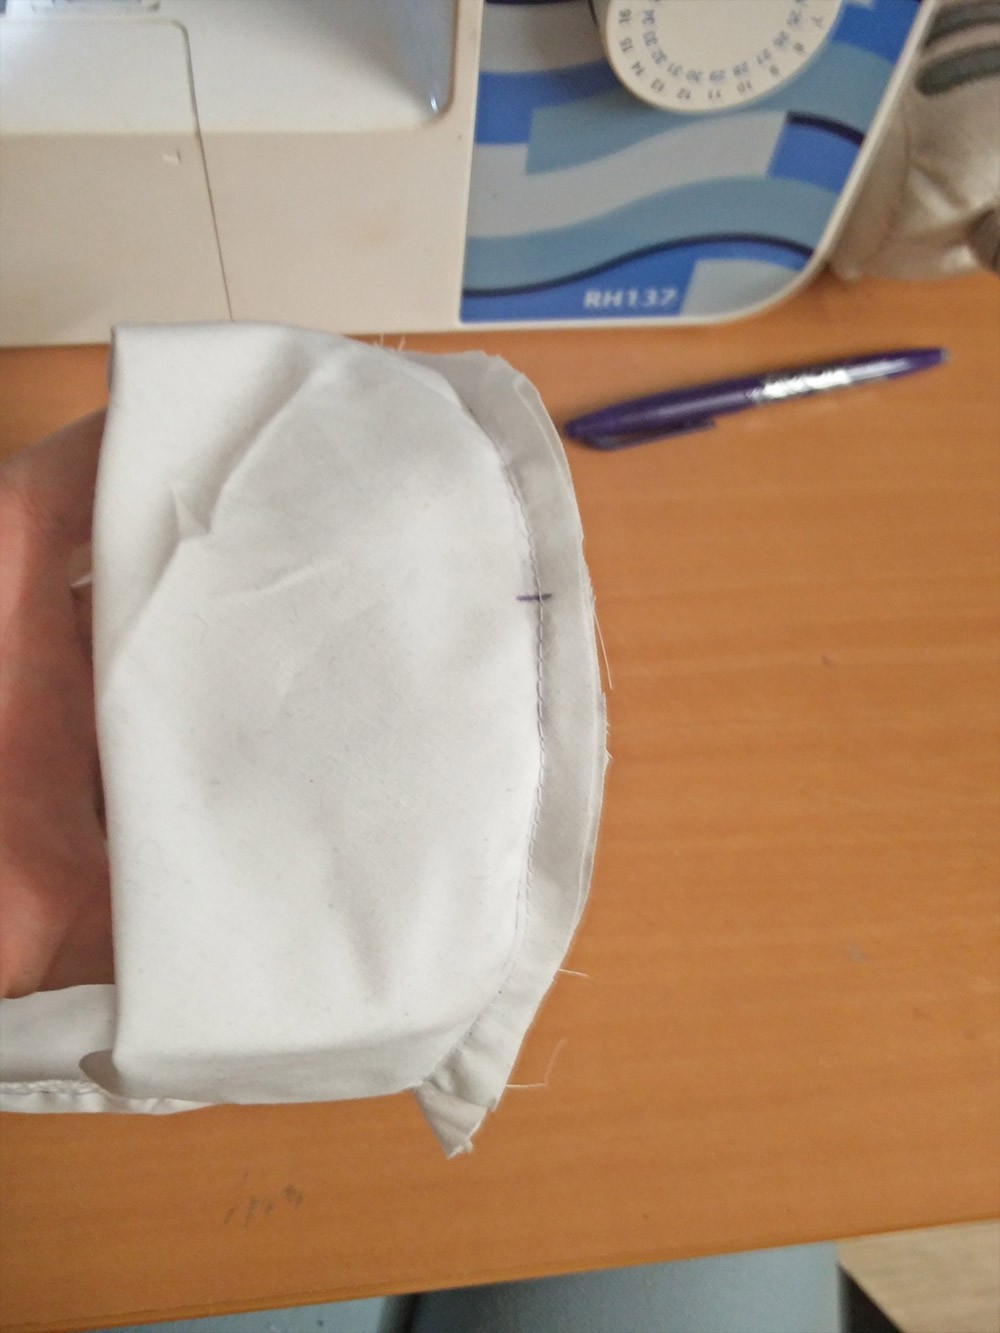
Once this part posed sew the oval at the bottom of the wrist of the arm following the registration marks (rather delicate stitching because the wrist is fine enough: to follow the trais I advise you to make a frames.

Step 7 : padding
Nothing complicated here! You just have to take the stuffing and fill the hole left armhole!

After closing the arms well filled with small blind stitch.
Conclusion
There's your arm is ready! It'll just fix it by simply pinning the shoulder belt to your mannequin.
I've done 2 directly so I am calm

 "Pin it")
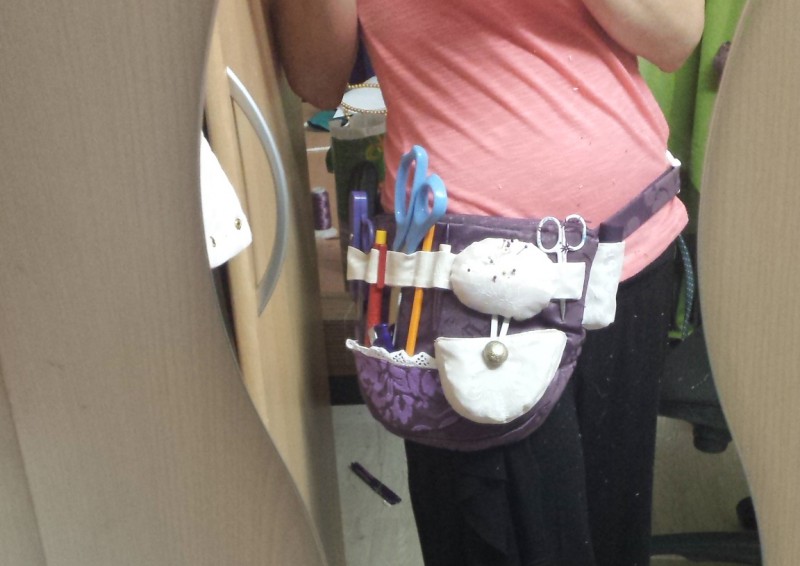
Range saddlebag tools
with belt
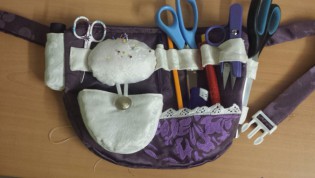
Here's how to easily create a belt saddlebag for your sewing tools! To always have everything on hand!
I relied on my own tools, depending on my needs so this is an example!
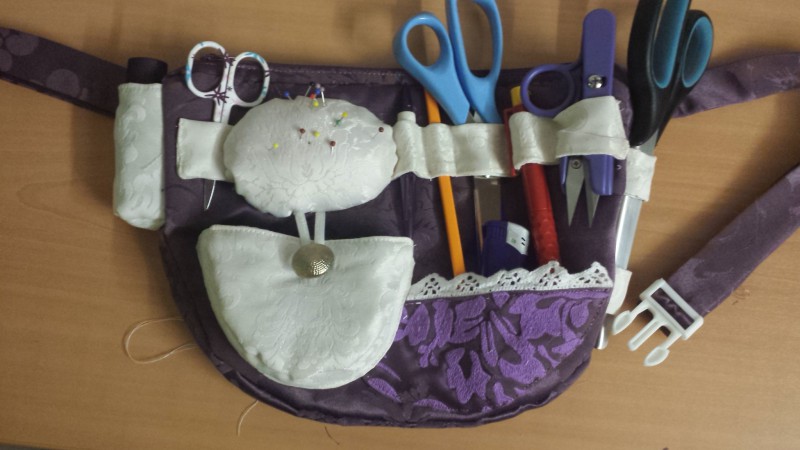
But I can store in the surface: small scissors, a seam ripper, a pencil, a pencil holder chalk sewing, large scissors, wire cutters, to a tape, a lighter and I added more (this is not detailed in the tutorial) what to put my hands and my box pinking scissors.
There is also an inside pocket for other tools such as wheels and carbon sheets for the postponement patterns on the fabric! But you can put whatever you want in it!
With that I mainly for my sewing around my waist! And it will prevent me from losing and searching all my tools that I tend to ask my side when I need!
Step 1 : the pattern
At first I invite you to download and print the following pattern , which will serve as a basis for your saddlebag ! This is an example! After you change the size of pockets that fit your own tools! Obviously I am based on my own!
Print the pattern, tape the two sheets side by side and possibly retrace some contours if like me your printer does not support bleeds! Finally cut all the elements of the pattern.
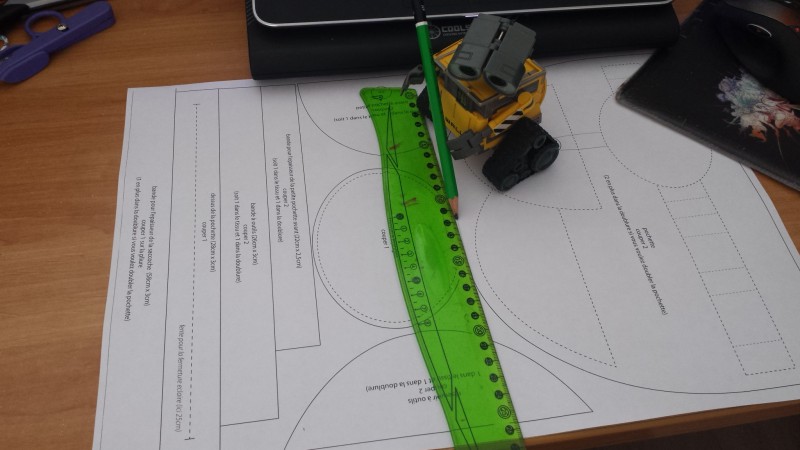
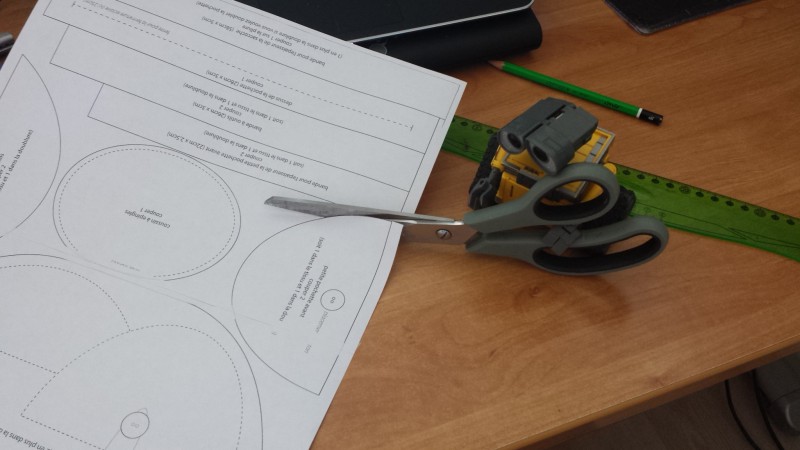
Step 2 : cutting
Watch out! The bosses do not take into account the values of the seams so draw on your fabric do not forget to leave room for cutting!

Choose a fairly stiff fabric for added support! You can also fusing required!
Once all your elements are cut will be able to pass on! Beginning with a face of your wallet so that you can sew all over without worry.
Tip: I would strongly advise you to also double large pocket especially if you do not have a serger!
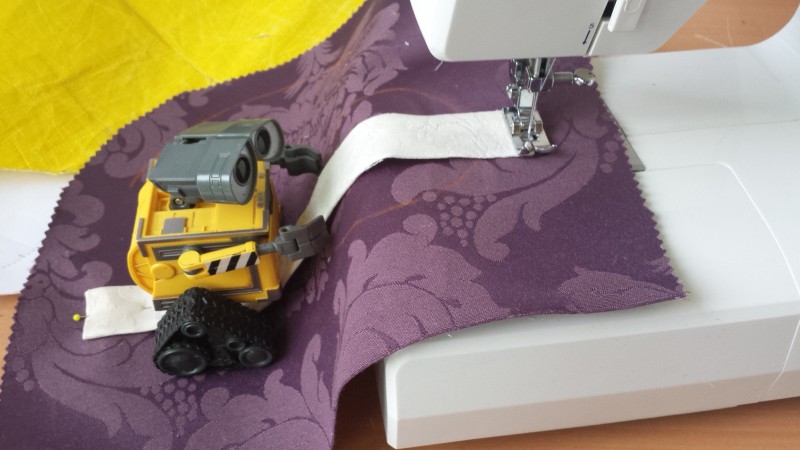
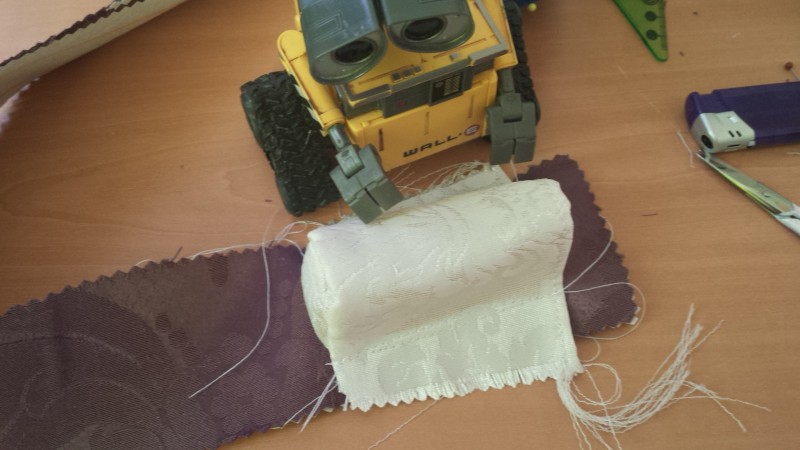
Step 3 : the toolholder
Simple step! Made a seam place against place your two parties; I have doubled with the same fabric so I cut a wider I just had to fold on itself and make a seam tape 2 times.
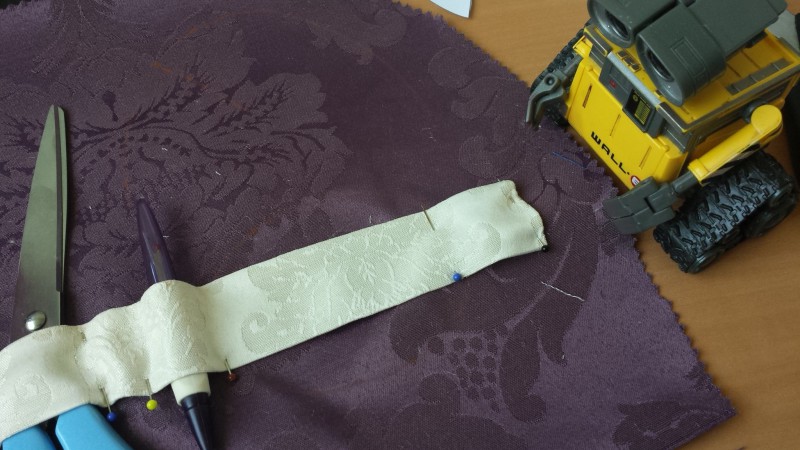
Return your band and do go beyond the ends by folding on the inside!
Made a first seam on the right side of the tape on the saddlebag end (referring to the patron for the placement of the tape).
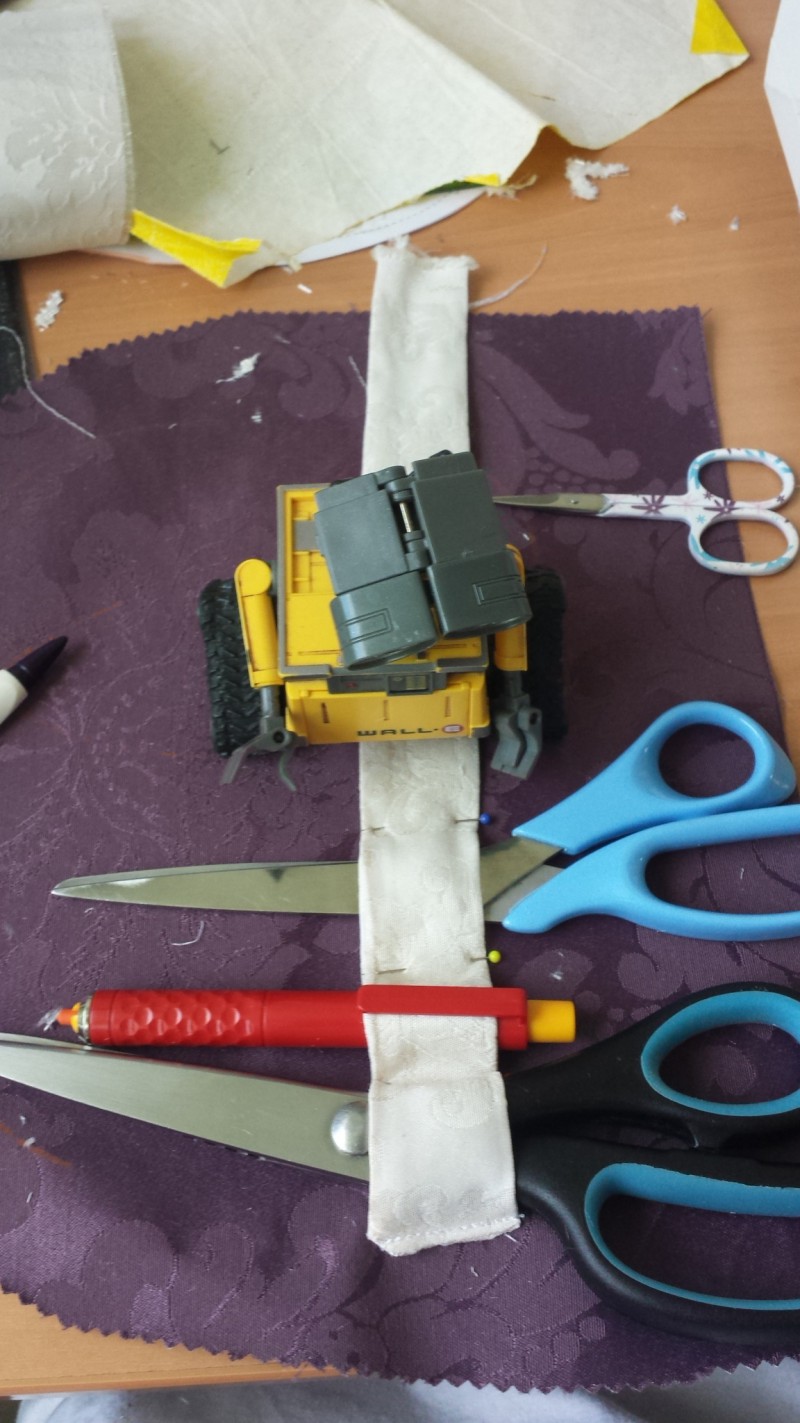
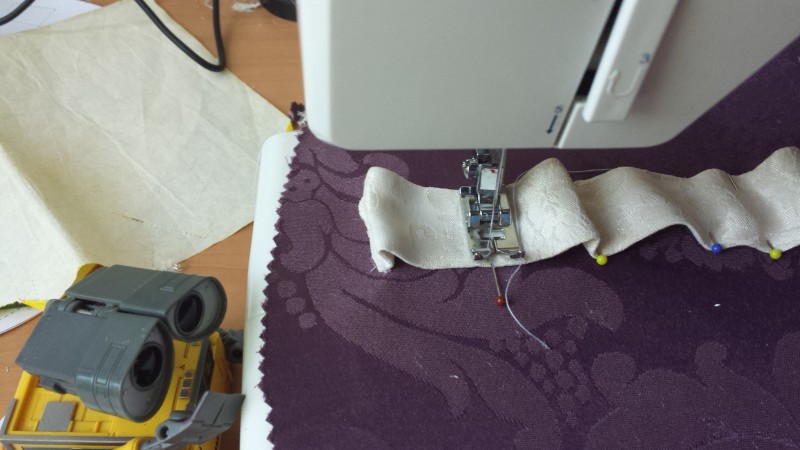
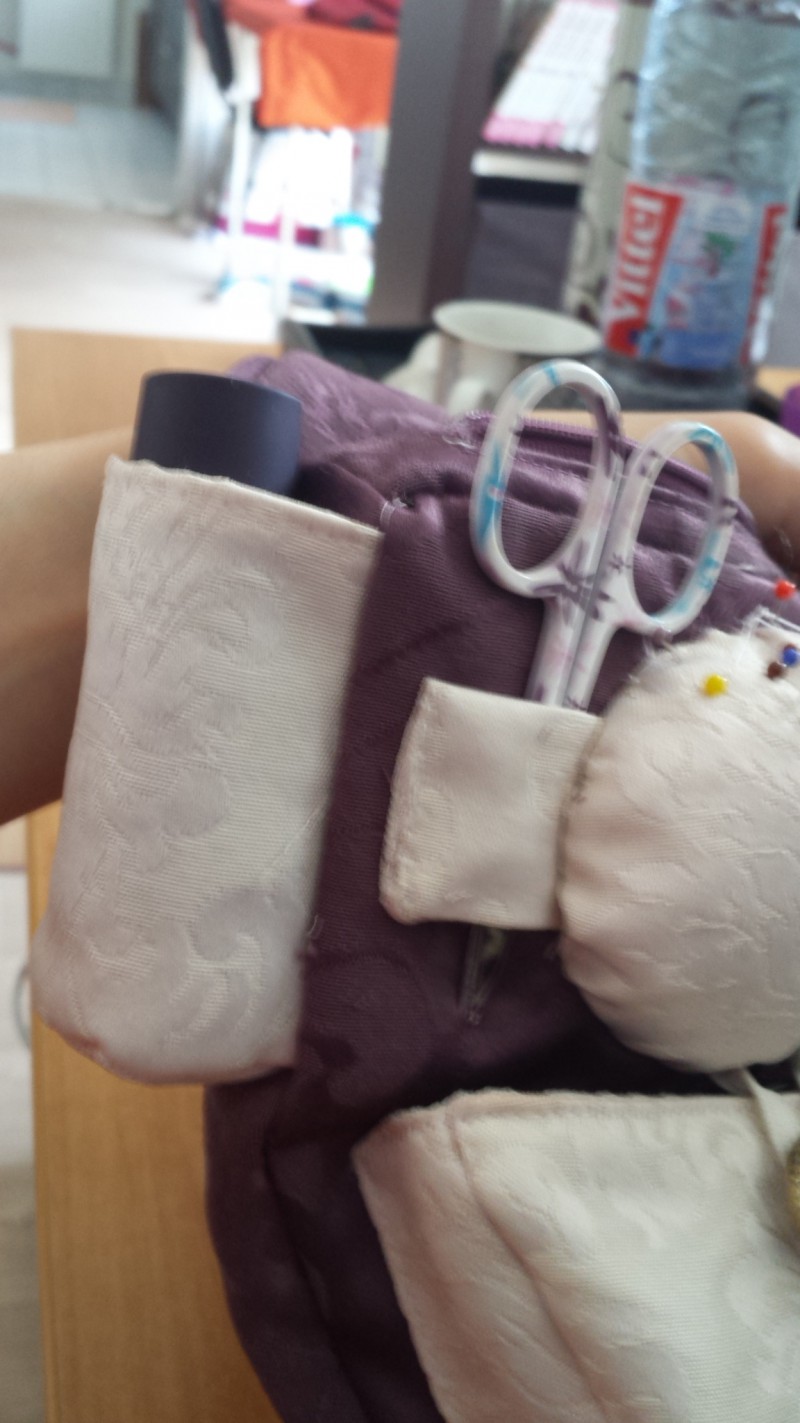
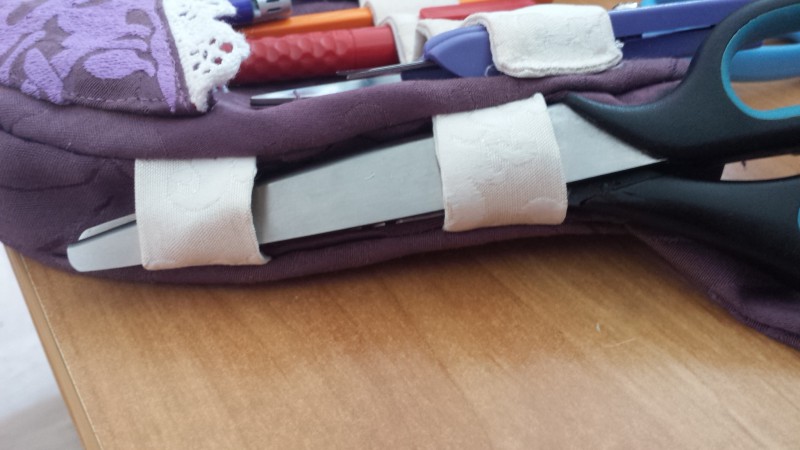
Then take your tools that you want to hang in this band: place them by passing the web over and secure with pins between each tool! This is very important because if you do that seams leaving your flat band you can not put your tools in!
Once you arrive on the other side (thinking that we will secure the cushion on the left so no need for passers under the cushion!) Cut your tape if it is too long (which is why the tape should be longer than 26cm because you always lose a few cm with passers!).
Fold the ends on the inside and made your last stitch to close the tape and make a final passing tool!

Tip: You can also not bother taking in the inside edges of the strip, make your strip from the edge of the saddlebag (leaving a little room beyond) and thus take the surplus Band sewing will close the big saddlebag ! I thought about it when I closed the saddlebag saying: it would have been nice like that!
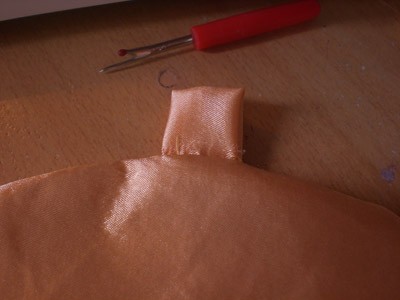
Step 4 : small saddlebags
Here we have two types of small saddlebag : one flat and one with one side to allow to thick objects such as put tape measure !
The flat saddlebag
Very simple: right sides (fabric / lining) made the sewing rounded. Turn your saddlebag and close the top with stitching. You still have to put it on the face of the big saddlebag following the pattern and make a seam across the rounded part.


The Chubby saddlebag
Here is a little longer!
Initially made on a strip of 22cm (2.5cm or 5cm if you double the same fabric) place place against place (or bend over backwards) and made your three seams: one on the length and 2 of sides (two sides if one doubles with the same).

Return your band and place it between your two parts of the small saddlebag (fabric and lining).
Make your stitching then flip your saddlebag. Close up with a stitching! Here you can put your saddlebag on the side of the big saddlebag following the pattern and sewing along the edge!

Tip: the iron and your friend! Feel free to use it to board edges and strips so that they are well flat!
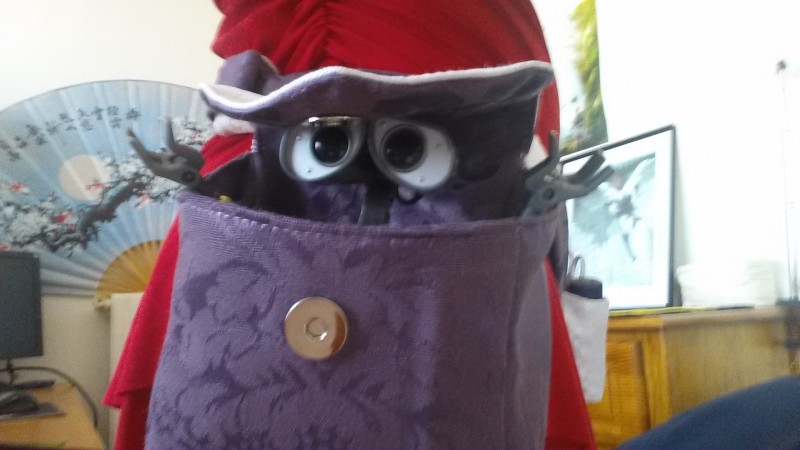
You can add the button to close the saddlebag (this is an option ... I'm a put but you see!) Avoid flat buttons! As it is to get an elastic from behind!
The elastic: you must fix so that the ends are under the pillow! For its length: simply attach one side, then thread the elastic around the button and attach the other side!

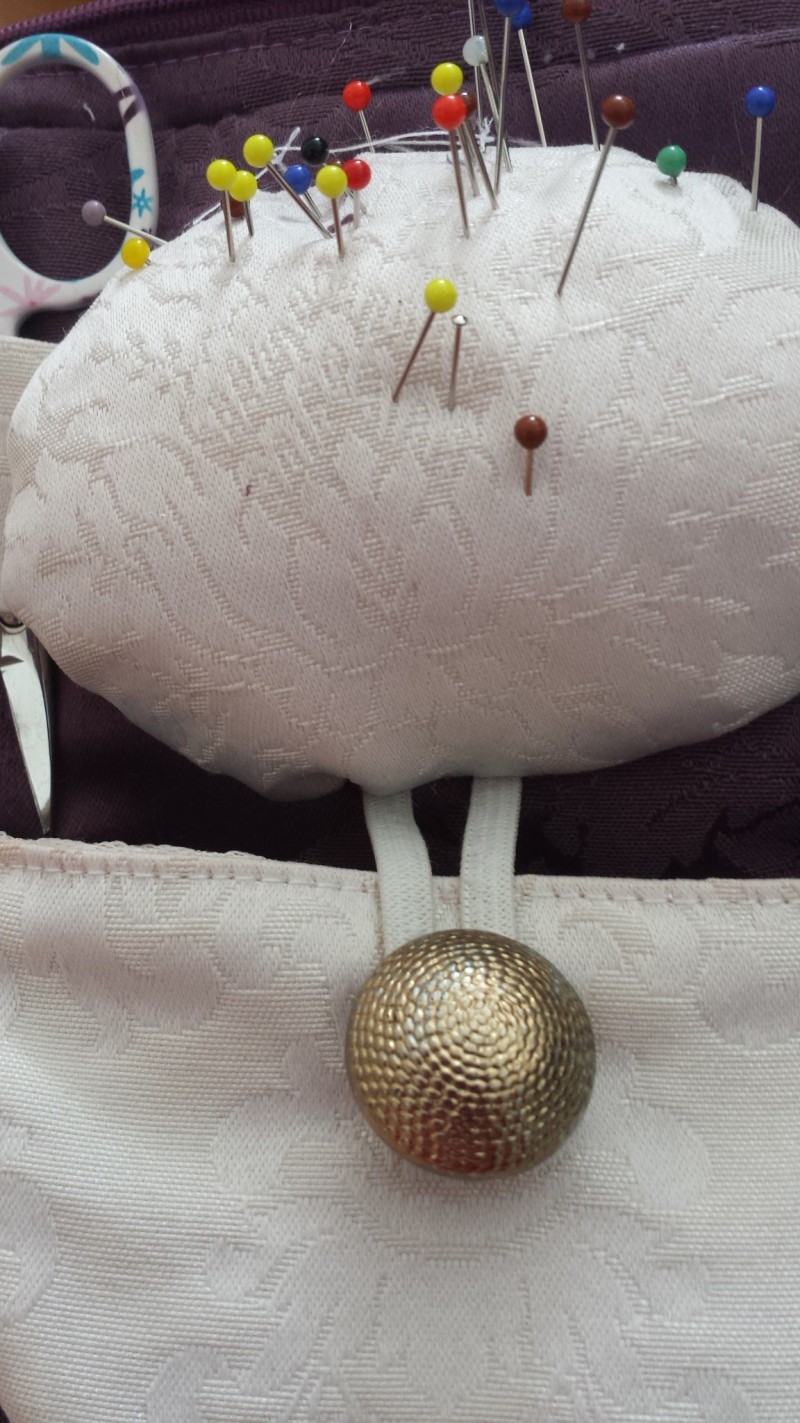
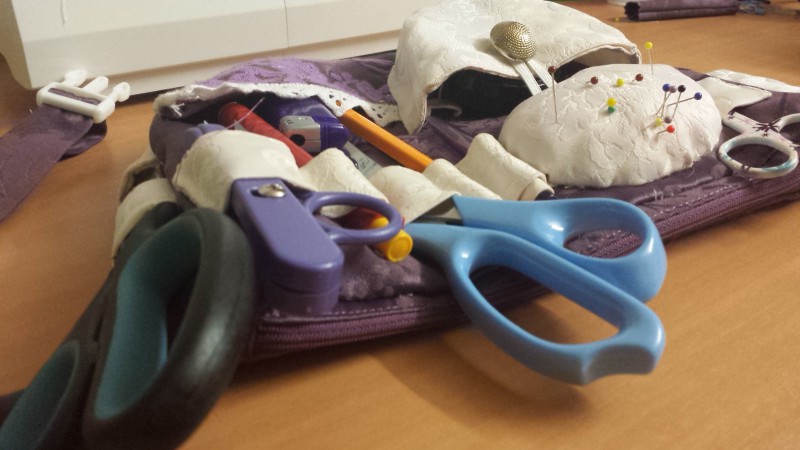
Step 5 : the pin cushion
Step quite painful as it is to the hand sewing in invisible item!
Cut your cushion and have a thread gathers all around! (Do it by hand or machine not matter!).
Gather a little then start placing your saddlebag on the front of the case following the pattern: it is normal that the oval of the face is smaller than the cushion: it is to give volume, which yarn knits!
Make your hand stitching all around the edges by folding on the inside.
When you reach the end stuff your cushion with fabric scraps (fleece if you ... but scraps of fabric for free and plus it rids ^ ^).
Then finish your seam to completely close the cushion.


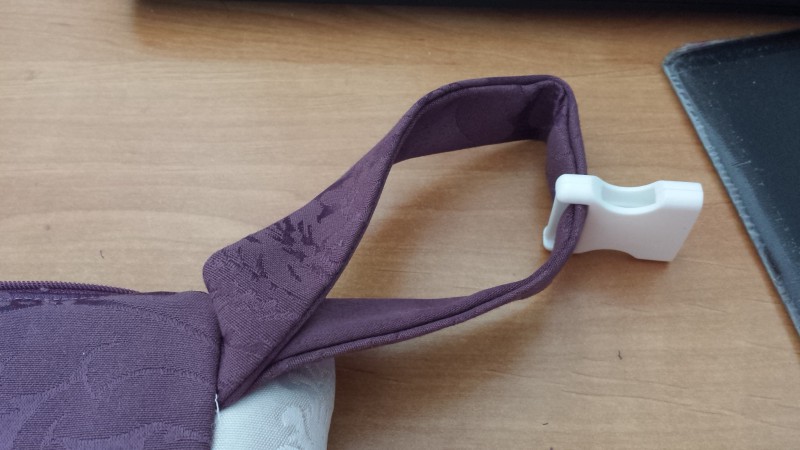
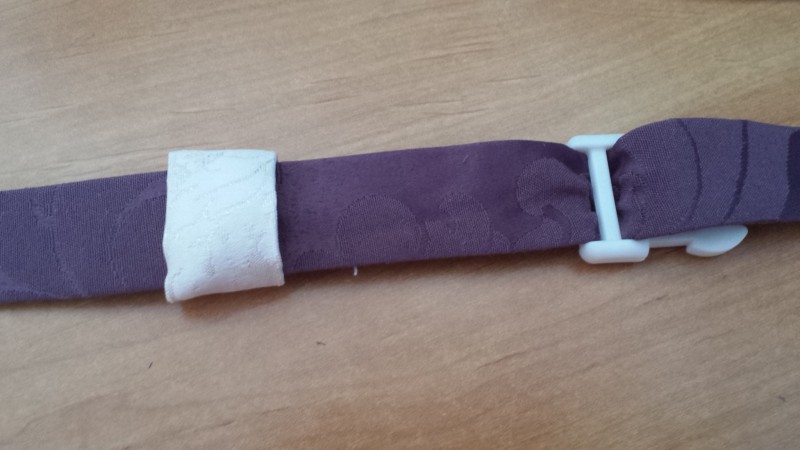
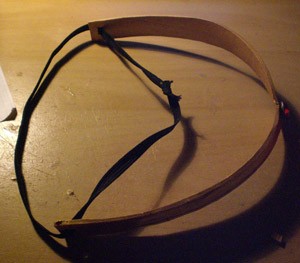
Step 6 : belt
To close your belt I suggest you take a binder clip as close to 2 gallons and with a node that is not practical! Especially with the weight of your saddlebag knot will tighten and you will struggle to open!
You can also do with a belt loop or loops provide a belt that you have in stock on the back of your saddlebag ! If you choose the last option do not forget to sew on the back before making your seams to attach the front to the back!
Here I will detail how to deal with a binder clip:
Cut 2 strips of fabric 2 times the width of your attachment to the length it depends on your body: the first at a fairly fixed size say 30cm (15cm useful because we're going to fold 2). For another, it is necessary that you can close your belt: I mine is 64cm (42cm to the clip: the rest is to be set according to where I want to put if I ... if I magnified lost weight ... if I ready. including short you will see wide ^ ^).
Make like other bands: place / location and returns!
For that which is 30cm or you will place the fixed part of the clip (which is hollow) you do not need to return your fabric to make beautiful borders as they will be taking in the seams of the saddlebag . Made just pass the hollow side of the clip in the band (do not forget to do this before sewing otherwise it is useless!).
For the other it will make a nice finish on one side (on the other caught in the seam of the saddlebag ).
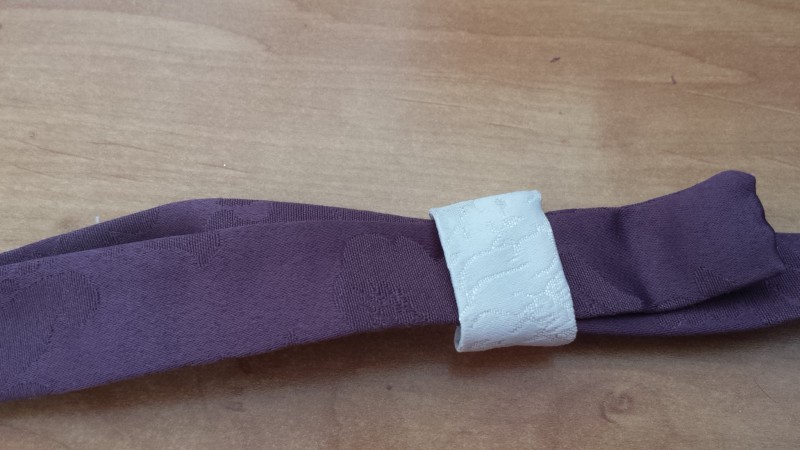
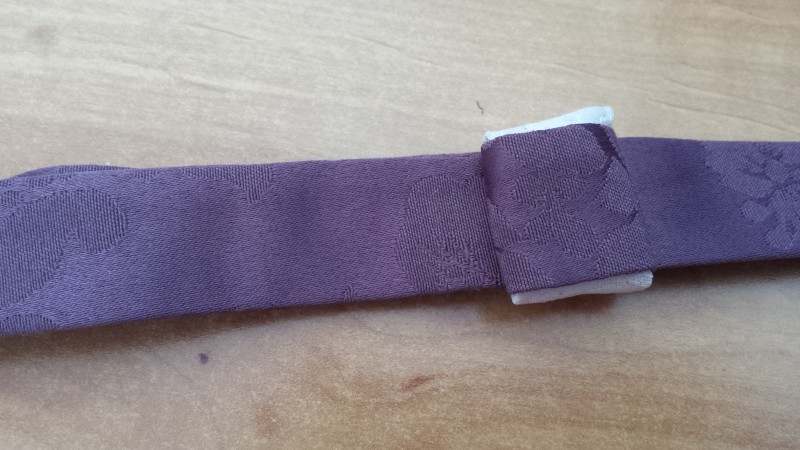
Planning a small loop for your extra strip on the side of the clip that fits in the fixed part.
Once your two belt portions ready we will be able to take the final step.

Step 7 : the big saddlebag
One key at the end! It'll just sew the edge of 3cm between the face and the back of your big saddlebag ! Do not forget to place your two pieces of belt between the edge and the back of your saddlebag ! (if of course you have opted for the solution described in step 6).
On the top we will place a zip! History of having a compartment that closes well.
Make an opening on the length of the upper part and then sew your zipper.
Once the closing set you just have to sew your top part of the saddlebag : Always place / location starting with a short side and encircling! Take it slow! Take your time it's pretty boring it must be accurate! And do not hesitate to pinking your fabric on the corners for more flexibility! If you want to double your big saddlebag (I board) must be repeated a whole big saddlebag with your liner and place it inside then set by hand with invisible dots all over the outline on the fabric rabantant inside.
You do not need to double the upper part or is the zipper!
I have even added a pocket on the model of flat pouch higher, cost free to let your imagination! And see especially useful!
Tip: If you do not want to saddlebag inside you just need to sew location / place your face and forget to go back without the pieces of the belt between the two on the top. Back and close surpiquant in the upper part and it's done ! You'll just have a tool holder in saddlebag inside! Which can be ample!
Conclusion
Here's your saddlebag is ready! I hope you find it useful!
Of course this is an example of a shape and size! You can make it smaller, bigger, with more storage: but do not see too much otherwise it will hinder you!
For example, I've added a small pocket on the side to store my box and needle loops on the back side to get another pair of scissors! You are free to add or remove options at this saddlebag remains an example ^ ^
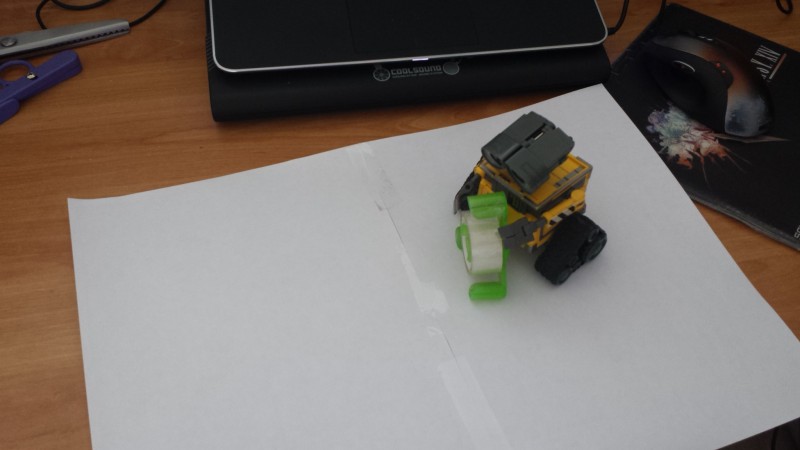
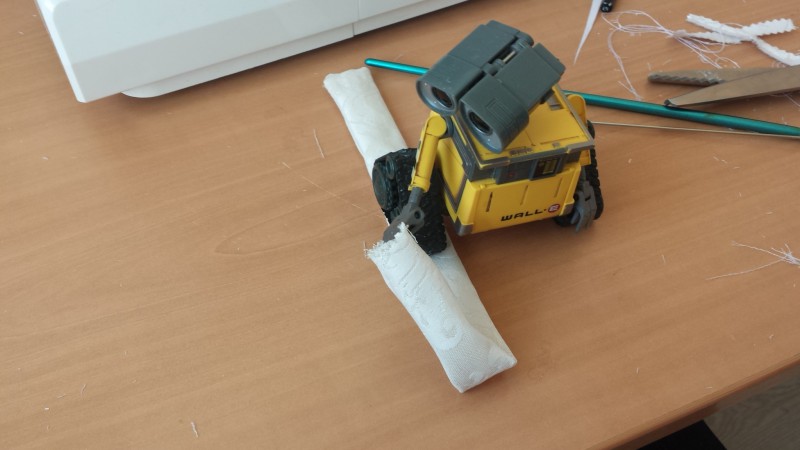
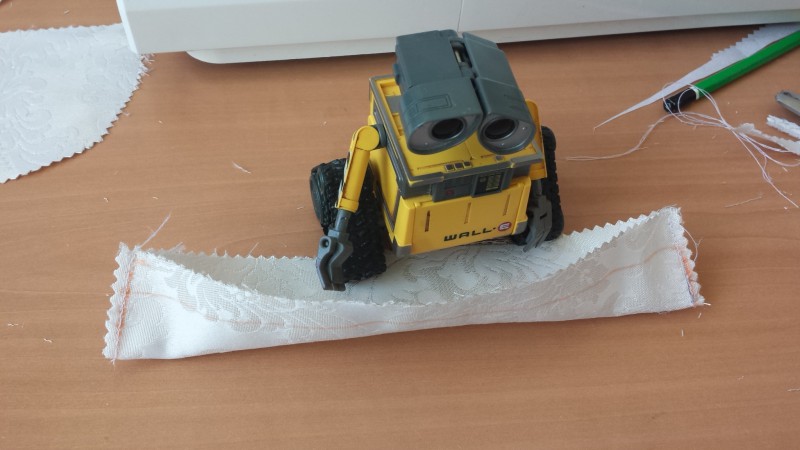
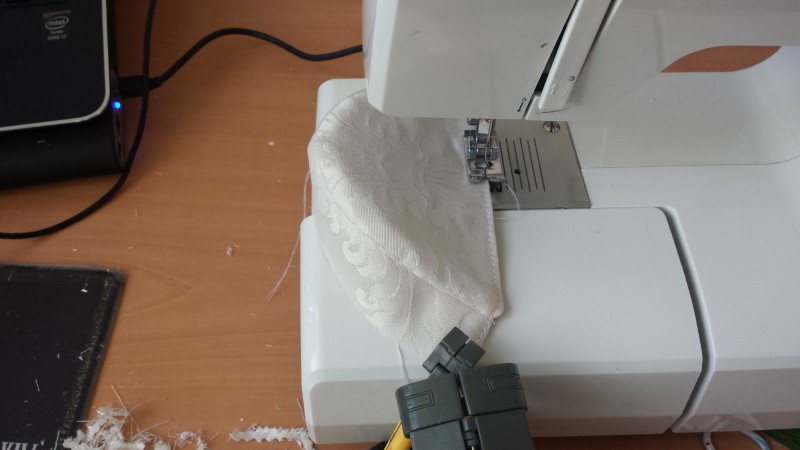
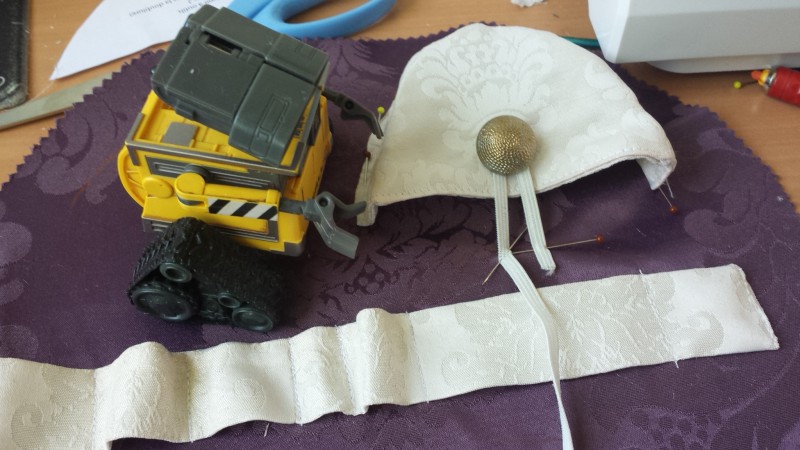
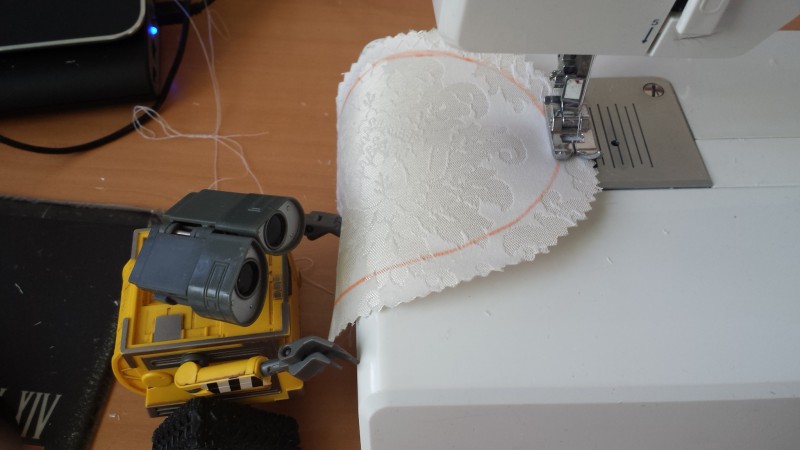
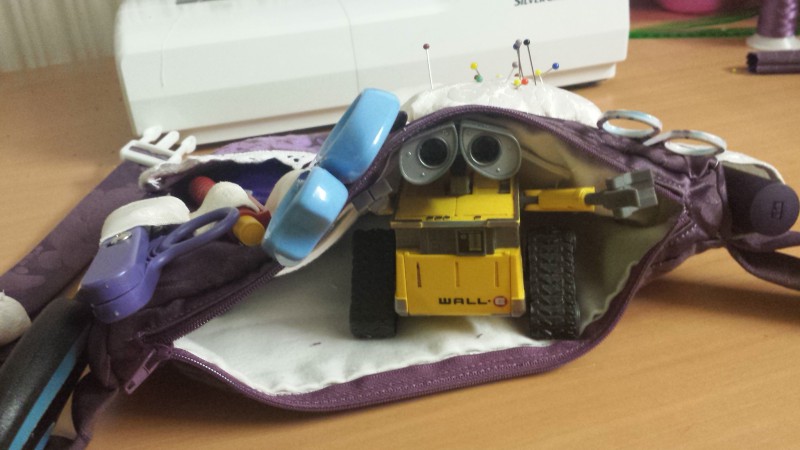
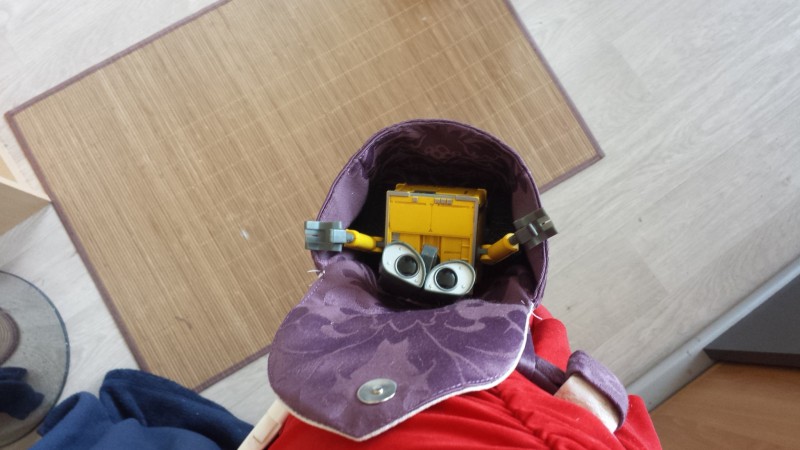
I even made a small pouch on the other side more for Wall-E

 "Pin it")
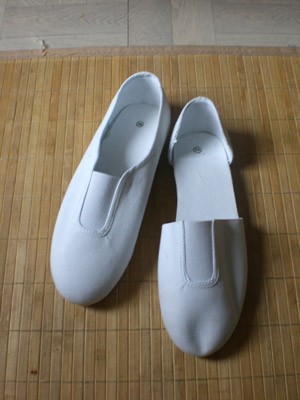
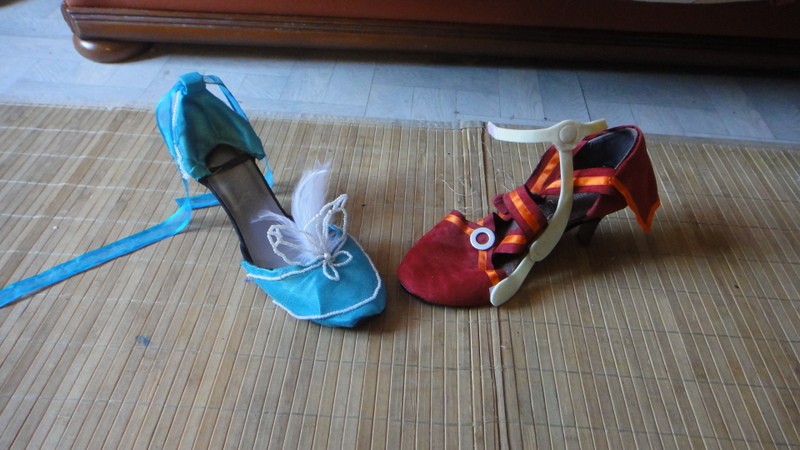
Cover de chaussures
adaptable à toutes vos chaussures
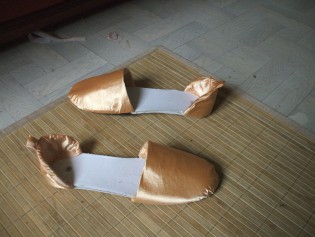
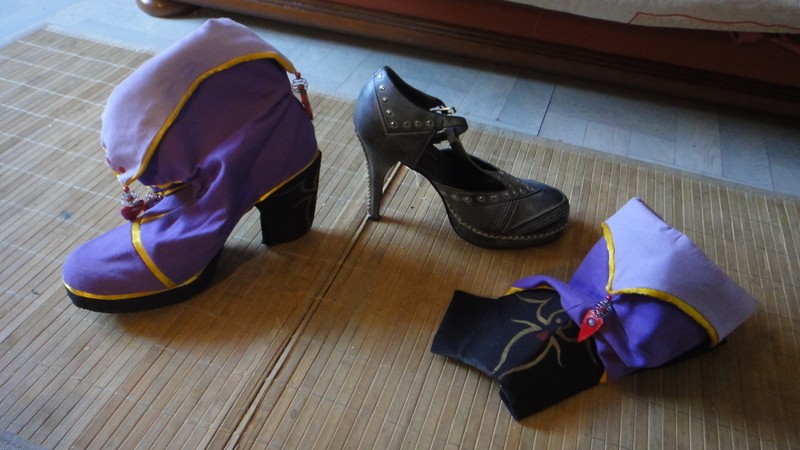
Voici une technique pour réaliser des covers de chaussures.
Il s'agit ici d'un exemple pratique : les chaussures des muses dans hercule, mais cette technique marche pour tous types de chaussures, il suffit d'adapter : c'est ça le cosplay !
PS : ici le tissu utilisé n'est pas du tout élastique !
Étape 1 : préparation des chaussures
Alors soit vous en avez rien a fiche de vos chaussures et vous n'allez pas vous en resservir donc on peut les foutre en l'aire, ou alors vous les trouvez trop belles et la forme convient donc pas question de les abimer ... pas de panique dans les 2 cas ça marche, il faut juste bidouillé dans le 2eme cas de figure afin de pouvoir sortir la chaussure du cover! Ici moi j'ai pris des ballerines à 3 € et c'était juste pour l'occasion donc j'ai fixer les covers directement avec de la colle... mais on peut faire des système avec des élastiques pour pouvoir sortir la chaussure.
Ici j'ai carrément découpé au cutter la chaussure pour avoir ma forme ... l’avantage pour l’arrière c’est qu’elles avaient des coutures que j’ai suivie histoire de pas faire un truc tout pourri !
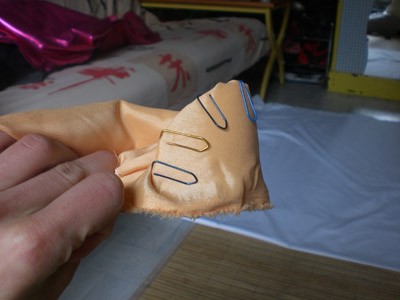
Étape 2 : le patronnage
Ensuite on va faire notre patronage ;
pour ce faire utiliser des chutes de votre tissu et positionner les sur votre chaussure.
Fixer le tout avec des trombones, puis dessiner le contour de votre chaussure :
- À l’arrière

- À l’avant : comme c’est arrondis le tissu va forcement faire des plis mais c’est pas grave on résorbera ça plus tard lors de la couture


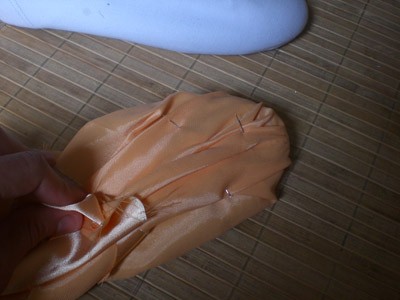
Après quoi vous pouvez virer les trombones et mettre bien à plat votre dessin pour repasser les trais au crayon, afin qu'ils soient bien visibles
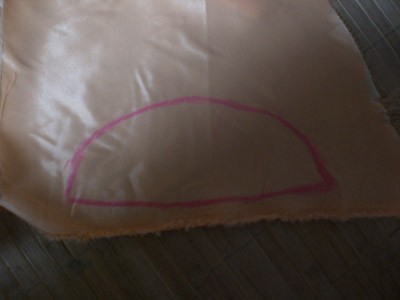

Étape 3 : préparation avant la couture
Ensuite comme on n’est pas unijambiste (dommage) reporter les patrons sur un autre bout de tissu pour avoir les même en miroir.
Pour l’arrière prévoyez de faire un doublure avec du tissu aussi : ce qui nous donnera donc 1 morceau pour l’avant et 2 pour l’arrière.
Bien entendu il faut adapter en fonction de votre chaussure, tissu, forme finale à obtenir, ici c'est assez simple comme cover mais il se peut que vous ayez des empiècements à faire : le principe reste le même il faut d'abord avoir la forme de base de votre patron tel qu'il doit être pour recouvrir la chaussure, après rien ne vous empêche de le découper en plusieurs parties pour obtenir la forme finale.
Ici moi j'ai thermocollé le tout car sinon quand on va coller sur la chaussure je vous raconte pas les traces vu l’épaisseur du tissu !

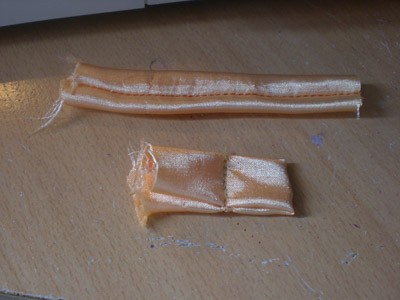
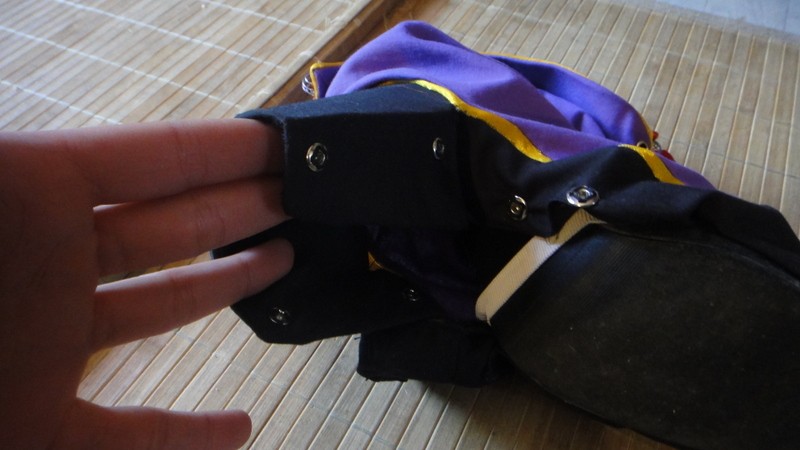
Étape 4 : la couture partie arrière
Avant toute chose on va faire nos petites boucles pour l’arrière des chaussures afin de passer le laçage !
Le truc tout con, on prend encore une chute on met endroit sur endroit , un coup de couture on retourne et ope le tour et joué, on coupe le bout en 2 on replis de telle sorte que la couture soit à l’intérieure ,
une autre couture pour tout tenir et voila vos 2 boucles sont prêtes (oui j’ai bien dit 2 la tu en a fait qu’une… allez il faut faire l’autre aussi !!!)
Ensuite on place notre boucle au centre d’un des bout de l’arrière, on met l’autre bout dessus (endroit/endroit) on fait notre couture

et on retourne ; tadaaa…
Il ne reste plus qu’a faire l’ourlet du bas et voila l’arrière est fini
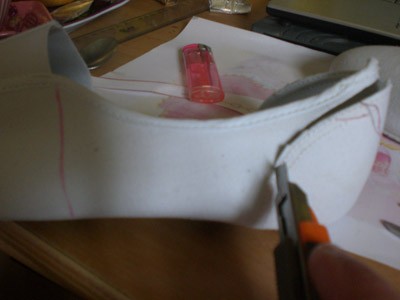
Étape 5 : la couture partie avant
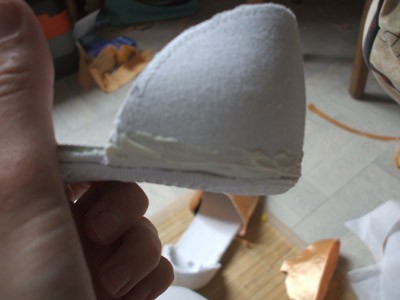
Donc dans un premier temps essayer de trouver dans vos chutes un tissu assez épais et résistant moi j’ai pris du simili cuir noir (j’aurais aimer avoir du blanc mais bon … c’est pas grave c’est pour faire le dessous de la chaussure
Donc prenez votre chaussure posez la sur l’envers de votre tissu et dessiner le contour de la partie avant en partant des extrémités de la partie découpé (oula c’est super claire : c’est à ça que servent les photos…)
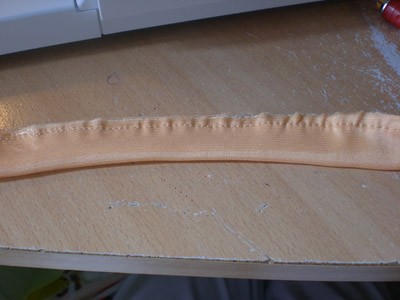
Vous avez votre semelle, on va maintenant adapter notre partie avant dessus
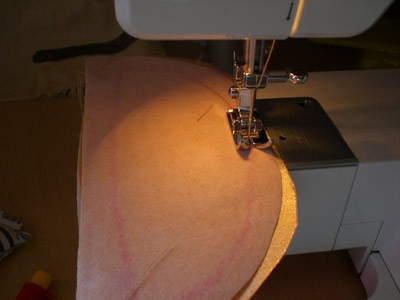
Pour se faire placez un fil de fronce sur toute la partie arrondie : moi j’utilise ma machine en déréglant la tension du fil sur 0
Une fois votre fil de fronces placé, épinglez votre partie avant sur votre semelle (endroit/endroit) en faisant froncer le fil sur l’arrondis à l’avant (évitez de le faire froncer sur les cotés ça sert à rien et ça fera moche) , puis un coup de couture (éviter de coudre sur le trais, mais plutôt à 5mm vers l’extérieur histoire de laisser un peu d’aisance quand vous allez le placer sur votre chaussure
Voila c’est prêt (du moins la chaussure droite) retournez le tout et faites l’autre coté
Étape 6 : Adaptation sur la chaussure
Bon il reste plus qu’a positionner nos petits habillages sur les chaussures et de coller le tout avec de la colle a tissu, inutile d’en mettre partout, mettez en juste sur les bordures car sinon ça risque de faire des taches
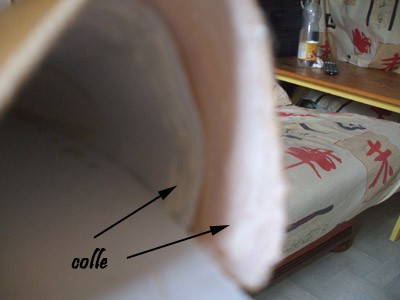

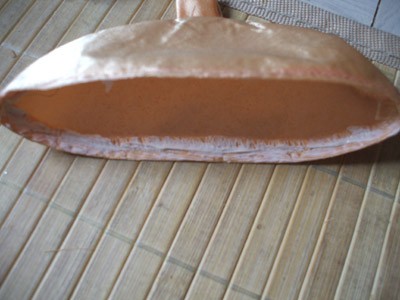
et pour la semelle il suffi juste de retourner le bout qui dépasse, normalement ça tien tout seul si c’est bien tendu

Voila

Conclusion
Donc c'est la fin de ce tuto, sachant que moi j'utilise cette méthode pour tout mes covers, quand je parle de méthode je veux bien sur parler de la semelle rajouté pour glisser la chaussure dans le cover, ça permet d'avoir un truc qui se tient et qui épouse bien la forme, donc je vous laisse créer vos belles petites chaussures sachant qu'avec un tissu élastique c'est encore plus simple Pour les chaussures à talons ça marche aussi il suffit de laisser un trou pour le talon, talon que vous pouvez également recouvrir ...
voici quelques autres exemples les chaussures de Millénia de Grandia 2 : le cover s'enlève complètement , et j'ai même refait un talon en tissu avec du carton dedans pour en avoir un bien carré
les chaussures de Paine (FFX-2) elles aussi on peut virer le cover, ici le talon n'est pas recouvert donc j'ai laissé un trou dans mon cover pour pouvoir le passer.
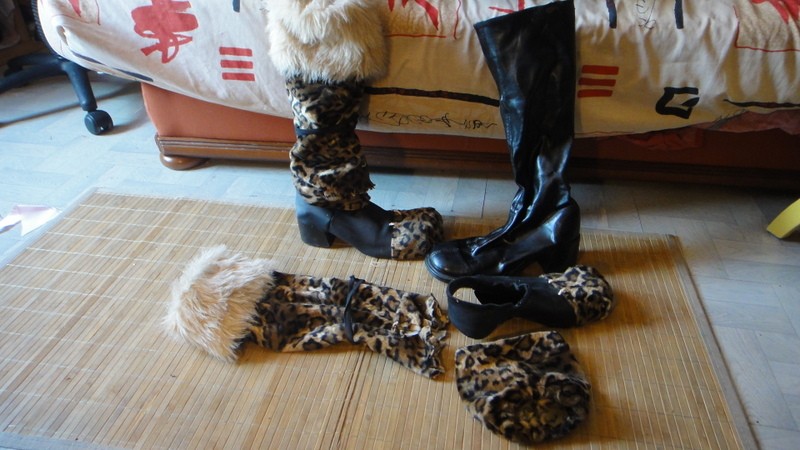
Enfin les chaussures de Yukari (paradise Kiss) ou le cover peut être enlever, et celles de Pai (.hack//GU) ou la le cover est en partie collé sur la chaussure (que j'avais acheté pour l'occasion à moins de 10€ ... de toute façon elles étaient trop moche sans le cover
 "Pin it")
Diadème de Sailor
en pate FIMO
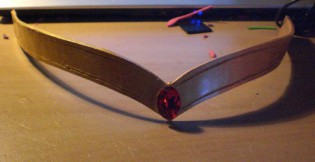
voici de quoi réaliser un diadème de sailor en pate FIMO, sachant que la technique utilisé peut l'être pour tous autres accessoires. La pâte FIMO n'est pas votre ennemie il faut juste savoir bien la travailler !
Étape 1 : l'impression
dans un premier temps imprimer ce fichier afin d'avoir la forme du diadème (et aussi la petite étoile des sailor saison 3 à mettre sur le collier).
Une fois le fichier imprimé, pliez le en 2 au niveau des pointillés puis rajoutez un peu de papier de l'autre coté afin d'avoir le morceau de diadème en double découpez selon les trais (mais pas sur la pliure centrale) puis dépliez : et voila vous avez votre diadème : mais en papier bien sur donc il faut lui donner un peu de volume si je puis dire ....
Étape 2 : l'étalage de la FIMO
Alors c'est simple , vous malaxez bien la pâte FIMO dans votre main (le bloc entier) de manière à avoir une boule, puis avec votre rouleau à pâtisserie vous l'étalez sur votre table (bien propre et lisse ).
Elle doit faire au final 2 à 3 mm d'épaisseur Si vous avez une machine à pâte FIMO (ou à pattes classiques comme moi ! c'est la même chose...) passez votre pâte dedans comme ça elle aura une épaisseur uniforme partout : mais il est préférable quand même de l'étaler d'abord avec le rouleau vu que la surface doit être grande.
De temps en temps placez le diadème en papier dessus pour voir si ça recouvre bien toute la surface (sans oublier la petite étoile si vous faite le costume saison 3)
Une fois que vous avez toute votre surface on va pouvoir passer à la suite
Étape 3 : la découpe
Posez votre diadème en papier et votre étoile sur la patte étalé puis découpez au cutter le contour de vos 2 éléments. Une fois que c'est fini enlevez le papier.
Si comme moi votre gemme n'est pas plate sous le dessous il est préférable de la poser sur votre diadème et d'appuyer un peu histoire d'avoir l'empreinte dessus comme ça quand vous la collerez elle ne ressortira pas!
Et bien sur comme on appuis on déforme un peu le diadème : donc reposez votre papier dessus et faites les petites retouches au cas ou !
Ensuite prenez l'épingle ou aiguille à couture puis faites les 2 trais en haut et en bas en creusant un peu ; enlever les petites épluchures qui se forment ... faites aussi des petits trous rectangles à chaque extrémités à environ 5mm du bord pour l'élastique voila votre diadème est prêt à être mis au four.
Étape 4 : la cuisson
Placez vos superbes créations sur une plaque qui va au four ; plate et recouverte de papier sulfurisé ou aluminium.
La pâte FIMO se fait cuire au four traditionnel surtout pas au micro ondes !!! moi je met thermostat 3, 4 puis je laisse 30min (des fois ça reste plus car j'oublie ) mais bon si ça reste 40 min c'est pas trop grave ; surtout si vous n'avez pas préchauffé votre four avant.
Étape 5 : la mise en forme
Donc une fois la pâte cuite, sortez la plaque du four puis prenez dans votre cuisine 2 objets qui tiennent debout tout seuls (moi j'ai pris ma salière et ma poivrière ).
Mettez votre diadème debout.
Puis placez la salière d'un coté et la poivrière de l'autre de telle sorte qu'il est la forme qu'il dois avoir sur votre tête (à 2 cm prêt car si votre pâte est fine elle sera flexible) laissez reposer le temps que la pâte soit bien froide. Voila votre diadème est prêt : du moins la forme car il reste encore pas mal de choses à faire
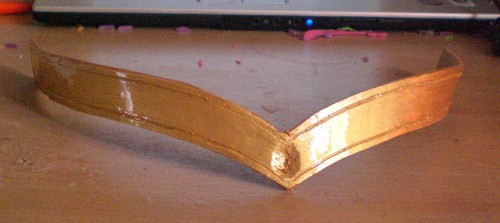
Étape 6 : Finitions
Peinture vernis ....
Moi la couleur me plaisez pas donc j'ai repassé une couche de peinture doré dessus (évitez la bombe la pâte FIMO supporte mal certaines marques ...).
On laisse sécher puis on passe le vernis (on peut aussi le faire sur l'étoile c'est pas plus mal )
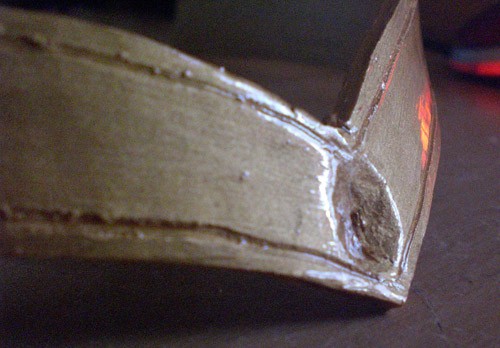
Le collage
Enfin on va pouvoir mettre la petite touche personnelle à chaque sailor : la gemme
Moi j'ai fais sailor mars donc elle est rouge, je l'ai collé au pistolet à colle mais bon la néoprène ça dois marcher aussi (éviter la glue car ça fait une réaction bizarre ...)
Pour un bon effat prendre une Gemme de 18mm sur 13mm : vous pouvez en trouver sur i-perles, mais il n'y a pas toutes les couleurs ... donc google est votre ami !
Le fixage
prenez de l'élastique puis passez le par les petits trous préalablement fait (si vous avez comme moi oublié de les faire, faites les avec un cutter en faisant attention car la pâte est cuite donc assez dure ) puis fermer le par un nœud )


 "Pin it")